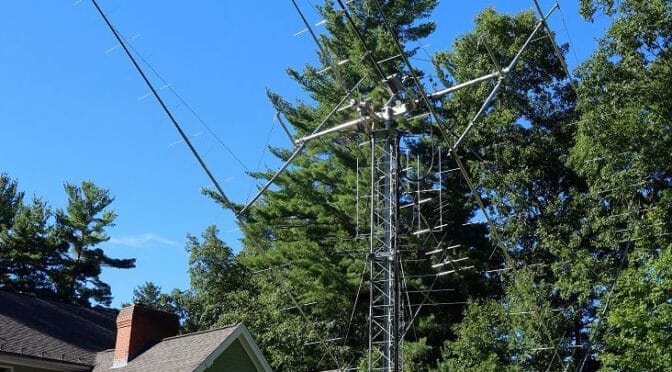
After a year’s worth of planning and 10 months of construction, we have our new 2m EME Antenna System installed on our EME Tower and working! This stage of our project took about a week…
We’re making good progress on a new 2m EME Antenna System here at AB1OC-AB1QB. Our Antenanns system is up on our EME Tower and we are working through the setup and integration of the equipment and software for our EME Station.
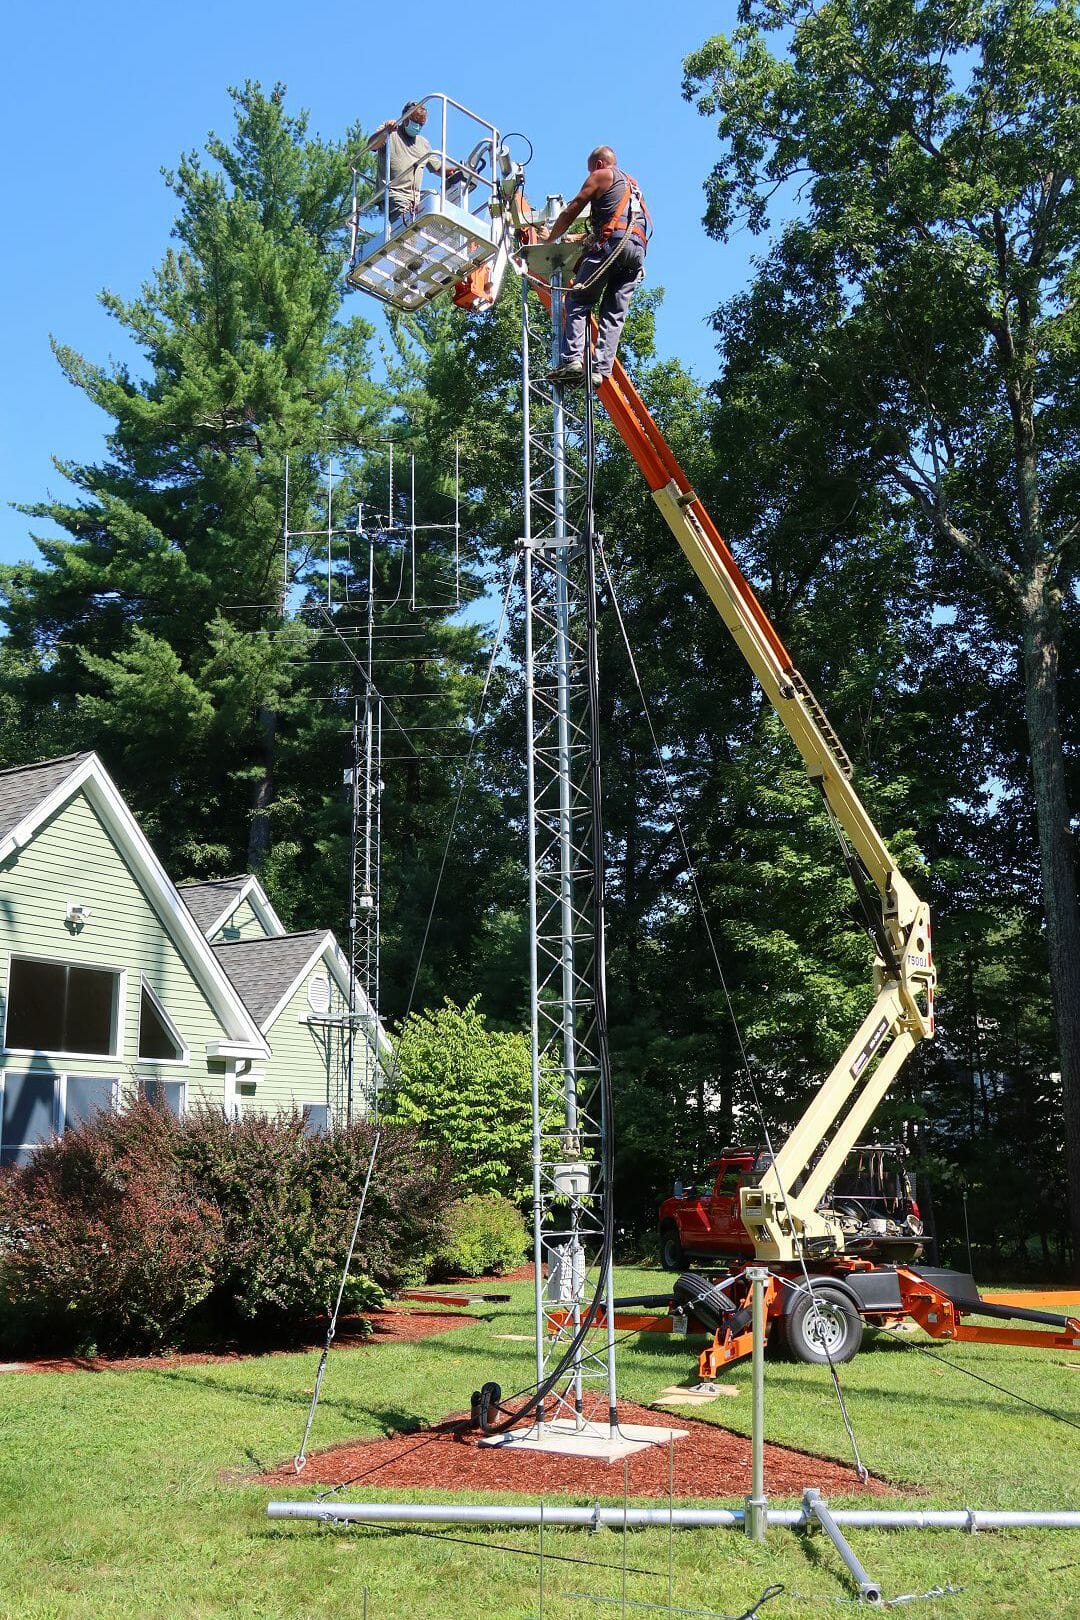
EME Antenna Installation Using A 50 Ft Boom Lift
We rented a boom lift and worked with Matt and Andrew from XX Towers to get our Antenna System up. Our antenna installation took a week to complete and it turned out quite well.
You can read all about this step in our project via the link above. We should have the work needed to bring the rest of our EME Station together sometime during the next few weeks. We can already receive signals that other Hams are reflecting off the moon!
September is the month when over 40% of our members are due for renewal. Thank you to all of the members who have renewed to date since my first call for September membership renewals.
The following members still need to renew before the end of September :
Call Sign
Last Name
First Name
Member Class
NJ1H
Bordy
Bill
SENIOR
KC1EMJ
Brand
Ira
SENIOR
KC1HUJ
Callahan
Robert
FULL
KI1M
Cantara
Peter
FULL
KG1RY
Cutbill
R Gary
FULL
N1CMD
Dude
Curtis
FULL
KC1JEB
Eyceoz
Aya
STUDENT
KC1GQN
Hamilton
Charles
FULL
K1VLB
Hopkins
Mike
FULL
K4BR
Macdonald
John
SENIOR
KC1FOZ
Manchester
Alfred
FULL
AB1UY
Maxwell
Jim
FULL
W1BP
McCaffrey
Brian
FULL
N1RF
Michaels
David
FULL
AB1ZN
Pentedemos
Charles
SENIOR
KC1BNG
Perich
Lou
FULL
KC1HDJ
Schroth
Michael
SENIOR
K9AEN
Yurcak
John
SENIOR
How to Renew Your Membership
To renew your membership, the first step is to log in to N1FD.org. Once you are logged in, you can fill out the membership renewal form on the following page: https://www.n1fd.org/renew-your-membership/. At the end of the form, you will be asked to pay your membership fee using PayPal.
We have multiple membership renewal options to choose from if you qualify, with the following yearly fees. Make sure you take advantage of a discounted rate if you qualify:
Regular Membership: $31
Senior Membership (Age 65 or over): $26
Full-Time Student: $26
Family Membership: $46
Members at a SOTA at the Mt. Washington Summit
Membership Benefits
Your membership allows you to participate in all of our activities including:
The Nashua Area Radio Society will hold three Amateur Radio License Classes this fall. Due to COVID-19, we will be holding them online, and they are open to anyone in the US.
Our classes will be held using Zoom web conferencing.
Gordon West Technician Class Book
Classes are based on the Gordon West License Class Manuals. We go over each question on the exam at least twice and give lots of demos to reinforce the materials.
Our knowledgeable instructors have given 6-7 amateur radio license classes per year for the past 5 years. We have had a high success rate with our amateur radio license classes and have received much positive feedback from our students.
We are working to implement an online exam at the end of our classes as we have in the past. It will take some effort to put this in place but we will make every attempt to have this ready for the Fall classes.
We use cookies to ensure that we give you the best experience on our website. If you continue to use this site we will assume that you are happy with it.