Category Archives: Digital

Articles and Information related to Digital Modes. Topics include PSK, RTTY, JT Modes, APRS, operating using Digital Modes, equipment, software, and more.
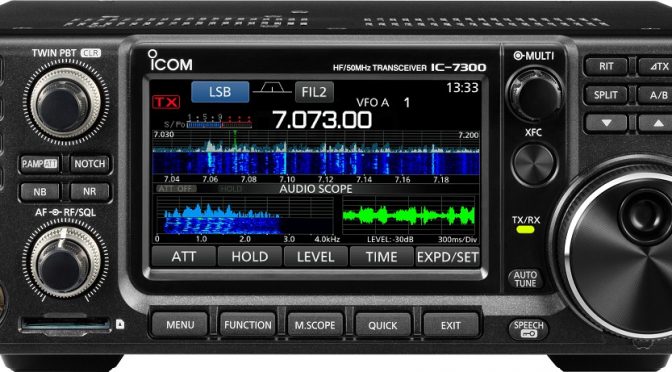
ARRL Rookie Roundup RTTY – Sunday August 20

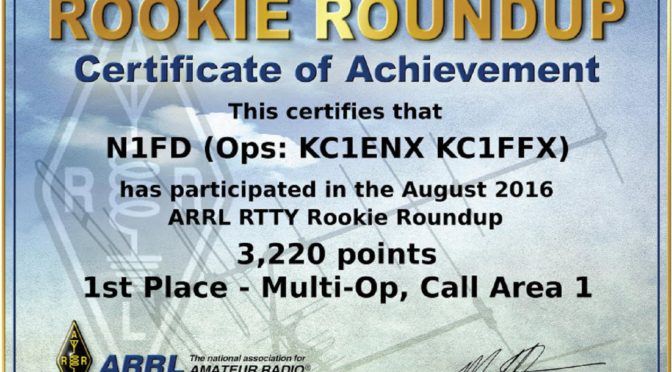
The ARRL Rookie Roundup RTTY contest is open to anyone who was first licensed in 2015, 2016 or 2017 or anyone who has never made a RTTY mode contact.

We will be defending our title as #1 Multi-Op Area 1 in the ARRL Rookie Roundup – RTTY.  The contest will take place on August 20 from 2 pm – 8 pm and we will operate from AB1OC/AB1QB’s QTH.

This is a great opportunity for you to try out digital modes or to try your hand at contesting!

Abby, AB1BY and Jamey, KC1FFX operate during the 2016 Rookie Roundup RTTY
Abby, AB1BY and Jamey, KC1FFX  operate during the 2016 Rookie Roundup RTTY

Please contact Anita at [email protected] if you are interested and for more details, see the calendar event.

Anita, AB1QB

High-Altitude Balloon Project Update #3 – Launch!

Our High-Altitude Balloon made it to the edge of space! The image above was taken from our HAB at an altitude of over 90,000 ft!

After many months of work, raising funds to finance the project, teaching STEM sessions in local High Schools, and an open-house to test the Balloon Platform and to learn about Amateur Radio; our High-Altitude Balloon Project (HAB) Team finally got the chance to launch and track our Balloon. We launched our Balloon from the Elementary School in Winchester, NH.

High-Altitude Balloon - Setting Up Our Gear On Site
Setting Up Our Gear On Site

Students, Teachers and Club Members came out to be part of the launch and to track our HAB. The first step was to move all of our gear to the center of the athletic fields at the school and organize all of our equipment.

High-Altitude Balloon Flight Platform Final Assembly and Test
Flight Platform Final Assembly and Test

Next, we attached the GoPro video cameras, satellite tracker and the battery pack for the Flight Computer and 2M APRS transmitter to the flight platform. We used an APRS capable HT to confirm that the flight computer and APRS transmitter were working.

Rigging the High-Altitude Balloon Flight Line
Rigging the Flight Line

We rigged the 40 ft. flight line which connected the HAB’s flight platform, recovery parachute, and the balloon.

High-Altitude Balloon Inflation
Balloon Inflation

And then came the inflation of the balloon from the Helium tank. The winds were gusting to about 12 mph at this point which made inflating the balloon a little tricky. When filled, the balloon was about 6 ft. in diameter on the ground.

High-Altitude Balloon Launch!
Launch!

With both GoPro cameras running on the flight platform, we were ready to launch. A 10-second countdown and the balloon was up and away!

Tracking Our High-Altitude Balloon
Tracking the HAB

We watched the balloon from the ground as it soared off into the clouds. The 2M APRS tracking system worked perfectly and we spent the next several hours at the launch site, at lunch, and in our cars tracking the HAB on aprs.fi.

Tracking Our High-Altitude Balloon Flight Path On APRS.fi
HAB’s Flight Path On APRS.fi

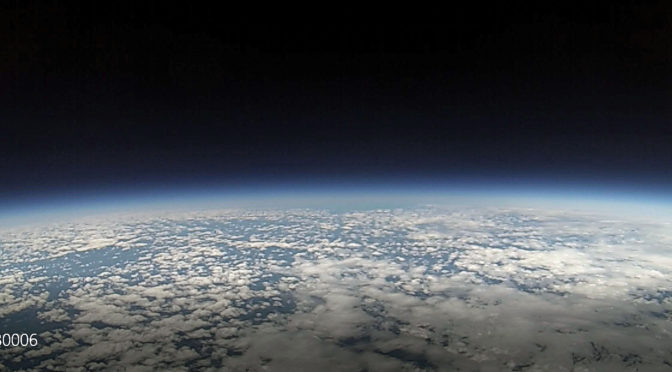
Our HAB’s flight path took it across Massachusetts where it reached a maximum altitude of 91,700 ft. above sea level (ASL).

Looking Upward at the High-Altitude Balloon (Near Burst)
Looking Upward at the Balloon (Near Burst)

The balloon reached a diameter of approximately 30 ft before it burst. After the balloon burst, the parachute deployed and the payload descended to a landing in the northeast corner of Rhode Island.

High-Altitude Ballon at Recovery Site in Rhode Island
HAB at Recovery Site in Rhode Island

A combination of the APRS transmitter data and the onboard sounder allowed the landing location to be pinpointed and the flight platform recovered with help from a local resident.

The onboard GoPro video cameras captured some awesome video during our HAB’s ascent! All of the media captured by everyone who participated in the launch as well as the APRS data allowed us to produce the video above. Turn up your speakers and give it a play in full-screen mode to enjoy the experience what we shared!

By the time we had launched, the school year was at an end so we will have to wait until the fall to work with the students and teachers who were part of our STEM project to analyze the data from the flight. All in all, our HAB project has been an amazing experience for all involved. We are planning another HAB STEM experience and launch with additional schools in the fall.

We want to especially thank all of our donors whose generous contributions made this project possible.

Fred, AB1OC

Hashtag: #N1FDHAB

Go Kit for Field Day and EMCOM

We’ve been thinking about building a portable Go Kit for VHF/UHF Emergency Communications (EMCOM) and Field Day Applications for a while now. The following is a list of our requirements for a Go Kit –

  • 2m and 70cm operation with FM simplex and repeaters
  • APRS capability and tactical display for portable coordination
  • Digital messaging capability
  • Weather band monitoring capability
  • AC Power with flexible battery backup options

A plan to build our Go Kit came together during our trip to the Dayton Hamvention this year.

EMCOM Go Kit - Kenwood TM-D710GA At Dayton
Kenwood TM-D710GA At Dayton

The heart of any Go Kit is the Transceiver. We’ve been using Kenwood equipment for our APRS iGate for some time now and we have had good results with it. Kenwood’s latest 50W transceiver with APRS is the TM-D710GA. This unit provides full support for APRS tactical applications and now includes a built-in GPS receiver making it ideal for our Go Kit application.

EMCOM Go Kit - AvMap GeoSat 6 APRS Tactical Display
AvMap GeoSat 6 APRS Tactical Display

We have been using the Kenwood TM-D710 along with an AvMap GeoSat APRS display in our APRS iGate setup and the combination works very well. The AvMap display lets one see the location of portable and mobile APRS stations on a map display. This arrangement is perfect for coordinating activities in an EMCOM situation. The AvMap GeoSat 6 APRS display is no longer in production but I was able to locate a nearly new unit on eBay.

EMCOM Go Kit Packaging


EMCOM Go Kit - iPortable Enclosure
iPortable Enclosure

We had a chance to look at the iPortable enclosure at Dayton and decided that their Pro 2 4U deep unit would be a good choice for our Go Kit application. The iPortable enclosures are based on a portable rack mount case and include a DC power system, speaker and headphone hookups, a light, and provisions for a cooling fan.

EMCOM Go Kit Construction


EMCOM Go Kit - Radio Shelf
Radio Shelf

With all the components in hand, we began the construction of our Go Kit. Reliability is important in any portable system like this so we put some time into securely mounting all of the equipment and neatly arranging the cabling. First came the shelf which holds the Kenwood transceiver and a SignaLink USB sound card. A combination of drilling the shelf to secure gear with large cable ties and #8 stainless hardware was used here.

EMCOM Go Kit - Coax Connector Cables
Coax Connector Cables

Our iPortable case was equipped with both SO-239 and N-connectors on the front panel to allow for antennas and feed lines equipped for either connector type. To make the change over between the connector types easy, we installed separate PL-259 jumper cables for each connector. One simply connects the appropriate jumper to the radio.

EMCOM Go Kit - Display and Power Shelf
Display and Power Shelf

The power and AvMap display shelf were next. The AvMap display mount was dissembled and modified to accept a custom mounting bracket.

EMCOM Go Kit - PWRgate Battery Interface and Charger
PWRgate Battery Interface and Charger

The iPortable enclosure was drilled to mount a West Mountain Radio PWRgate to handle backup battery charging and management. The PWRgate supports instantaneous switching between an AC power supply and a backup battery and can accommodate a wide range of battery types and sizes.

EMCOM Go Kit Backup Battery
Backup Battery

The PWRgate was configured to properly charge our 18AH AGM backup battery. Note the use of a fuse in series with the battery for safety reasons. We used a Powerwerx SPS-30DM adjustable power supply set to 14.5Vdc to operate our Go Kit and to provide the proper charging voltage for our AGM battery.

EMCOM Go Kit Operation


EMCOM Go Kt - Diamond X-30 Antenna and Mast
Diamond X-30 Antenna and Mast

The last piece of the setup was the antenna. We wanted something that was portable, easy to set up and would provide good performance. We choose a Diamond X-30A 2m/70cm ground plane antenna and mounted it on a 12′ fiberglass push up mast. The feed line is made from 25′ of LMR-400UF coax. Several bungee cords are used to attach the mast to a fence post or other vertical structure.

EMCOM - Finished Go Kit In Use
Finished Go Kit In Use

The picture above shows the completed Go Kit in operation. We typically set one side of the Kenwood TM-D710GA to operate as an APRS transceiver and Digipeater and the other side to operate on a local repeater or simplex FM. The SignaLink sound card is used with a laptop computer running Fldigi and NBEMS for messaging applications. The iPortable case has a 13.8V lighter socket which connects to a power brick to power our laptop PC.

EMCOM Go Kit Packaged for Transport
Go Kit Packaged for Transport

The Go Kit is quite portable when closed. All of the equipment and cable connections are enclosed and protected by the case’s removable end caps. We’ve tested our Go Kit during our club’s weekly repeater net and it worked great. The first real use of our new Go Kit will be at Field Day this year. It will be located in our public information tent and will be used as a “talk-in” system.

Fred, AB1OC

Radio Amateurs Developing Skills Worldwide