All posts by Nashua Area Radio Society

Webmaster for the Nashua Area Radio Society

One Radio, Two Shacks

One Radio, Two Shacks

My wife and I have two houses, one in MA and the other in NH.  I can afford to have an antenna set up at each location but duplicating the radio and amplifier is more expensive.  The point of the article is to describe how I transport the interior of my shack from one QTH to another.  As a new ham, I focused on building a shack in my primary QTH in MA.  Additionally, I wanted to be able to operate from our second home in NH. My solution was to put some effort into putting up a good antenna there and I would just bring my “rig” up to NH when we went there.  I could have set up remote access from the NH QTH to my MA QTH, but there was something about the property that made me want to have an antenna up there.

Advantages of operating from two locations

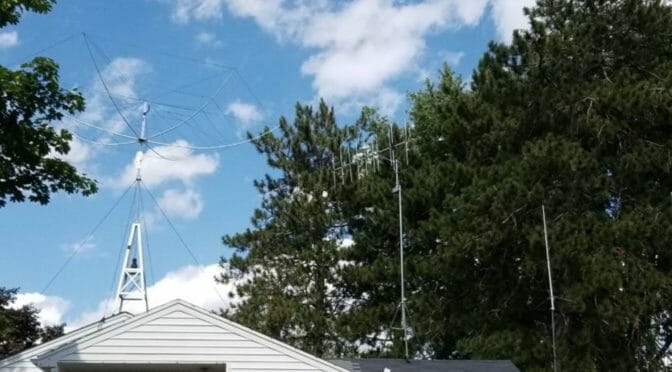
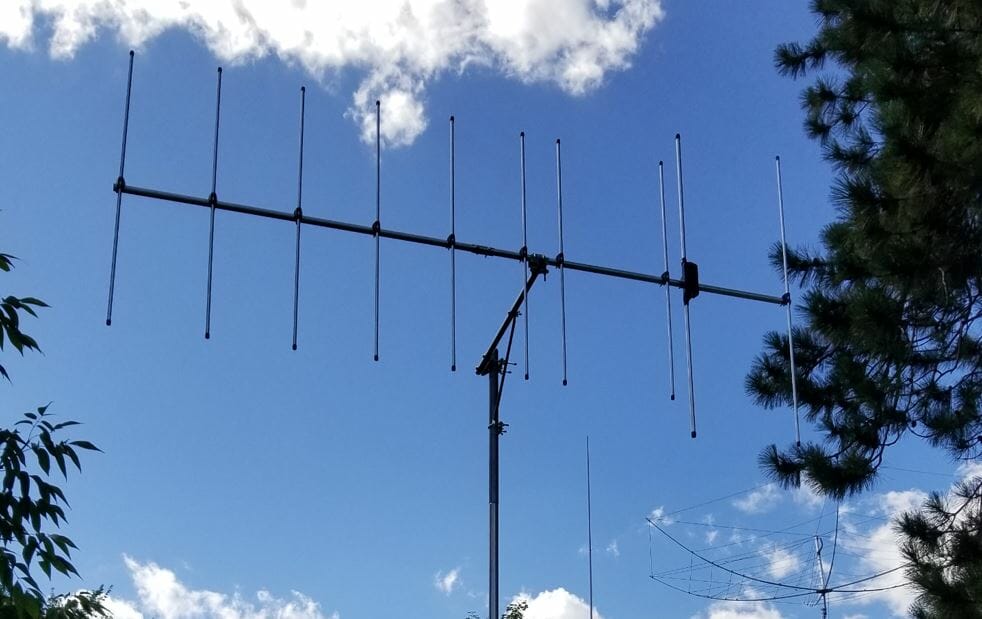
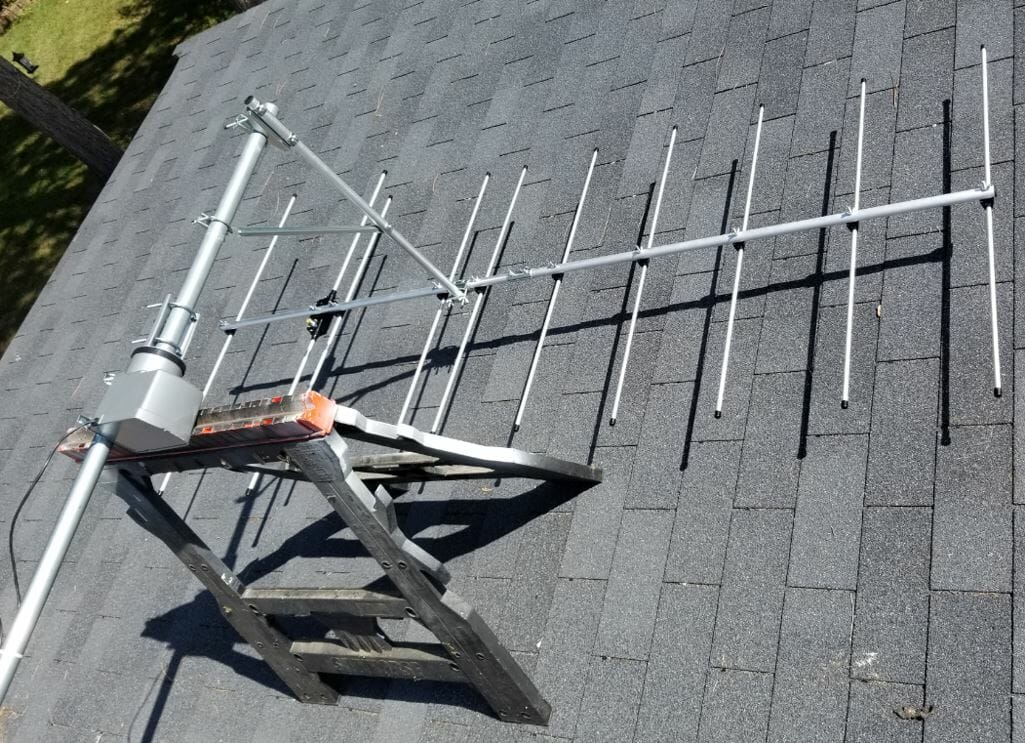
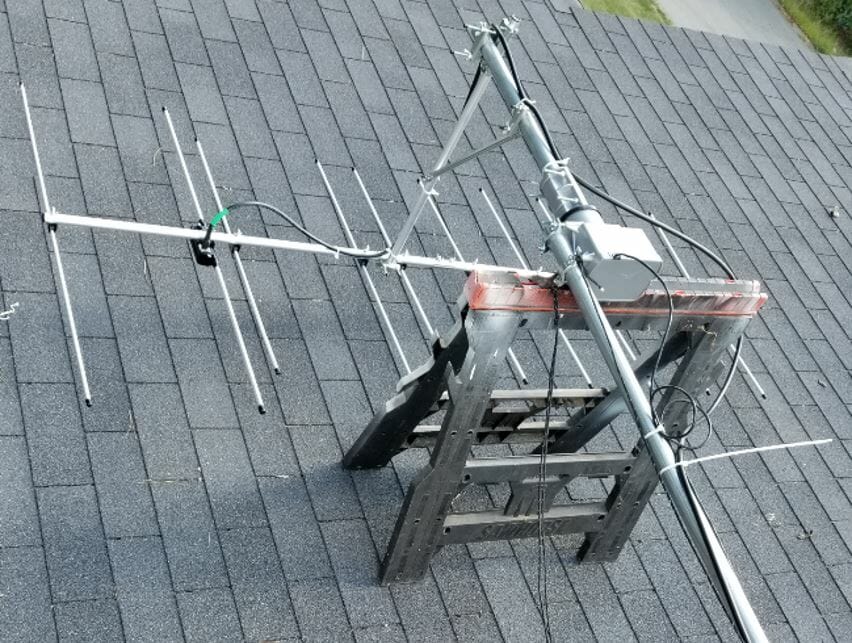
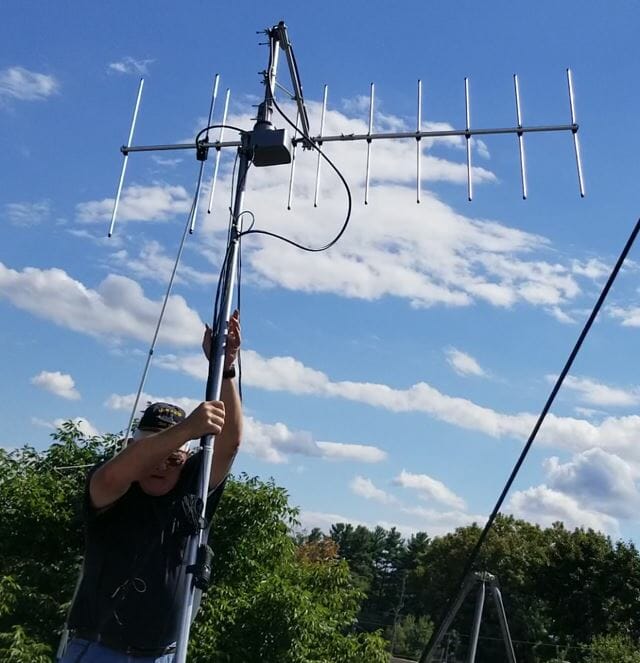
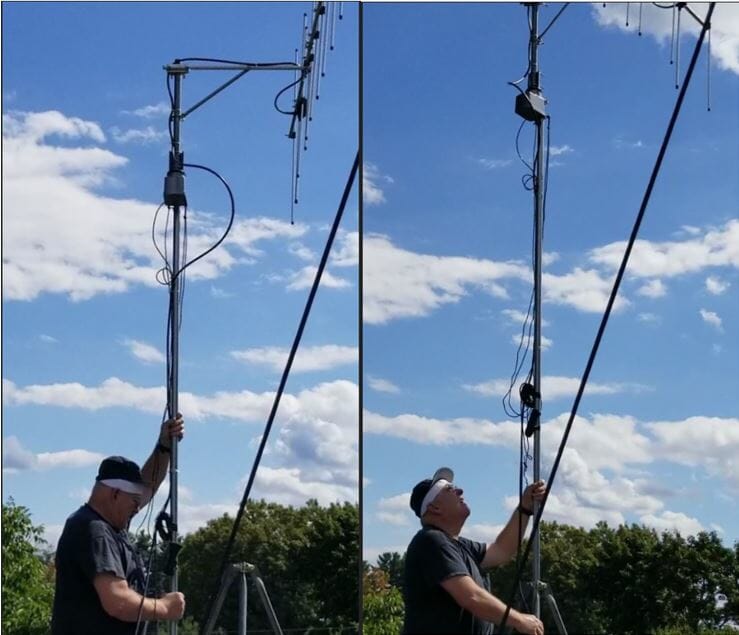
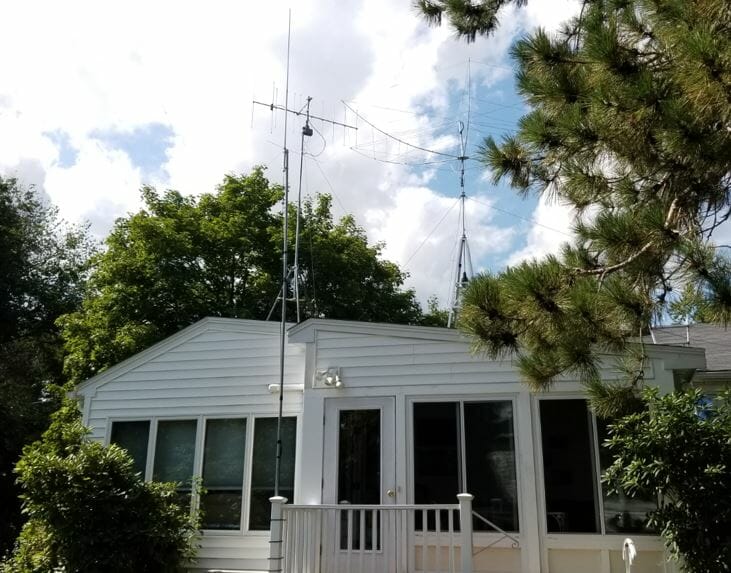
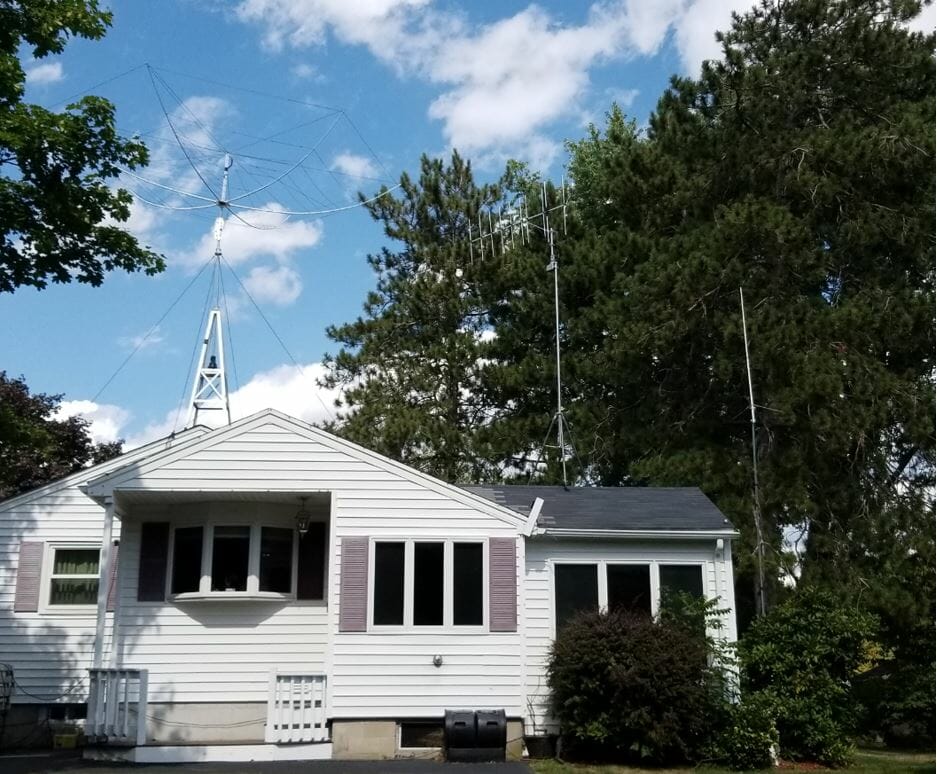
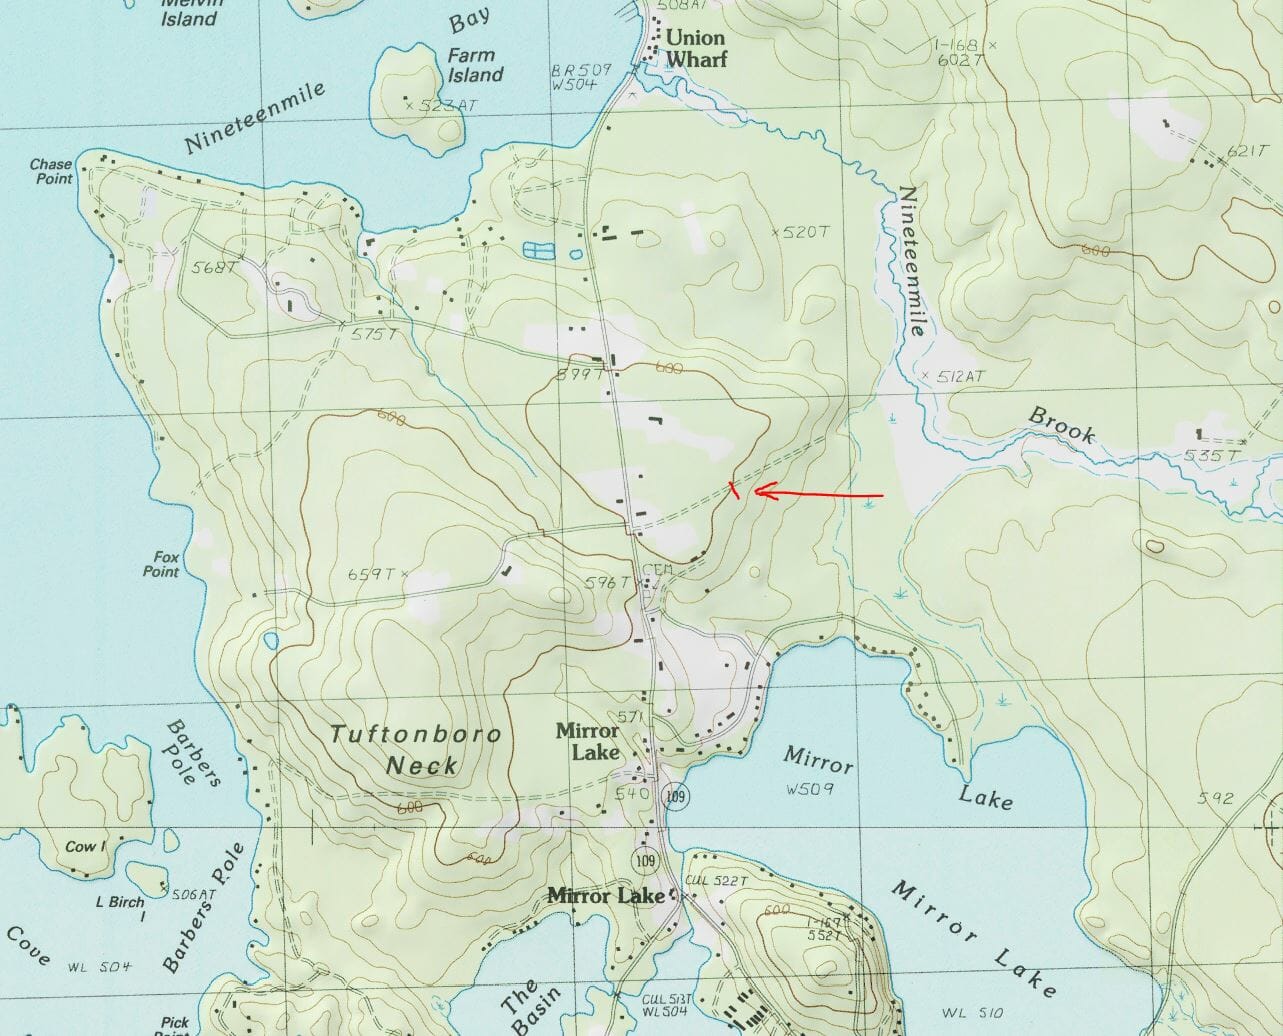
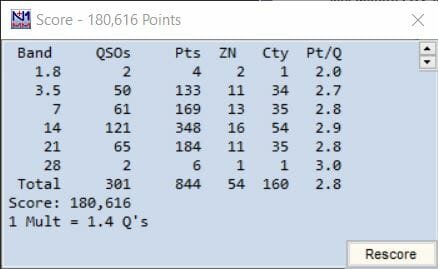
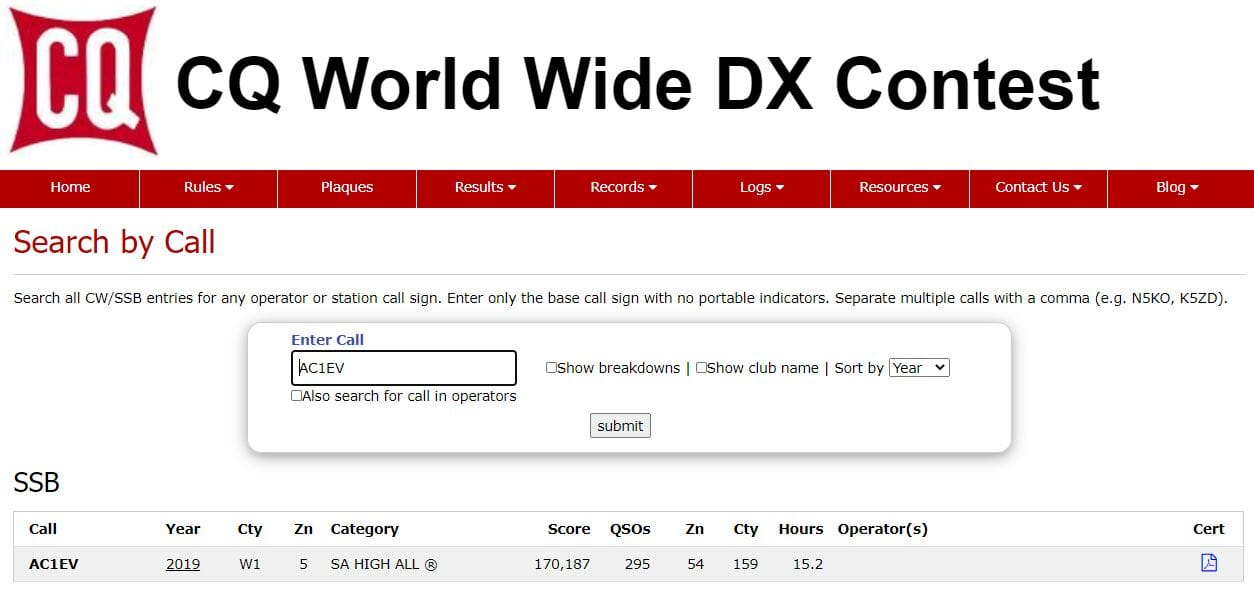
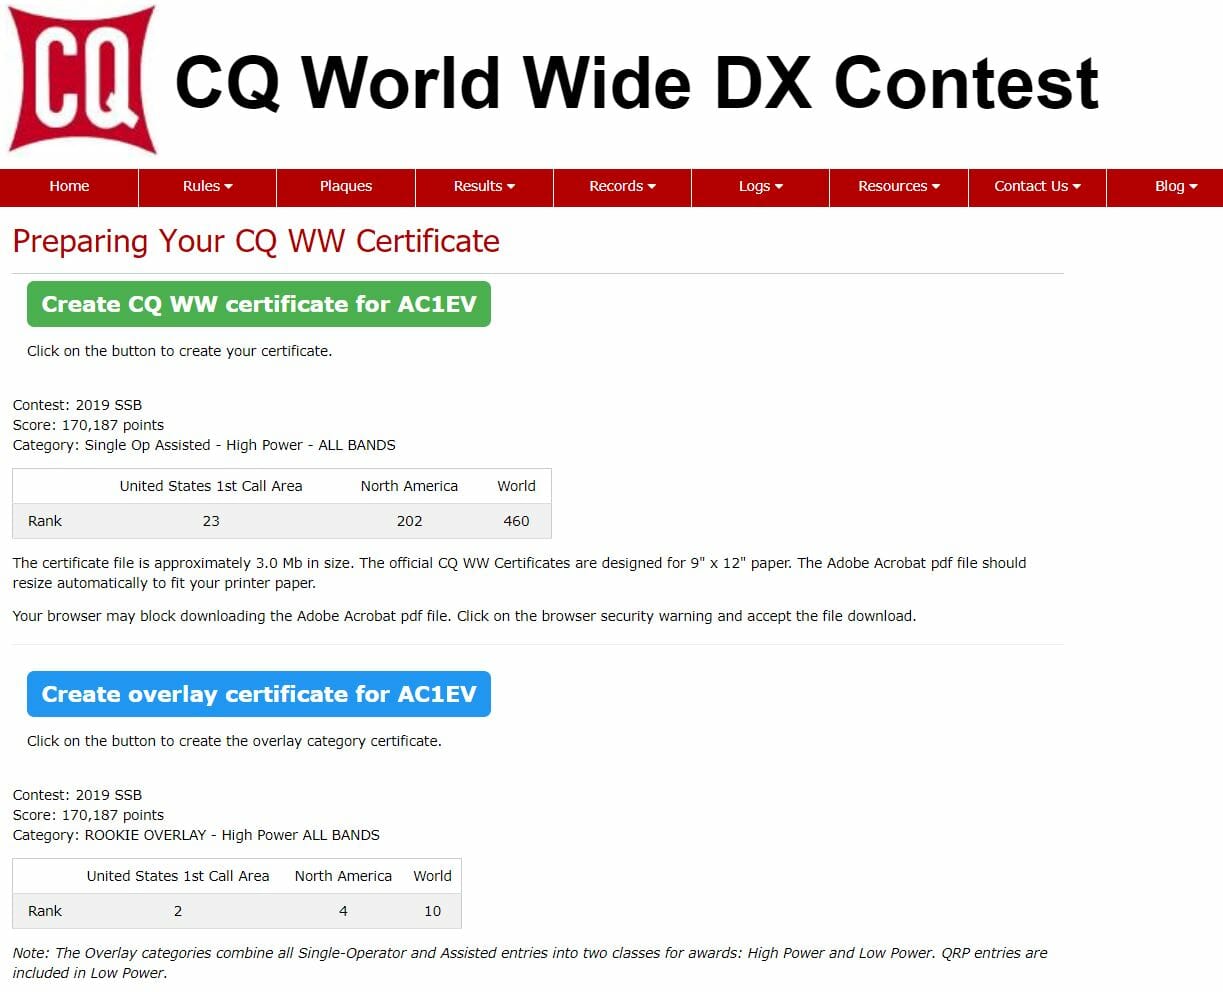
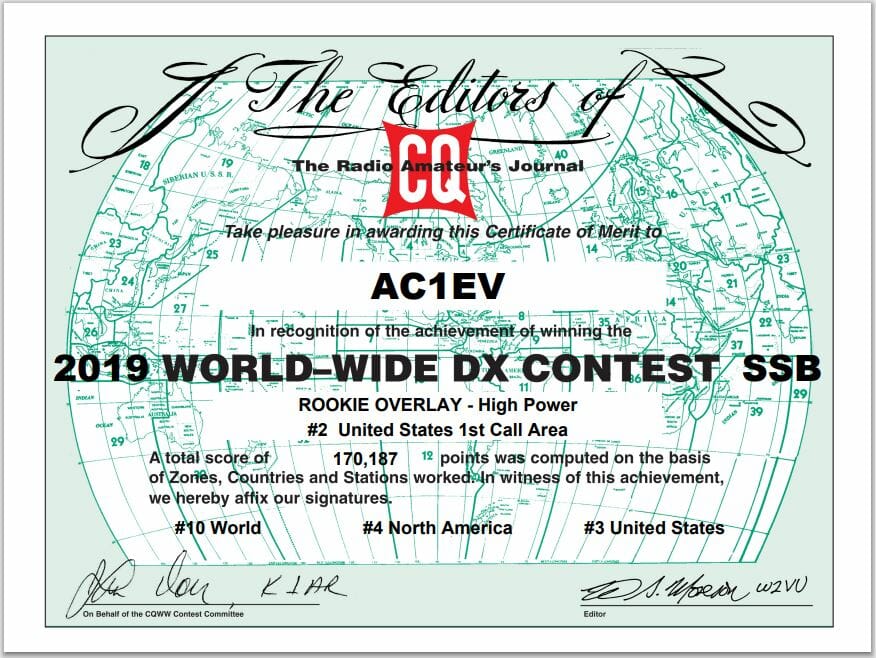
The MA QTH is in Tewksbury, MA, and has all the RF noise present in a suburban environment.  Additionally, the terrain was flat, so my antenna height above my roof was all I had.  The NH QTH offered many advantages. The first was there were many tall trees over 80 feet high.  Another advantage was the house was on top of an 85-foot hill.   The RF environment in the rural forest setting was noticeably quieter.  Installing an antenna high up in one of the trees on top of the hill is powerful. I ended up installing an 8010 EFHW antenna from MyAntennas.com which you can view here.  This second article discusses the topography of the NH QTH and how well the antenna worked in the 2019 CQ World-Wide DX SSB Contest. A disadvantage to operating remotely was that power and internet at the NH QTH were not reliable and I could anticipate losing connectivity multiple times a year.  I think this is a good case for wanting to operate locally from both locations.  A few hundred dollars for the antenna installation was an amount I could handle that would not eat into the Ham budget for the primary station in MA.  Duplicating the major components of that station would cost around $4500 which may happen someday, but until then, I will transport them between shacks.

One Radio, Two Shacks – Moving the Components Between Shacks

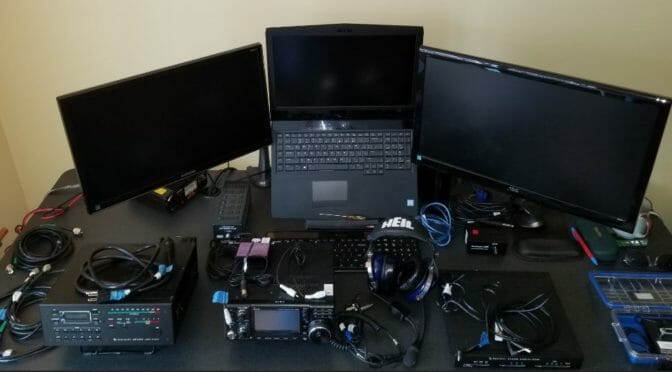
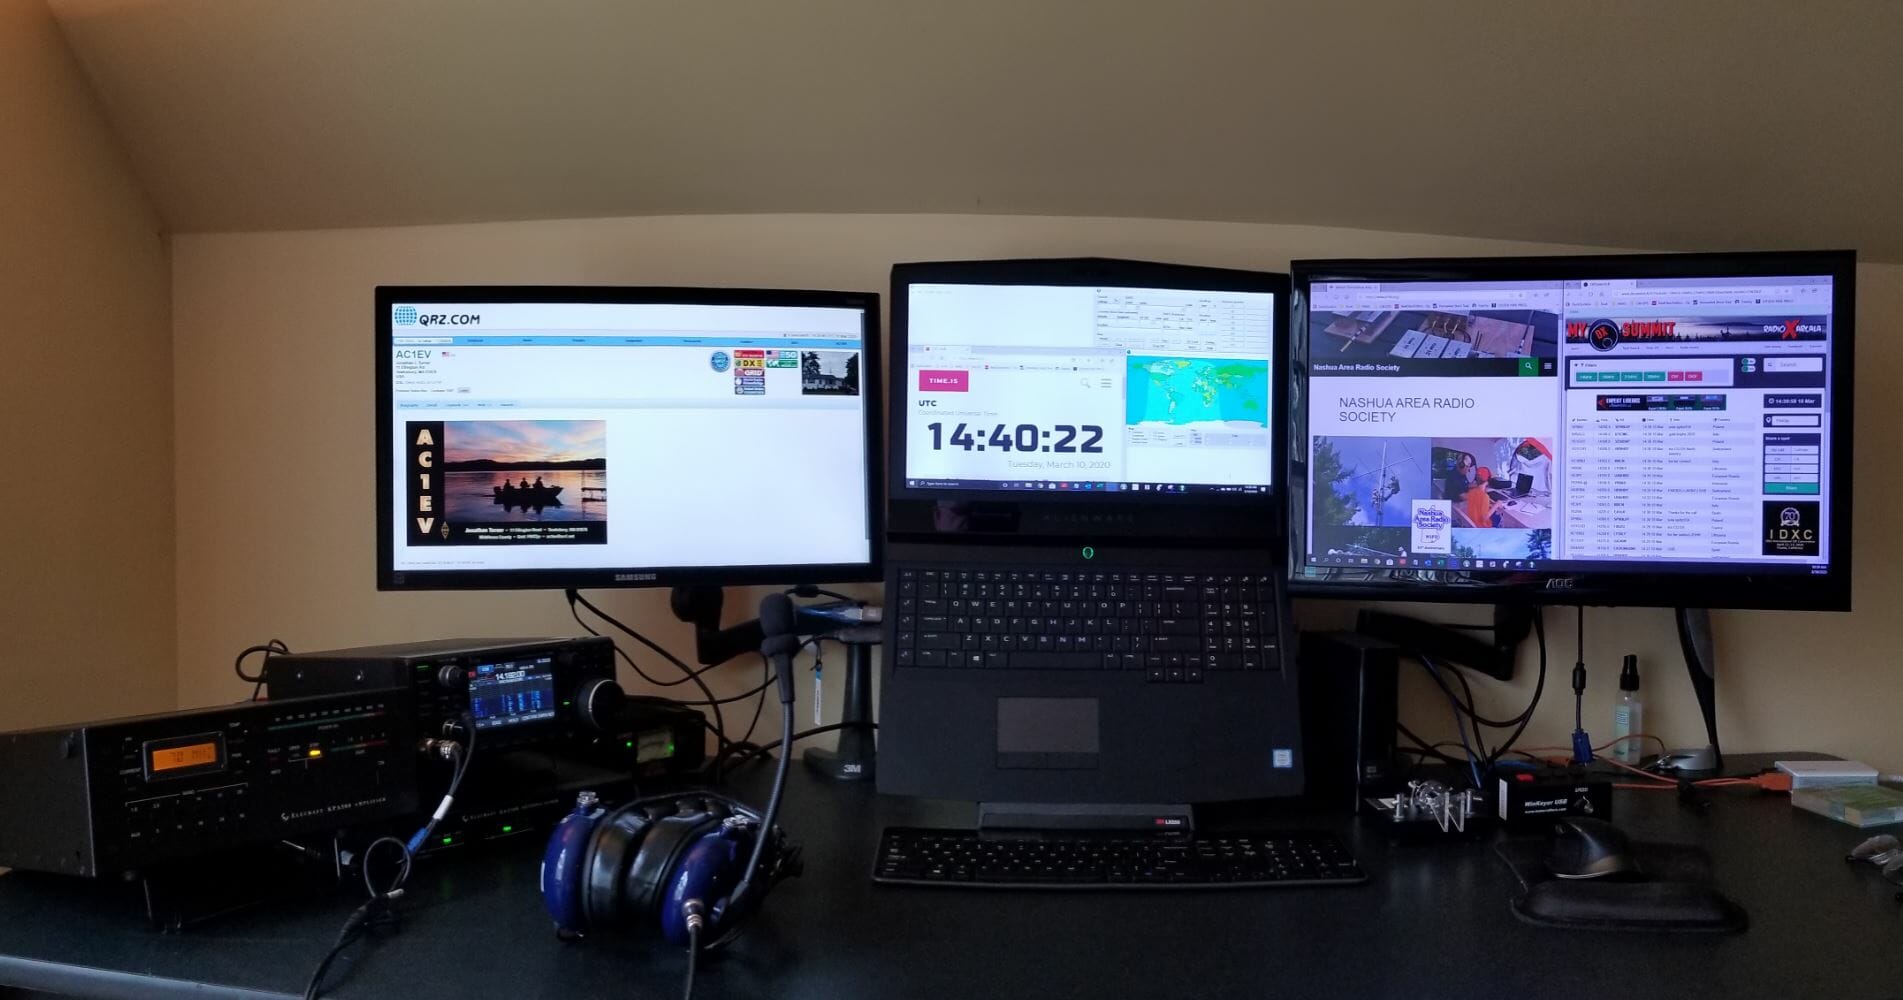
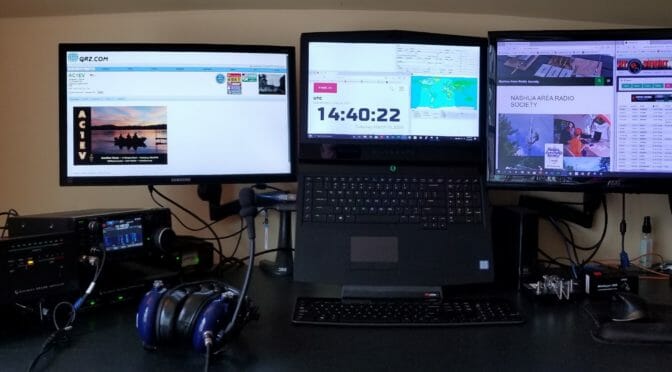
Here is what my MA shack looks like

MA Shack - One Radio, Two Shacks
MA Shack

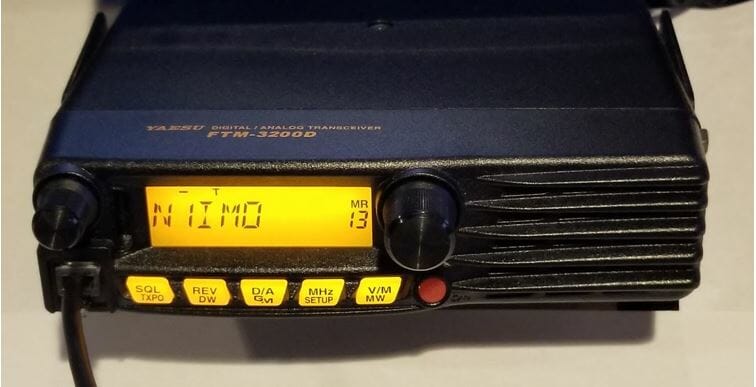
Icom 7300, Elecraft KPA500 amp, and KAT500 Tuner are the core components that need to travel between shacks.

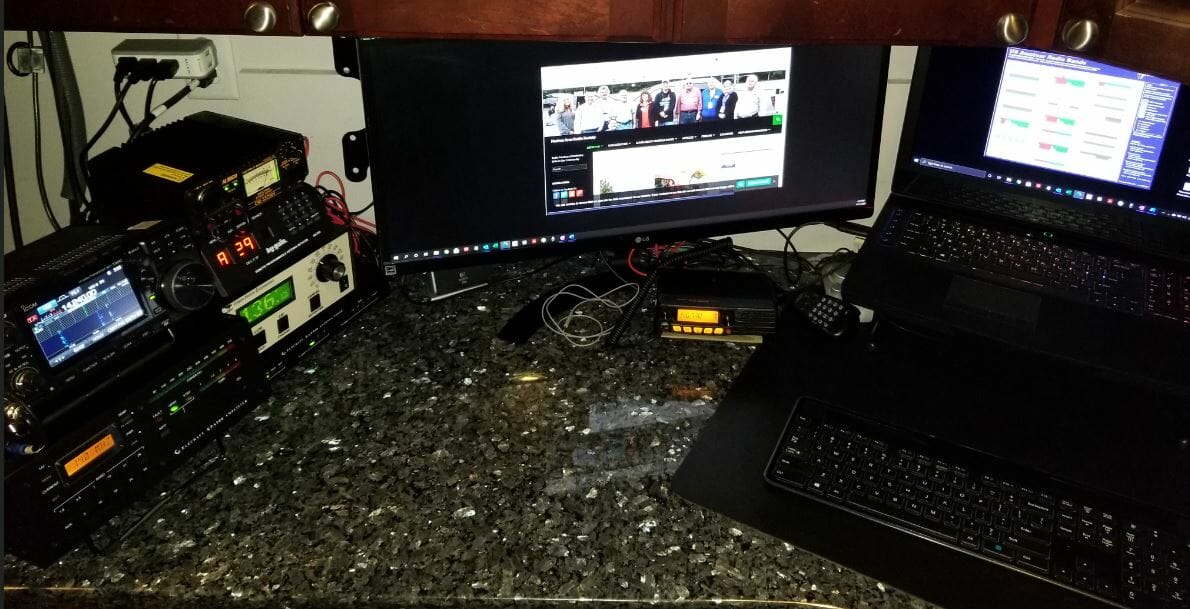
When I arrive at the NH QTH this is what the shack there looks like.

Empty Desk
Empty Desk

In addition to the radio gear, I bring my laptop.

Laptop with 2 Additional Monitors

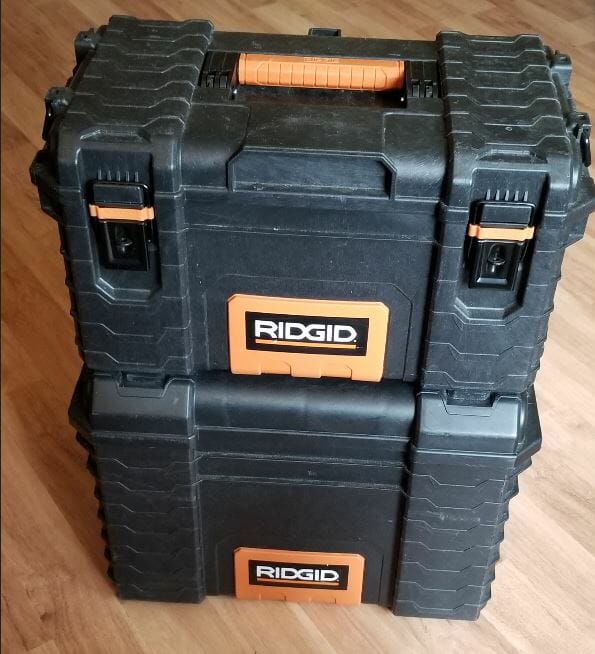
I packed all the gear required to set up the NH Shack in these two toolboxes.  Pelican cases would be great, but these were around $60.00 at Home Depot.  They are watertight and the bottom one has wheels.

Stacked Tool Boxes
Stacked Tool Boxes

Let’s unpack the smaller one on the top first.

Small Tool Box Full
Small Tool Box Full

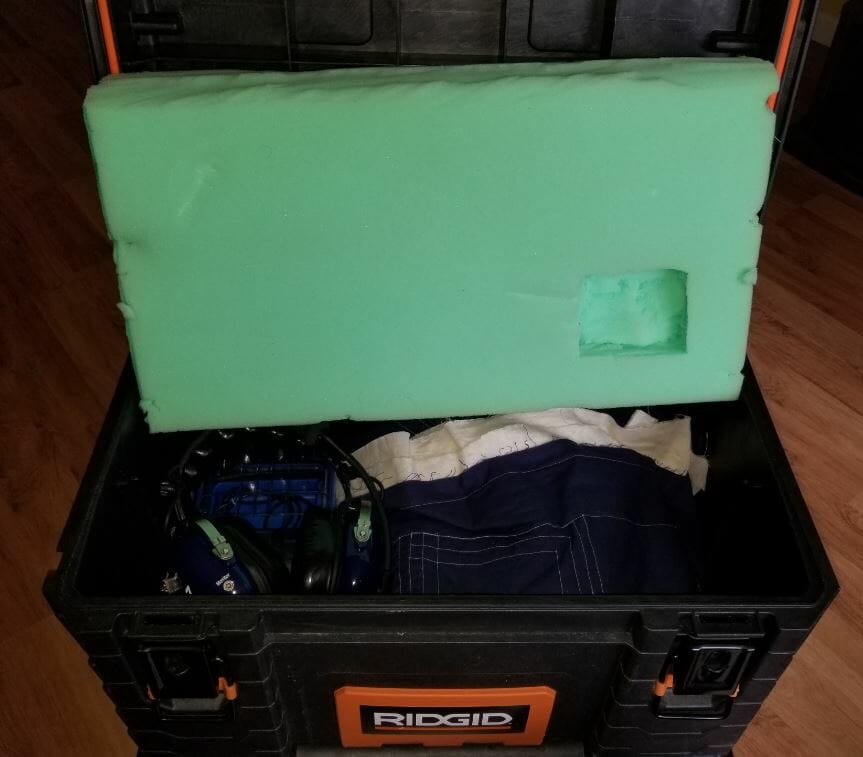
Inside is the IC-7300, Heil Pro 7, and Bencher CW Key.

The big toolbox is full and quite heavy.

Big Tool Box Full
Big Tool Box Full

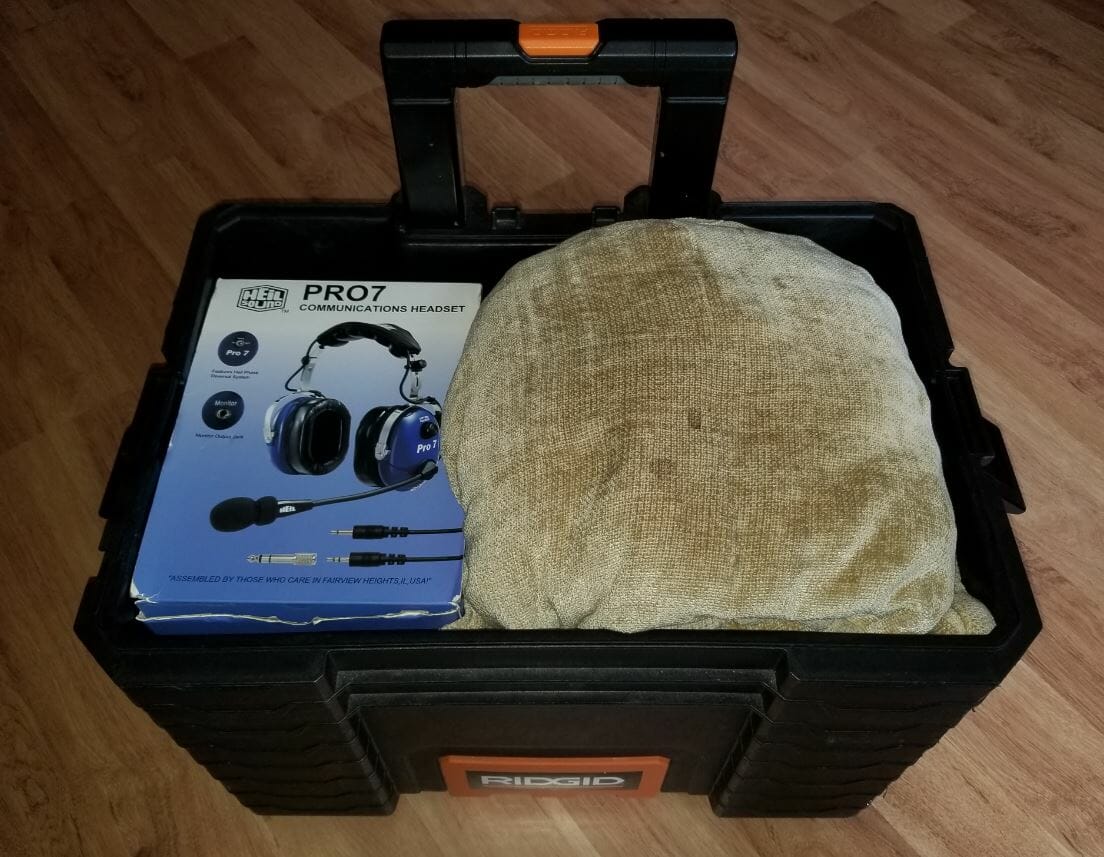
The box from the Pro7 headset holds the loose cables and fits in the toolbox perfectly.

Big Toolbox Middle Layer - One Radio, Two Shacks
Big Toolbox Middle Layer

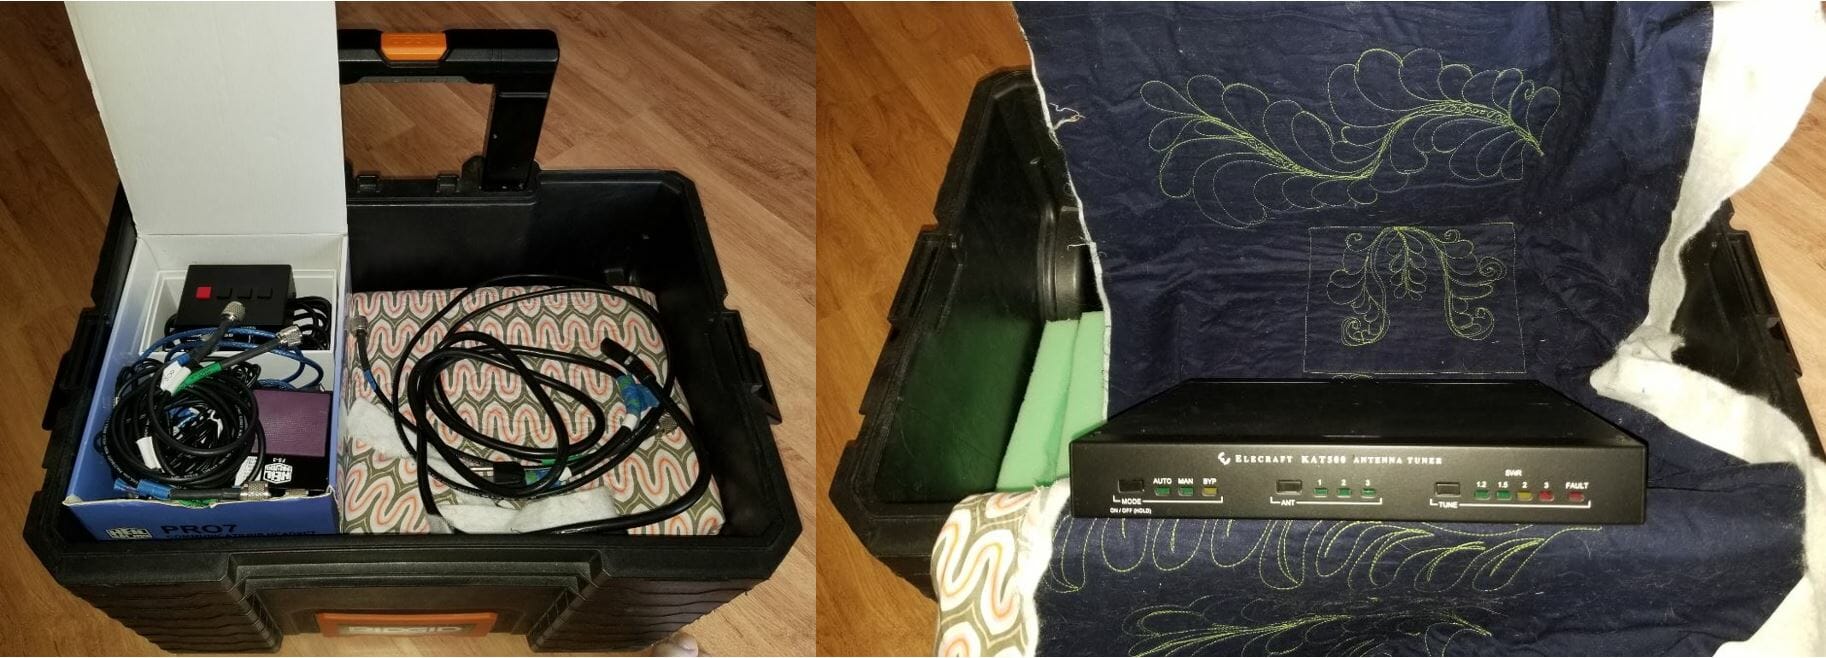
The KAT500 Tuner is unwrapped.  You can see below how well the toolboxes fit the components.

Big Tool Box Bottom
Big Tool Box Bottom

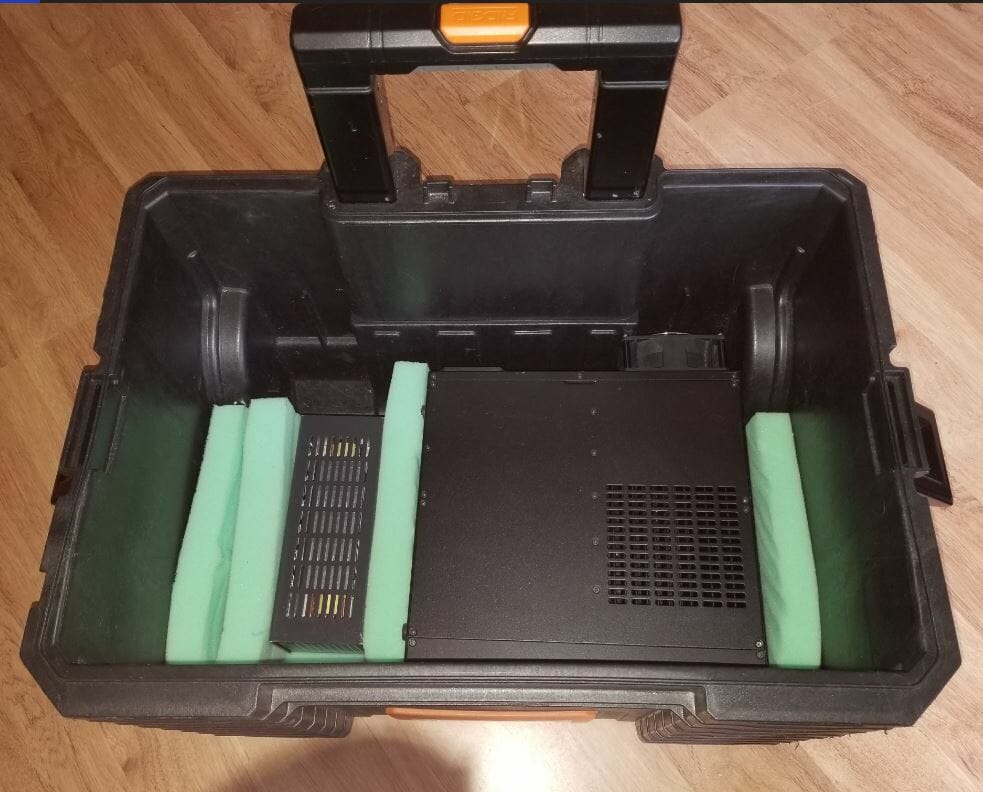
Dummy Load and KPA500 amp on the bottom of the large toolbox.

Components Laid Out - One Radio, Two Shacks
Components Laid Out

Here are all the components laid out.  Key cords and cables are labeled.

Wires and Ground

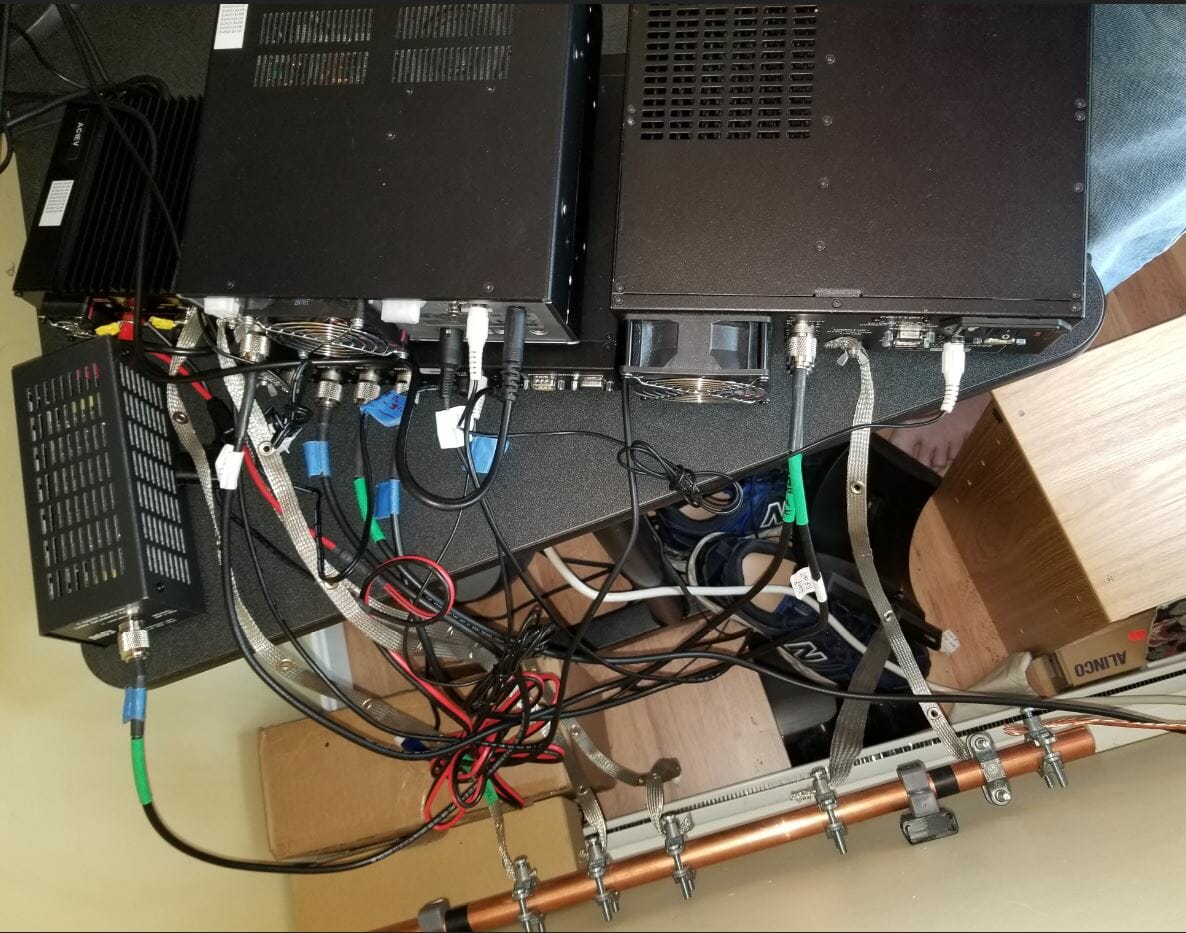
I connected the components.  The copper pipe is a bus for common ground.  The wire on the right side connects to the house ground outside.  The radio is noticeably quiet.
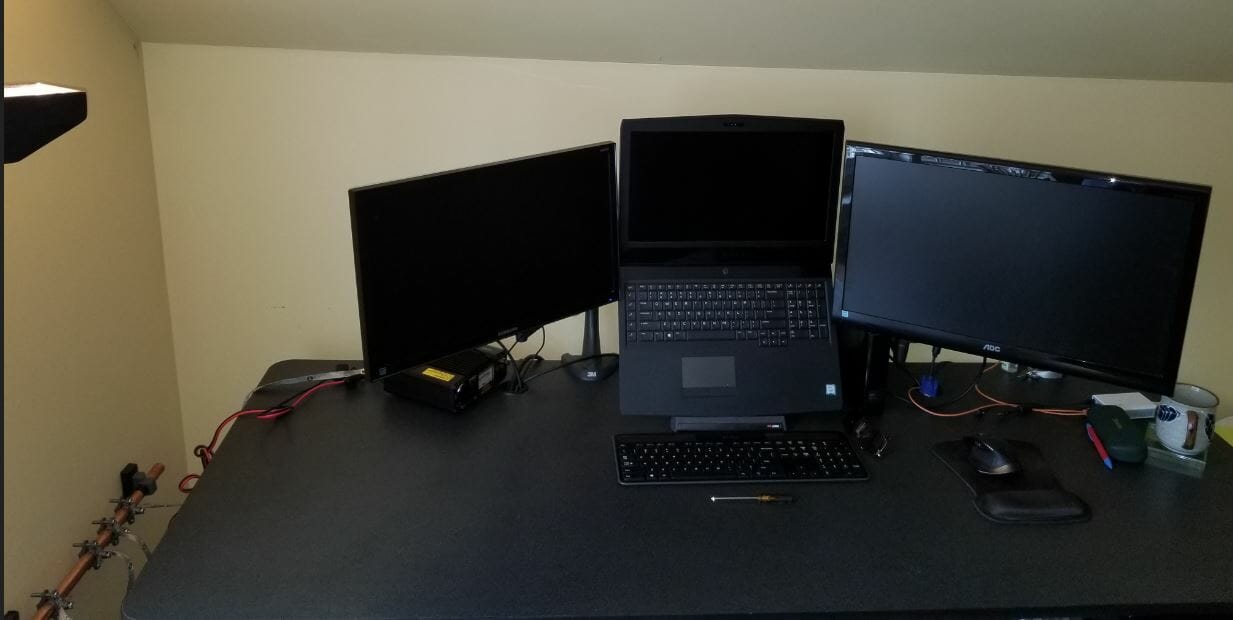
NH Shack Ready
NH Shack Ready

The shack is ready.

One Radio, Two Shacks – Here’s How Set Up Goes…

Click on the above image for a hyper-lapse video of me putting the shack together.

Jon, AC1EV

2 Meter Vertical Yagi for Better VHF Performance

Some Issues with 2 meters VHF

I have a VHF radio in my car with a mag-mount antenna. One of the things I like to do is join in the Nashua Area Radio Society’s Weekly Repeater Net. I enjoy it so much that I volunteer to be in the Net Control rotation. When it is my turn, I need to be sure I can reliably reach the repeater and there were a few times when my mobile setup let me down.

Yaesu FTM-3200D
Yaesu FTM-3200D

I recently updated my shack to include a Yaesu FTM-3200D 2-meter radio that has up to 65 Watts output on 2 meters.

Diamond X200A Dual Band VHF/UHF Antenna

I paired that with a Diamond X200A Dual Band VHF/UHF Antenna and things improved a bit, but there were still a few times when I was scheduled to be Net Control that I could not reliably connect to the repeater.    I did some research and here is what I learned.

Distance and Line of Sight Calculator to Repeater

VHF, especially in the FM mode is mainly a line of sight band.  There are many propagation modes that go way beyond the line of sight, such as Sporadic-e, Tropospheric ducting, Auroral propagation, Meteor scatter, and Earth-Moon-Earth (EME), but they are not relevant to this discussion of connecting to a repeater.  The map above shows the approximate location of the repeater and my QTH in Tewksbury.  I looked up the height of the repeater antenna and my QTH and came up with a difference between them to help calculate the distance to the horizon from one point to the other.  Here is the link to the calculator in the blue box:  http://www.ringbell.co.uk/info/hdist.htm  Line of sight, as it applies to radio in this situation extends a bit beyond what the optical line of sight maybe, and that describes perfectly the situation shown above.  The repeater appears to be located about 10% beyond the optical line of sight from my QTH.

What can I do about it?

Most of the time, I can connect to the repeater.  Unfortunately, I cannot predict whether or not I will be able to connect.  The first thing I thought I could try was to raise the antenna at my QTH to extend the view over the horizon.  I checked on the LOS calculator and found that adding 10 feet to my antenna mast would only get me out to 21.2 miles or a .3-mile gain.  This approach would quickly reach the point of diminishing returns, so I needed another solution.  The next thing I thought about was improving the antenna.  2-meter yagi beam antennas are very reasonably priced, and I found the Diamond A144S10 Base Station Yagi Beam Antenna for under $95.00.  It has 11.6 dBi gain, so should work well.

A144S10 Base Station Yagi Beam - 2 meter yagi
A144S10 Base Station Yagi Beam

Any antenna project will include more than the price of the antenna but by using some parts I already had on hand and adding an inexpensive TV rotator, I was able to install the antenna at a reasonable cost.

Building the 2 Meter Yagi Antenna

Antenna Unboxed - 2m Yagi
Antenna Unboxed

The antenna comes in a small box with many of the parts pre-assembled.

Beginning the Assembly - 2 meter Yagi
Beginning the Assembly

I twisted the elements of one section into position and tightened the wing nuts to hold them in place.

After repeating the process with the other elements and assembling the pieces I moved on to install the horizontal bracket on a piece of chain link top rail I used for the mast.

Stand-off Mounting Bracket

The stand-off bracket serves two functions.  First, it attaches the antenna to the mast in a vertical orientation and second, it moves the antenna away from the mast so that there is no interaction between the metal mast and the antenna elements.

Completed Antenna Staged on Mast - 2 meter Yagi
Completed Antenna Staged on Mast

Here is the antenna staged without the rotator, prior to installation on the roof.

Preparing to install the antenna on the roof

It is a good idea to pre-wire the antenna rotator and calibrate it before going up on the roof.  The Hy-Gain AR-500 Rotator is easy to configure.

Hy-Gain AR-500 Rotator

I installed the tripod on the roof taking care to place the lag bolts into the rafters and waterproof them thoroughly.  Importantly, I used the level and the top rail to ensure that it would be vertical prior to mounting it to the roof.

Tripod Base Mount
Tripod Base Mount
Antenna, Mast Sections and Rotator Assembled - 2 Meter Yagi
Antenna, Mast Sections, and Rotator Assembled

Assemble the Antenna, Mast, and Rotator.

Attach Wires, Coax and Guy Lines - 2 Meter Yagi
Attach Wires, Coax, and Guy Lines

Next, attach all wires, coax, and guy lines while the antenna is in reach.

Install the 2 Meter Yagi antenna in the roof mount tripod

Lifting the Completed Antenna Assembly - 2 meter Yagi
Lifting the Completed Antenna Assembly

Lifting the completed assembly to mount it in the tripod.

I lined up the whole assembly and carefully lifted it into the tripod mount.  If I ever do this again, I will have a helper!

3 Antennas Over the House - 2 meter Yagi
3 Antennas Over the House
HF and VHF Antennas
HF and VHF Antennas

The Hex Beam is 33 feet up.  The new A144S10 10 element 2 meter Yagi is around 28 feet and the Diamond X200A is around 20 feet high at the feed point.

The results are in

Finally, I made arrangements with Fred, AB1OC to do some testing later that afternoon.  I oriented the antenna to the compass accurately and looked up the heading to the repeater.  Fred helped me with adjusting my mic gain and power output to make sure the radio was working properly.  After a few tweaks, we were both happy with the results. I hosted the Nashua Area Radio Society’s Weekly Repeater Net that night, which turned out to be a success.  I am looking forward to exploring the capabilities of this new antenna.

Jon, AC1EV

Try Rookie Contesting

New England QSO Party, Revisited

At the end of April this year I wrote an article about my experience with the New England QSO Party.  The event took place in May 2019.  At the time, my station at my NH QTH was IC-7300, 500 Watts, and EFHW antenna at 50 feet.  When I received the certificate from the NEQP it was for second place in Carroll County, NH, and I got a big kick out of it.  I examined the details of the event and learned more about my competition. I found out that there was a total of 4 entries from Carroll County and only two of us were in the HP category.  This means that I also came-in the last place for High Power!  Still, I had fun and a certificate, so no complaints.  It also prompted me to enter the 2020 NEQP as Low Power, which would give me a chance to come in first in that category for Carroll County.

Checking on results from other contests

Not all contests will send you your results.  I expect the big guns who finish at the top may hear something, but not every contest will let each minor award winner know about it.  A fellow ham sent me this link to use to check on results from ARRL events.

https://contests.arrl.org/certificates.php

Enter your call and you will get a list of PDFs suitable for printing or framing. Any that you earned a certificate for as well as any multi-operator stations you have participated with. Be sure to also enter any of your ex-calls. I found 2 certificates that I did not know about!

ARRL Certificate Search
ARRL Certificates
ARRL Certificates

When I entered these ARRL contests my goal was to make QSOs and then import them into my QRZ log.  I did not really participate at a serious level and probably spent less than 10 hours on each one.  I wanted my contacts to count for the other participants, so I logged with N1MM+ and submitted the logs as if I was in it to win it.  When I entered the 2019 CQ World-Wide DX Contest SSB, I decided to give it more effort and operated for 15.2 hours out of 40 hours available.

Rookie Contesting

Many contests have an option for operators who have their licenses for under 3 years to enter with a Rookie Overlay.  I highly recommend that any hams who qualify for this do it.  In addition to competing against all the entrants in the contest, your score will also be ranked against just Rookies.  Competing against highly experienced operators with advanced contest stations is tough and there are many that are in that class.  Entering as a Rookie may give you a chance to compete against other operators who match your skills and equipment.  You can set the option in the contest set up in N1MM.

Rookie Contesting
Rookie Overlay

I Raised my Antenna for Better Performance

The 2019 CQ World-Wide DX Contest SSB was held in October.  I obtained spousal approval to put in more time on this one than any other contests I worked.  I was operating from my NH QTH with my IC-7300 and 500 Watts of power.  My 8010 EFHW antenna was installed at 50 feet.  My previous experience with the antenna was OK and I made many QSOs with it.  When I tried in the contest environment, it was not meeting my expectations.  I could not break into pileups reliably.  On 80 meters, I was only able to make QSOs out to around 1500 miles.  I decided to take the end of the antenna down from the tree at 50 feet and use my new Bigshot Slingshot Throwline Launcher to raise the end as much as possible.  I wrote about this in an article I posted on the NARS website.    It took me around an hour to raise the antenna to 70 feet and it made a BIG difference!  All bands showed noticeable improvement with 80 meters being the most dramatic.  My first QSO on 80 was to Ukraine, over 4000 miles away.

NH QTH Topography

My QTH in Mirror Lake, NH is located close to the top of a long ridge.  The land falls off sharply from 80 to 100 feet within a half-mile or less to the NE to SW.  It falls off less sharply for most of the rest of the compass points.  The arrow points to my antenna and how it is oriented below.

NH QTH Topographic Map

I am not sure precisely how much this added elevation adds to the apparent height of my antenna, but I’m pretty sure it makes it seem like it is even higher than the 70 feet it is up in the tree.  Additionally, the ground under the antenna is moist and mineral-rich and should be better than the average ground.

My Results!

Raw Score
Raw Score

Here is my raw score from N1MM for the contest.  I only had 301 QSOs, but many multipliers, and that really boosted the score.  The contest organizers sent me an email a few months after the contest. They asked me to provide details about when I was first licensed. I replied to them with my info and a screenshot of my ULS listing.  After that, I just forgot about it.  Once I learned about checking on results with the ARRL link, I decided to check and see how I did in the 2019 CQ World-Wide DX Contest SSB contest.

CQ DX WW SSB lookup
CQ DX WW SSB lookup

I saw there was a Cert available, so something was good.  I downloaded the certificate and found out I did way better than come in second out of two entrants in my small county.  Here is how I did:

CQ WW DX Contest Results

I printed this certificate, suitable for framing!

Certificate of Merit - Rookie Contesting
Certificate of Merit

I was thrilled to see this and am very motivated to give maximum effort for the upcoming 2020 contest.  Now I plan to upgrade to a HEX Beam or Spider Beam for my NH QTH. If the location worked so well with an EFHW antenna I can only imagine how well it will work with a Yagi.  If I add more time in the chair and operate for closer to the maximum allowable time, I should be able to improve on this result dramatically.

Try Rookie Contesting

I would have been quite happy with my results scored without the Rookie Contesting Overlay but having a competitive result as a Rookie is very motivating and satisfying.  My three years as a Rookie last until the end of the year so I intend on entering a few more contests while I can.  If you qualify as a Rookie, you should try this out.

Jon, AC1EV

Radio Amateurs Developing Skills Worldwide