All posts by Nashua Area Radio Society

Webmaster for the Nashua Area Radio Society

A First Homebrewed Transceiver

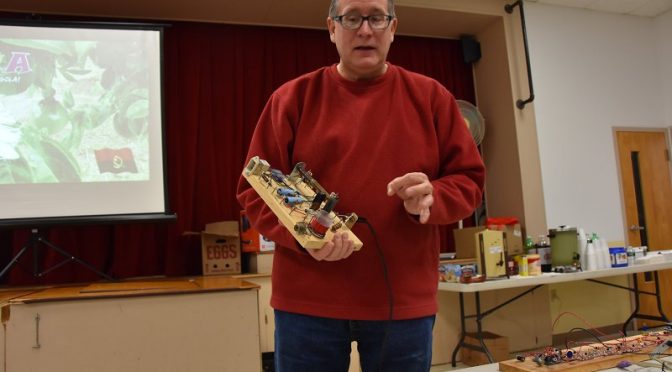
I recently wrote an article about Nashua ARC’s 2017 Project Night (forgive my shameless self-promotion). In it, I expressed my awe of what our club members can do, and how it has inspired me to attempt my own first build.

The winter really is the best time to do this. And it’s time for me to embark on this journey of fun, learning, and frustration! So I turned to Mike (AB1YK) who knows about such things since he and I are attempting to organize a future summer weekend Tech Build Event for the club. The Pixie and the DSO138 oscilloscope are the warm-ups for this main-event. One suggestion Mike threw out was a Direct-Conversion Receiver (DCR) as advertised in the January 2015 issue of QRP Quarterly which you can actually download here (and as far as the application to the Tech Build goes, perhaps we only build parts of the DCR given time constraints). This article is entitled Let’s Build Something: Part I by Ben Kuo (KK6FUT) and Pete Juliano (N6QW).
Homebrewed Transceiver Block Diagram

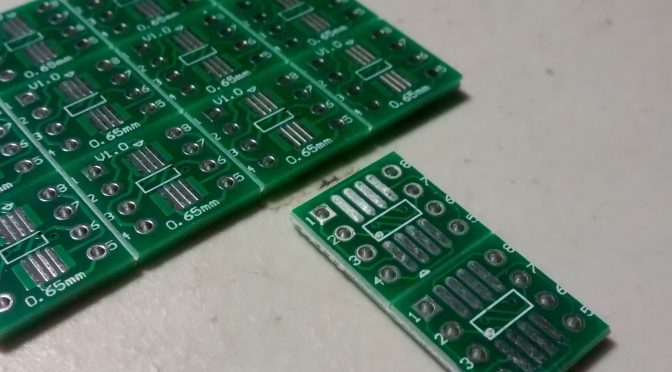
In it, they outline the main building blocks of the build. The nice thing about this build is once one is done, it is amenable to some modular alteration to turn it into a fully working QRP SSB transceiver! (Though I do not know how much wattage at this stage) The other nice thing about this build is all the parts are clearly labeled and Pete provides links at the end of the article for YouTube videos about the build. Maybe it’s just my noob eyes, but I find the videos moderately useful for someone starting from scratch, but I can see the utility for a more experienced builder. Additionally, this build utilizes the Manhattan style of building. I find this optimal for someone just starting out because I can easily visualize all the connections between the components and have relatively easy access to make measurements and tests with probes.

Let’s go through parts and I’ll tell you what I know (at a cursory level) and what I don’t

  • 40m bandpass filter: Totally on this one. I’ve never built a filter before but looking forward to doing this. In fact, I need to build one for my ADS-B antenna at 1090 MHz, but it doesn’t seem feasible to do from components at that frequency. Any ideas anyone? I’m kind of stumped.

Homebrewed Transceiver Bandpass Filter Schematic

  • RF amplifier: REALLY looking forward to tackling this one, but this won’t be the first thing I do. Makes sense to have for weak signals.

Homebrewed Transceiver RF Amplifier Schematic

Homebrewed Transceiver RF Amplifier

  • Double-balanced mixer: Now I know something has to knock the RF down to an intermediate frequency (IF) and when I see mixer, this is where my brain goes.  The double-balanced bit was foreign to me, but as advertised in the article (‘double balanced’ implies that the original signal and local oscillator frequencies are deliberately nulled out as part of the mixing process and do not appear at the output.)

Homebrewed Transceiver Double Mixer Schematic

  • Arduino Based Sample DDS: In order to even produce an IF, we need a local oscillator (LO). This is where the Arduino comes in. The authors argued they looked at a number of options for the LO including a VFO (variable frequency oscillator), a varactor tuned oscillator (should know this from my Extra exam — but full disclosure — I can’t help you now), and a DDS (direct digital synthesizer). They felt the simplest option was the DDS (hence the Arduino).

Homebrewed Transceiver DDS Schematic

  • Audio amplifier: We want to amplify the audio signal so we can hear it through our 8 Ohm speaker!

Homebrewed Transceiver Audio Amplifier Schematic

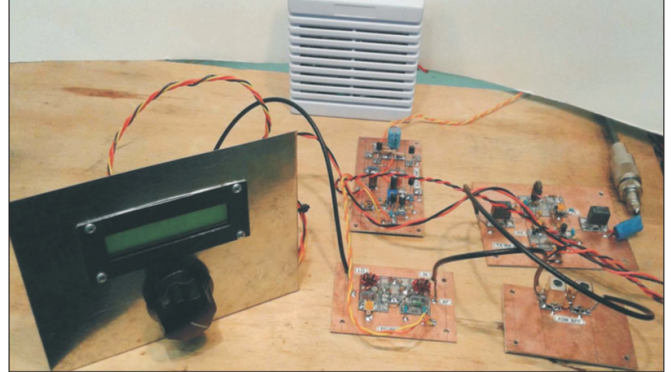
So now if you put all the components and modules together, you arrive at something which should look like:

Homebrewed Receiver

I like this project for a few reasons.

  1. It’s a more interesting build and takes longer than 2 hours.
  2. It will have amateur radio applications in my shack. I do hope to work some pretty cool QRP with this rig (when I turn it into a full-on transceiver).
  3. I will learn A LOT about the electronic components integrated into the rig and be able to have an excuse to buy some test equipment.
  4. I get to work on my soldering skills.
  5. The modular design is attractive so that if I wish to make alterations in the future, it seems I will readily be able to do so without having to tear the entire rig apart.
  6. Understanding, at the end, how all of these parts function together to make my transceiver work. I look forward to sharing whatever knowledge I accrue during this build with future amateur radio hobbyists just breaking in.

I will certainly post articles as my progress commences. Currently, I am in the market to buy components and test equipment and will begin to build probably the simplest module first; currently, that seems to be the filter. And I have learned a very valuable lesson from being in the club and participating in its activities that I am applying to this build. Initially do things to set yourself up for the highest probability of success so that you keep your morale, interest, and momentum high. Nothing is worse than diving head-first into the hardest part of a project and losing any and all ambition when things begin to not work (and they will…).

73,

Brian, AB1ZO

How to Solder SMT ICs or Surface Mounted Integrated Circuits for your Homebrew Projects

I have some of LM386 ICs that are of the small surface mount type.

Soldering leads to the very small chips is possible but messy, time-consuming, and not fun!

Below is a photo of some PCBs that I ordered from Amazon.  They are also available through Adafruit and Sparkfun.

Surface Mount Soldering PCBs

Below you can see how I soldered the IC in place along with a capacitor on pins 1 and 8 that sets the audio gain.

Surface Mount Soldering Proto Board

Below is a close-up image of the soldering.

Surface Mount Soldering Proto Board Close Up

Alan Wolke (W2AEW) posted a very good video on YouTube on how to drag solder an SSOP IC package.


It would be a good idea to subscribe to his YouTube channel and see all of his other very good videos.  Without Alan’s help, I would still be working on this project!  Thank you, Alan!

73,

Mike, AB1YK

January 2017 Project Night

I wanted to take another moment to share a few thoughts about last night’s Project Night. Sometimes, when I’m speaking on the spot, everything I want to say doesn’t come to me all at once, so please bear with me again. I really was very impressed by the level of talent that was showcased. And, more importantly, I know there is even more of it out there amongst the folks who didn’t get the opportunity to present. But I hope you will during a future club meeting.

Dennis, K1LGQ At Project Night
Dennis, K1LGQ Shows QRP Kits at Project Night

The Jan 2016 Project Night was my first Nashua Area RC meeting. And, it was that first meeting which played an instrumental role in sucking me completely into the hobby: and I’m in pretty deep right now.

I’ve noticed over my years on this pale, blue dot that part of my personality is to think big, try to generate a lot of ideas, but then sometimes get fearful to execute. I think it’s because I’m afraid to fail and I’ve convinced myself (probably through some poor advice by the few poor mentors I’ve had in my life) that I should be able to do everything on my own. My graduate school advisor once told me after someone’s defense that a good physicist should know everything. (Crap! What should a great physicist know then?) If you’re a theorist, you should know every experiment being done. If you work on string theory, you should also know solid-state physics incredibly deeply. This is, of course, complete and utter nonsense. But, nonetheless, I still lean on that ethos like a bad crutch — but I’ve been doing it less.

Charlie, AB1ZN Showing A Vintage Rig at Project Night
Charlie, AB1ZN Showing A Vintage Rig

Project night helped served to snap me back to reality. There I saw people work for months on projects, and no doubt encounters obstacles and challenges along the way, and they happily discussed who they went to for help and even welcomed advice and Elmering from club members after the presentations were finished. It was clear they were not discouraged by the challenges they knew they would face, and the time being invested into their project. And honestly, it made me feel a little better to see that even the best of us get stumped and need to collaborate. In fact, that is expected.

Hamilton, K1HMS Explains CPLD Technology

We have many experts in the club. Hamilton, (K1HMS), did a great job presenting a super-technical talk about CPLD’s.

Anita, AB1QB Demonstrates her Raspberry Pi DX Alarm Clock at Project Night
Anita, AB1QB Demonstrates her Raspberry Pi DX Alarm Clock

Anita, (AB1QB), had a really entertaining and pedagogical talk about software, DX spotting, Raspberry Pis, and annoying Fred (AB1OC) with DX alerts.

Mike, AB1YK Shows His Home-Build Transceiver at Project Night
Mike, AB1YK Shows His Home-Build Transceiver

But one talk which really stood out in my mind was given by Mike (AB1YK) who said during his talk that he’s mainly a digital guy with a ton of Arduino experience. But, he was interested in diving into the analog world, and so his first foray into that world was to construct a QRP transceiver from scratch and teach himself what he needed.

Jeff, WA1HCO Shows His Optimized Matching System at Project Night
Jeff, WA1HCO Shows His Optimized Matching System

What last night was for me was inspirational. It gave me the peace of mind I needed to believe I can tackle subjects I really don’t know much about at all, and be somewhat successful at it. I won’t be a Hamilton, but I’ll know enough to make me dangerous, and that’s good enough for me.

Thank you, Nashua Area Radio Club members for opening my eyes, again. I look forward to crossing some of the projects I want to get busy on, off my list.

73,

Brian, AB1ZO

Radio Amateurs Developing Skills Worldwide