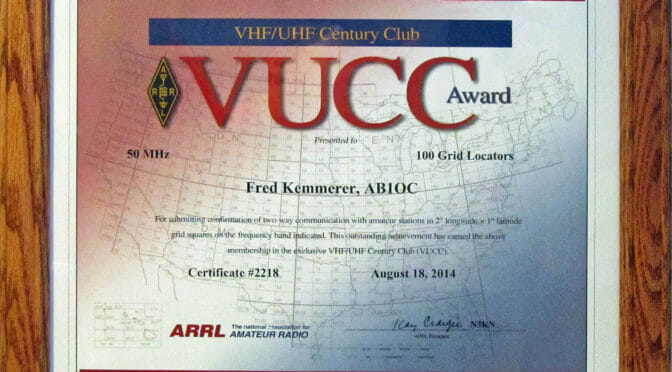
The 6m Band is one of my favorite bands. The combination of its unpredictability and the amazing openings that it can produce certainly makes 6m The Magic Band for me! Conditions on 6m were so good on Saturday that I almost worked a 6m VUCC by 11 pm on Saturday evening …
I had an amazing experience on the 6m Band this past weekend during the 2020 ARRL June VHF Contest. Among other this, I was able to work a VUCC on 6m using FT8/FT4 Digital in less than a day!
We experienced great 6m band openings for nearly the entire contest period here in New England. I was able to work station in Europe, the Caribean, and on the West Coast of the United States during the contest.
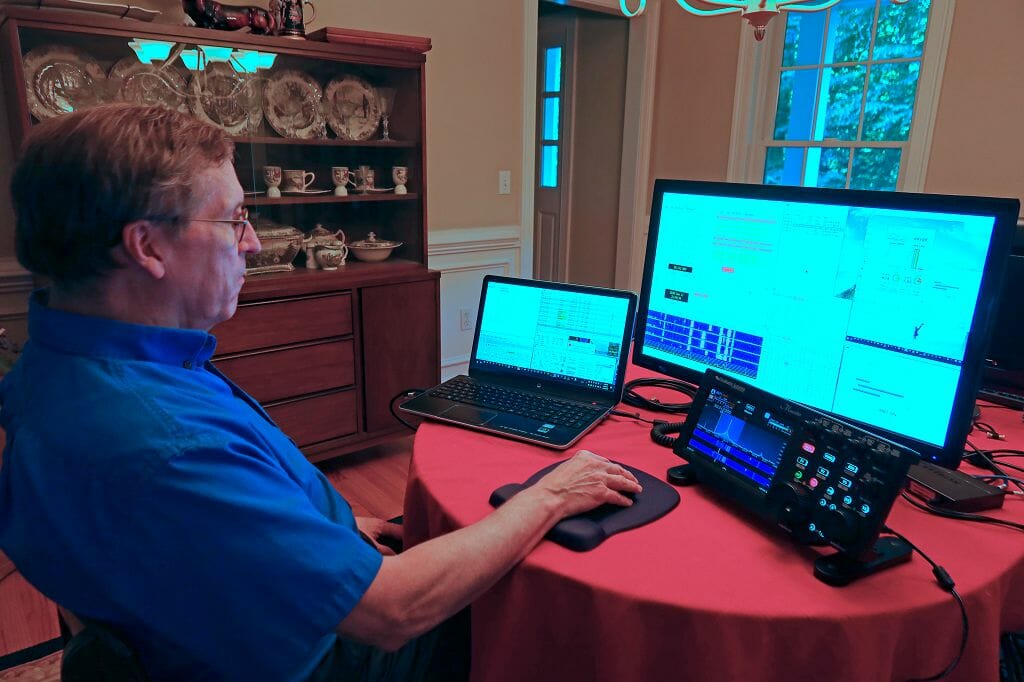
Operating During ARRL June VHF via the AB1OC-AB1QB Station Gateway
The article in the link above describes the station and software setup used during the contest and shares the results of our operations on 6m during the contest period.
You can read the entire story and see some information about how we used the station here as part of June VHF.
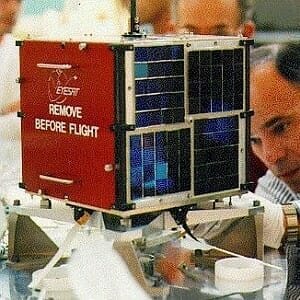
The AO-27 FM satellite is back on the air! It is an FM V/U Mode satellite that was launched back in 1993. The satellite’s Amateur Radio payload became inoperative about 7 years ago due to …
The AO-27 FM satellite is back on the air! This satellite is an FM V/U Mode satellite that was launched back in 1993. The satellite is back on the air on a limited-time basis (4 minutes, twice per orbit over the mid-latitudes).
I was able to make my first contact through AO-27 this morning. The contact was with AI9IN in Indiana, USA. I’m looking forward to making more contacts using this satellite in the near future.
You can learn more about this satellite and how to make contacts using it via the link above. I hope to contact you on it sometime soon.
We get quite a few requests from folks to explain how to get started with Amateur Radio Satellites. Requests for information on how to build a computer-controlled ground station for Linear Satellites are also pretty common. I recently got such a request from our CWA class so I decided to put together a session on this topic…
We recently put together a presentation and demonstration on Getting Started with Amateur Radio Satellites. We covered quite a bit of ground during the presentation including:
How to put together a simple station and work FM EasySats with HTs and a handheld antenna
A recorded demonstration of some contacts using FM EasySats
How-to build a computer-controlled station and work Linear Transponder Satellites
Fixed and Portable Satellite Station Antenna options
A recorded demonstration of some contacts using Linear Satellites
We recorded the session so that we could share it with folks. The link above will take you to our Blog where you can view the presentation video and Powerpoint. The post also includes links to many additional articles about building and operating Amateur Satellite Stations.
We use cookies to ensure that we give you the best experience on our website. If you continue to use this site we will assume that you are happy with it.