Thanks to some great work by the ARISS Team, a new Voice Repeater system is operating on the International Space Station (ISS)! Here is the access information…
Thanks to some great work by the ARISS Team, a new FM Voice Repeater system is operating on the International Space Station!
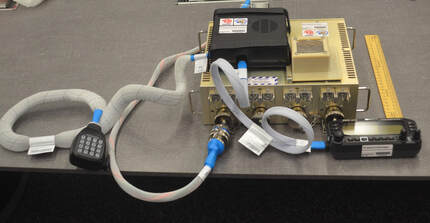
ISS Voice Repeater Hardware
The link above provides the details and the information needed to access the ISS Voice Repeater.
I was able to work several stations using the new Voice Repeater this morning. It is very sensitive and uses 5 watts of downlink power with a good antenna on the ISS. I was able to make solid contacts using the Ground Station here using only 1.5 watts uplink power when the ISS was at 10 degrees above the horizon. At least one of my contacts was with a station using an HT with a whip antenna!
The voice repeater is sensitive enough and uses a power level that will enable folks with an HT and a whip antenna to make contacts using the ISS when its close to the horizon. It should also be easy to make contacts using mobile rigs that can support cross-band operation as well. Program your radios!
I’m looking forward to working you through the ISS!
The Nashua Area Radio Society is sponsoring a QSO party on September 26 and 27. The goal is to get more people on the air. The Sporadic E season is winding down but the sun is starting to wake from its slumber. With added solar activity we have the possibility of an increase in propagation so definitely give 10 meters a try!
Thanks to feedback from a club member there will be two categories to help even the playing field for those that don’t have an HF station. VHF and up and All band. please see the rules below for a full explanation.
We feel this contest has something for everyone. You can earn points using any mode (except repeaters) you like using any bands you like (except the WARC bands). If your new to contesting that’s great too. I urge you to give it a try. The exchange is short and this should be an easy and low-stress introduction to contesting.
A note on digital modes. CQ Worldwide RTTY is held the same weekend. If RTTY is your thing or you want to try it out this is a great opportunity!
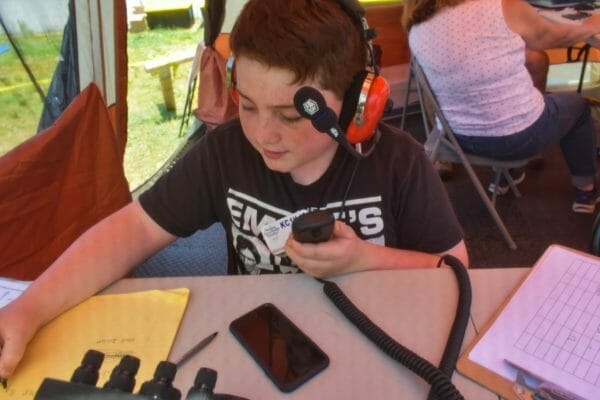
Ryan K1RMW field day 2019
The rules can be found below.
NARS QSO Party
Object: To contact as many amateur radio operators in as many states, provinces and dx entities as possible
Who: You don’t have to be a Nashua Area Radio Society Member. Everyone is invited to participate!
Date: September 26 0000z to 2359z September 27 2020
Categories: there are two categories to choose from VHF only for 6 meters on up and All band. Power categories are accounted for in the multiplier section of the rules. Multi not permitted
Exchange: W/VE: RST+State/Province DX: RST+ DX
Valid Contacts: Work each station once per band and mode.
QSO Points: phone QSO=1pt, digital and cw=2pts.
Multipliers: Each US State, Canadian Province, and every Dx Entity is a multiplier.
Power Multiplier: Stations not indicating power level within their log will be scored as operating with greater than 100 watts (>100 watts). Greater than 100 watts (> 100 watts) , total score x 1, 100 or less (<=100), total score x2, 5 watts or less (<=5 watts), total score x3.
Scoring: Final score= total QSO points x power multiplier.
Electronic entries only and should include a complete Cabrillo format log and claimed score. If your software does not provide that option, include a summary file in plain text format. This QSO party was designed for ease of scoring. If you choose Deleware QSO Party in N1MM or your favorite contest software it will compute your score for you. Logs should indicate time in UTC, bands, modes, calls, and complete exchange.
Certificates will be awarded to the top 3 stations and the top score will also receive a 2020 ARRL Handbook. Good Luck I hope to get you in my log!
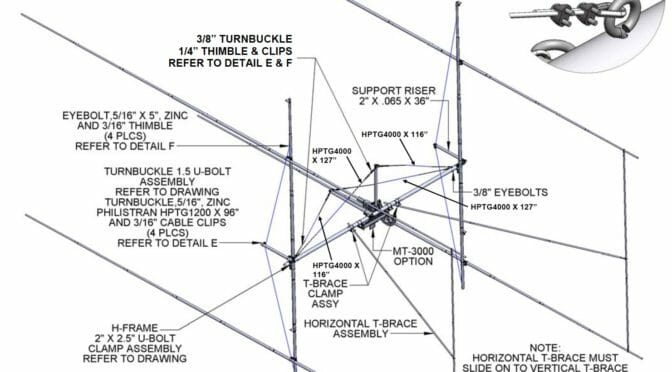
The final major component in our 2m EME Station Upgrade to be assembled is the 2MXP28-32-2X2-3K H-Frame which will support our four 2MXP28 Antennas. The H-Frame is one of the most mechanically complex components in our EME antenna system…
We are almost ready to put our new 2m EME Antenna System. We’ve been working to pre-assemble and test all of the components in the new Antenna Array. The last major component to be prepared in the H-Frame assembly which is used to mount our four new antennas on our Tower. The H-frame component is one of the most mechanically complex parts of our Antenna System. The link above shares all the details of this part of our project.
We use cookies to ensure that we give you the best experience on our website. If you continue to use this site we will assume that you are happy with it.