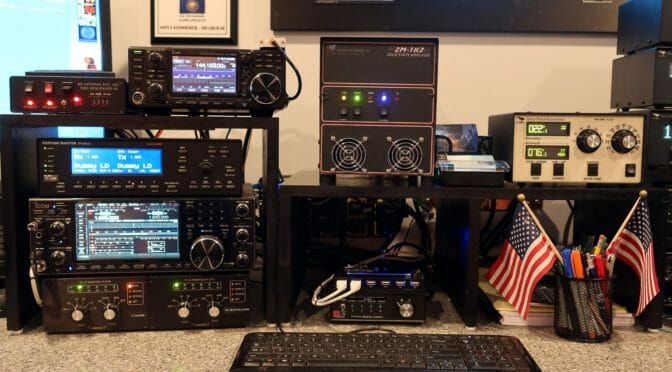
Now that our 2m EME Antenna Array is fully installed, we have turned our attention to the set up the EME Station Hardware in our Shack. Our plan is to do a mix of JT65 Digital and CW operation with our 2m EME…
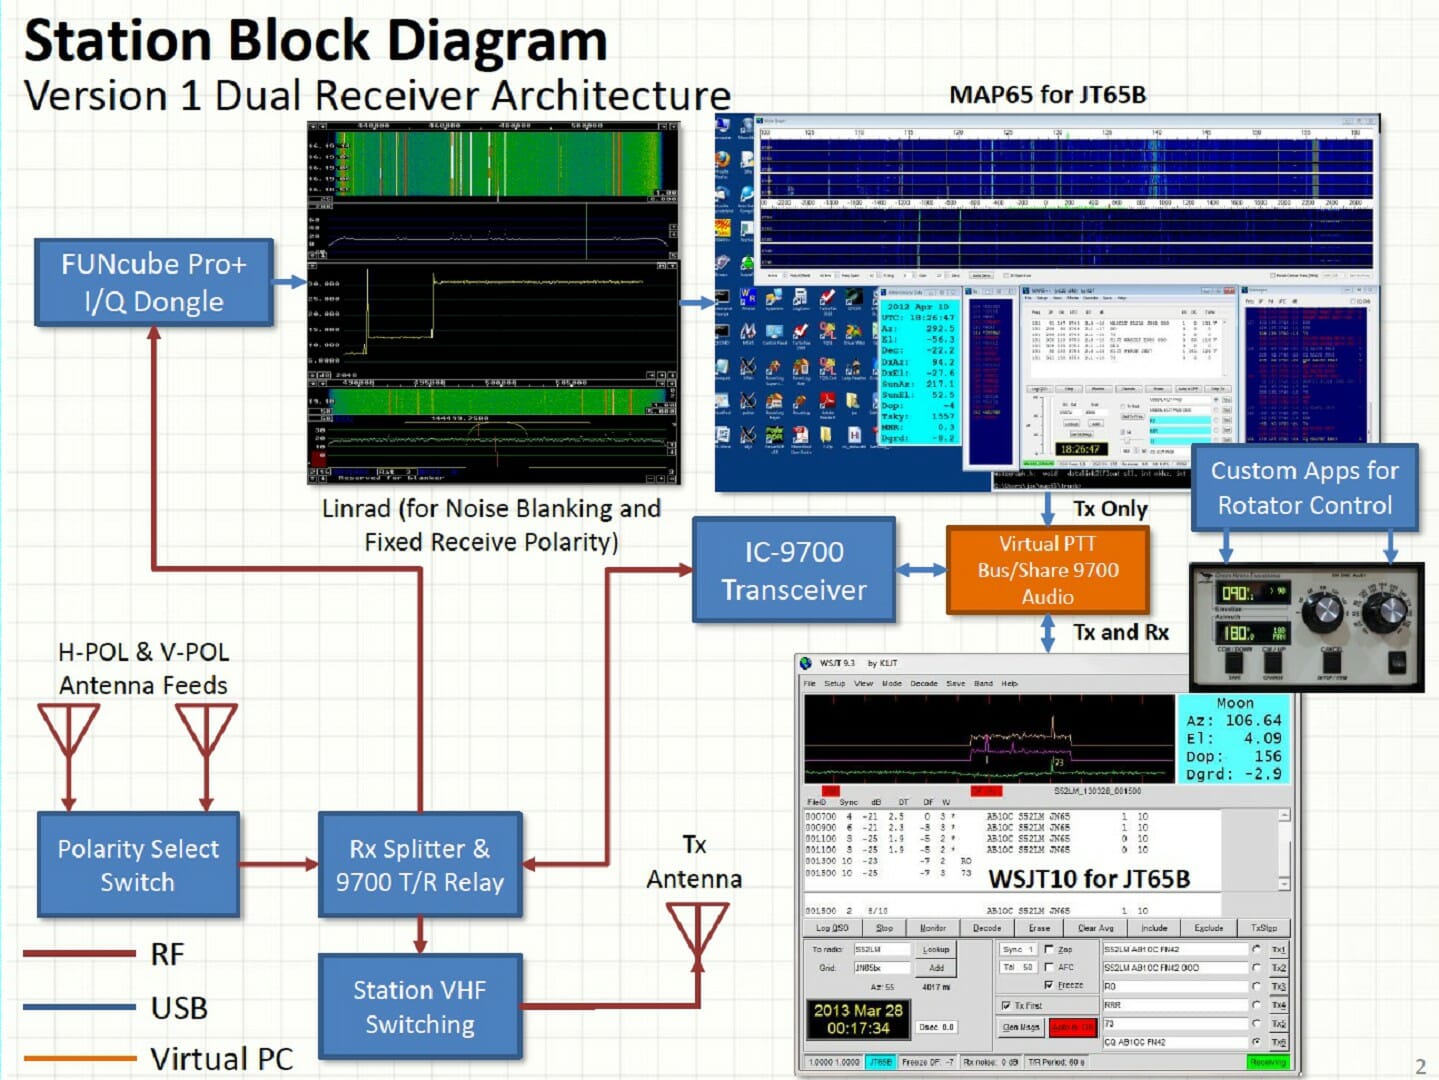
AB1OC-AB1QB 2m EME Station Block Diagram – Phase 1
We’ve created a Phase I Architecture that uses an SDR Dongle and manual selection of Receive Polarity via a switch. We also added a receive splitter and a Transmit/Receive relay in front of an Icom IC-9700 Transceiver which is dedicated to our EME setup to enable both the MAP65 and WSJT10 Software Decoders to operate simultaneously.
This approach has some significant advantages when conditions are poor as one of either MAP65 or WSJT10 will often decode a marginal signal when the other will not.
Special Transmit/Receive hardware was created and added to the sequencing system in our EME station to permit the simultaneous operation of two separate receivers and software decoders for JT65.
The article also covers the installation of a Reference Locking Board in the IC-9700 which allows the IC-9700 to be frequency locked to a clock derived from GPS Satellites.
You can read all about the setup of our EME Station Hardware via the link above.
I have a VHF radio in my car with a mag-mount antenna. One of the things I like to do is join in the Nashua Area Radio Society’s Weekly Repeater Net. I enjoy it so much that I volunteer to be in the Net Control rotation. When it is my turn, I need to be sure I can reliably reach the repeater and there were a few times when my mobile setup let me down.
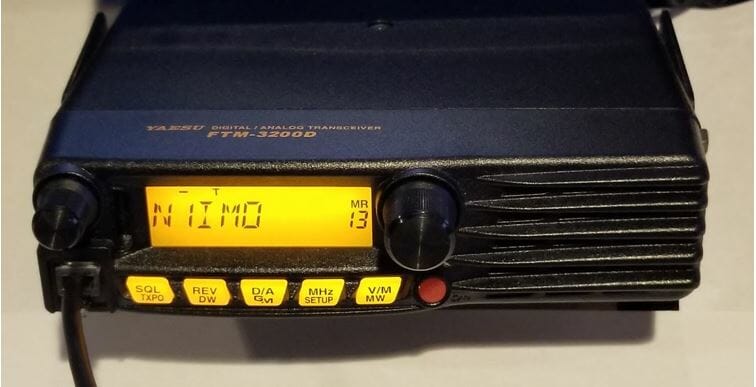
Yaesu FTM-3200D
I recently updated my shack to include a Yaesu FTM-3200D 2-meter radio that has up to 65 Watts output on 2 meters.
Diamond X200A Dual Band VHF/UHF Antenna
I paired that with a Diamond X200A Dual Band VHF/UHF Antenna and things improved a bit, but there were still a few times when I was scheduled to be Net Control that I could not reliably connect to the repeater. I did some research and here is what I learned.
Distance and Line of Sight Calculator to Repeater
VHF, especially in the FM mode is mainly a line of sight band. There are many propagation modes that go way beyond the line of sight, such as Sporadic-e, Tropospheric ducting, Auroral propagation, Meteor scatter, and Earth-Moon-Earth (EME), but they are not relevant to this discussion of connecting to a repeater. The map above shows the approximate location of the repeater and my QTH in Tewksbury. I looked up the height of the repeater antenna and my QTH and came up with a difference between them to help calculate the distance to the horizon from one point to the other. Here is the link to the calculator in the blue box: http://www.ringbell.co.uk/info/hdist.htm Line of sight, as it applies to radio in this situation extends a bit beyond what the optical line of sight maybe, and that describes perfectly the situation shown above. The repeater appears to be located about 10% beyond the optical line of sight from my QTH.
What can I do about it?
Most of the time, I can connect to the repeater. Unfortunately, I cannot predict whether or not I will be able to connect. The first thing I thought I could try was to raise the antenna at my QTH to extend the view over the horizon. I checked on the LOS calculator and found that adding 10 feet to my antenna mast would only get me out to 21.2 miles or a .3-mile gain. This approach would quickly reach the point of diminishing returns, so I needed another solution. The next thing I thought about was improving the antenna. 2-meter yagi beam antennas are very reasonably priced, and I found the Diamond A144S10 Base Station Yagi Beam Antenna for under $95.00. It has 11.6 dBi gain, so should work well.
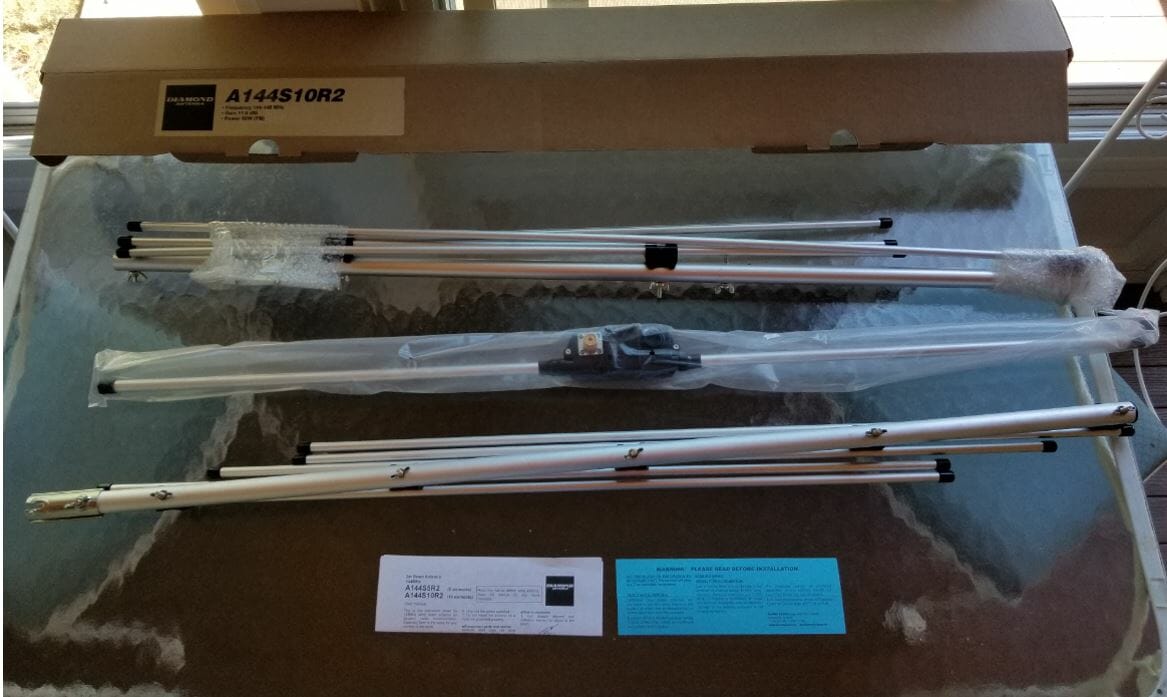
A144S10 Base Station Yagi Beam
Any antenna project will include more than the price of the antenna but by using some parts I already had on hand and adding an inexpensive TV rotator, I was able to install the antenna at a reasonable cost.
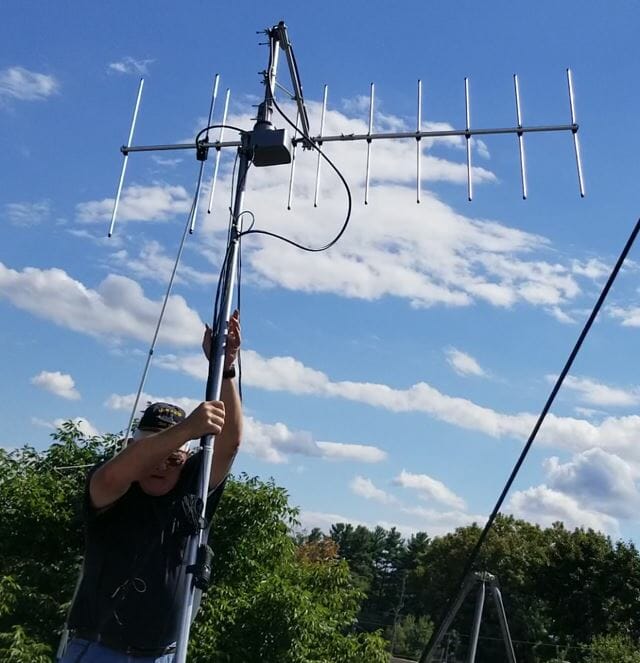
Building the 2 Meter Yagi Antenna
Antenna Unboxed
The antenna comes in a small box with many of the parts pre-assembled.
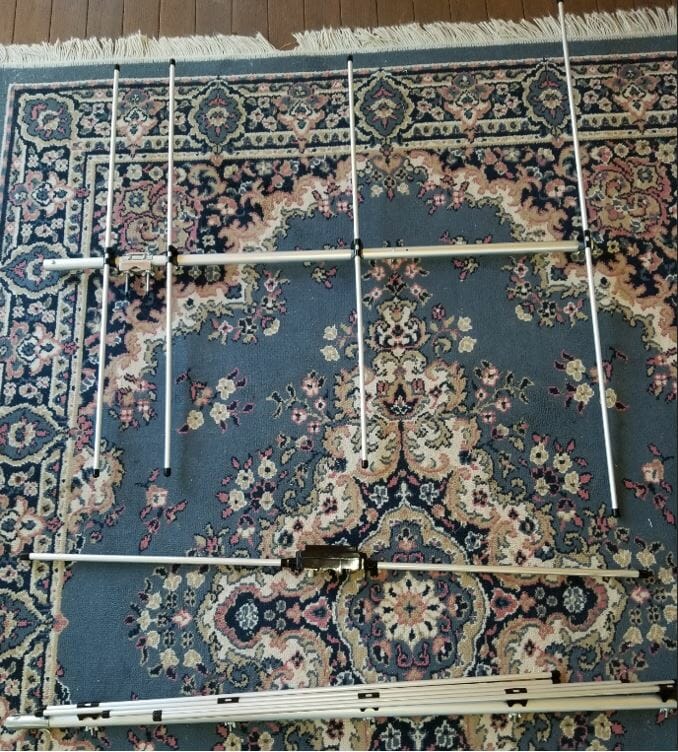
Beginning the Assembly
I twisted the elements of one section into position and tightened the wing nuts to hold them in place.
After repeating the process with the other elements and assembling the pieces I moved on to install the horizontal bracket on a piece of chain link top rail I used for the mast.
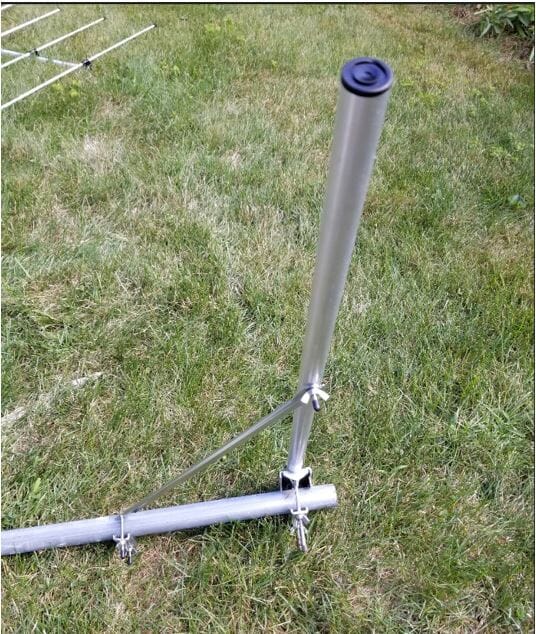
Stand-off Mounting Bracket
The stand-off bracket serves two functions. First, it attaches the antenna to the mast in a vertical orientation and second, it moves the antenna away from the mast so that there is no interaction between the metal mast and the antenna elements.
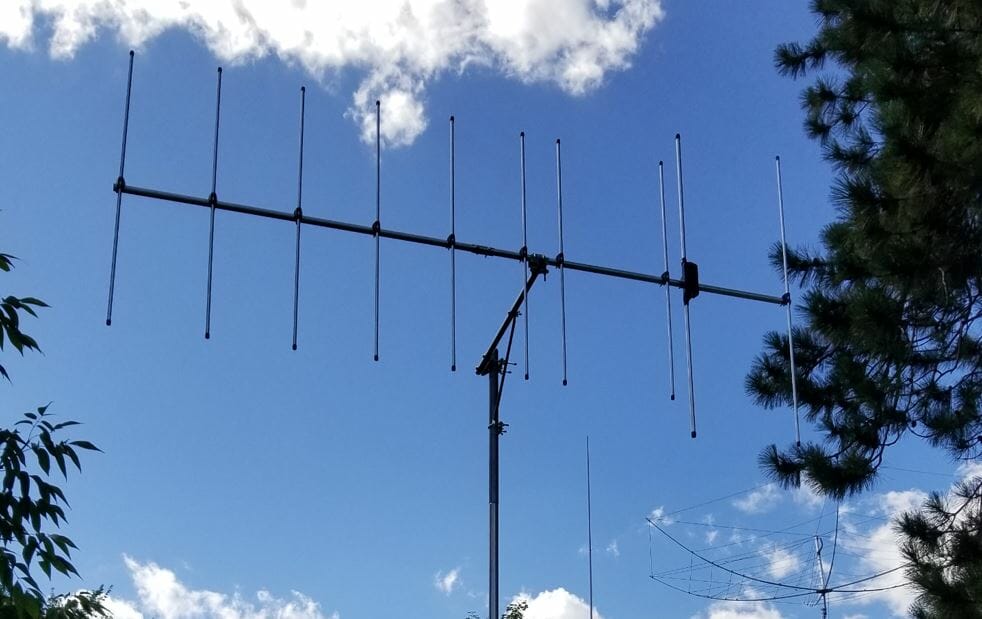
Completed Antenna Staged on Mast
Here is the antenna staged without the rotator, prior to installation on the roof.
Preparing to install the antenna on the roof
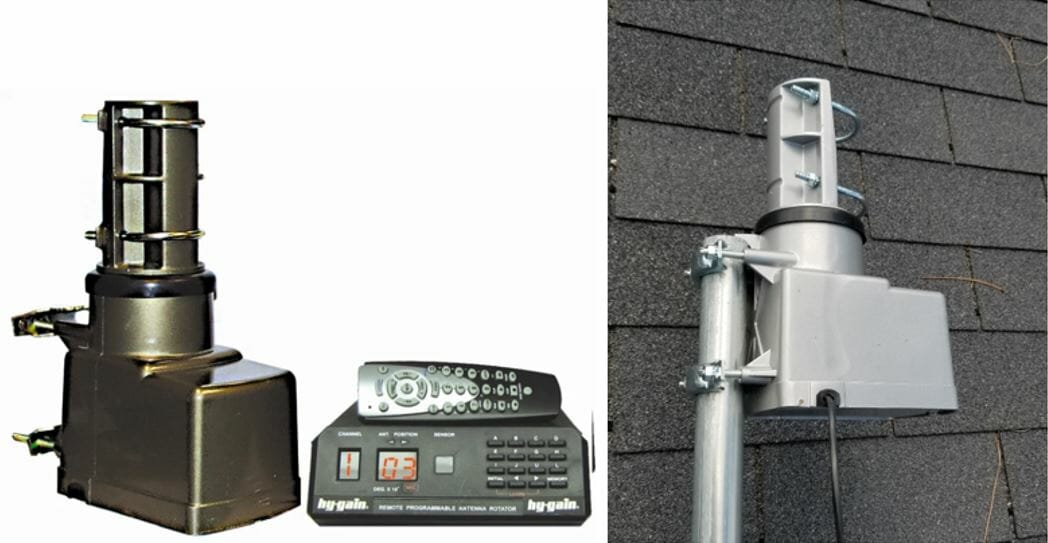
It is a good idea to pre-wire the antenna rotator and calibrate it before going up on the roof. The Hy-Gain AR-500 Rotator is easy to configure.
Hy-Gain AR-500 Rotator
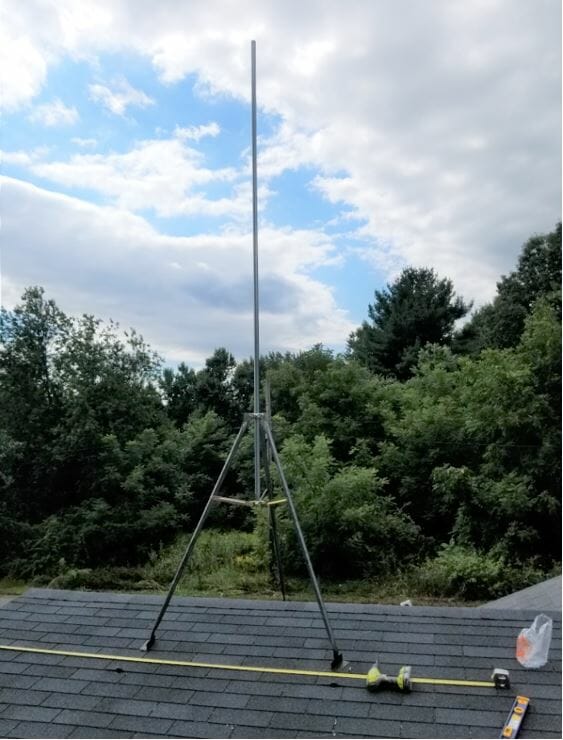
I installed the tripod on the roof taking care to place the lag bolts into the rafters and waterproof them thoroughly. Importantly, I used the level and the top rail to ensure that it would be vertical prior to mounting it to the roof.
Tripod Base MountAntenna, Mast Sections, and Rotator Assembled
Assemble the Antenna, Mast, and Rotator.
Attach Wires, Coax, and Guy Lines
Next, attach all wires, coax, and guy lines while the antenna is in reach.
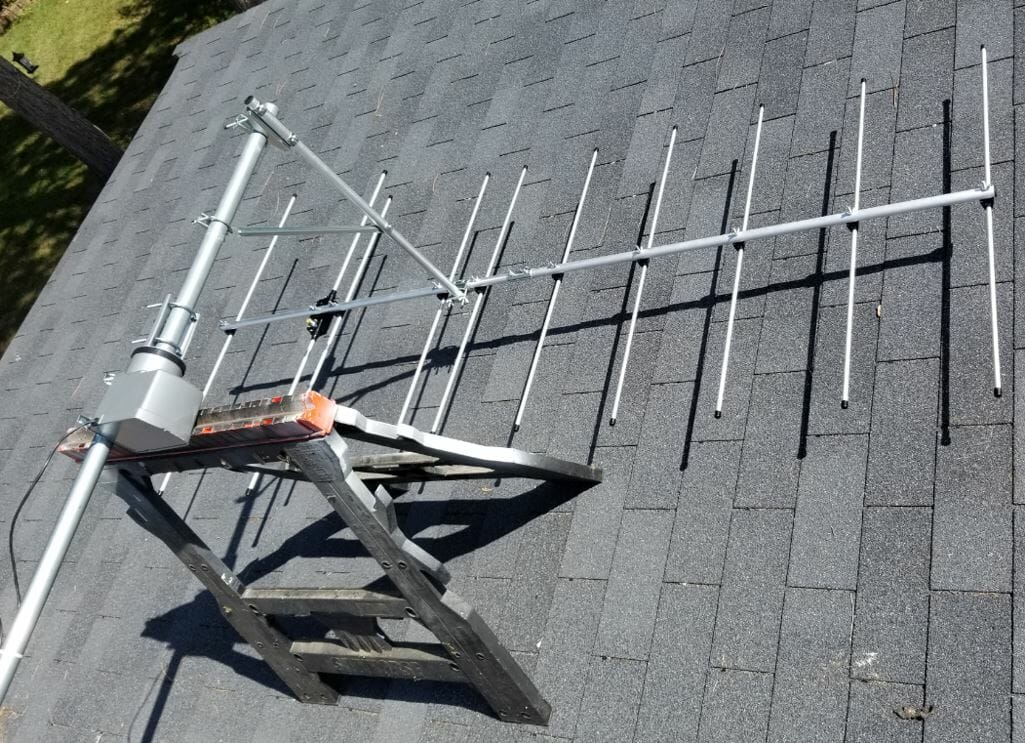
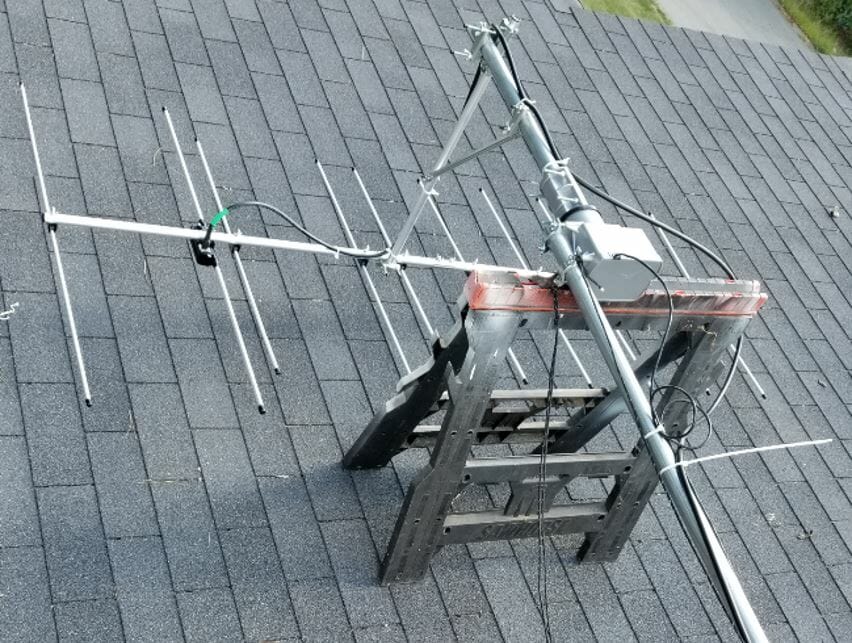
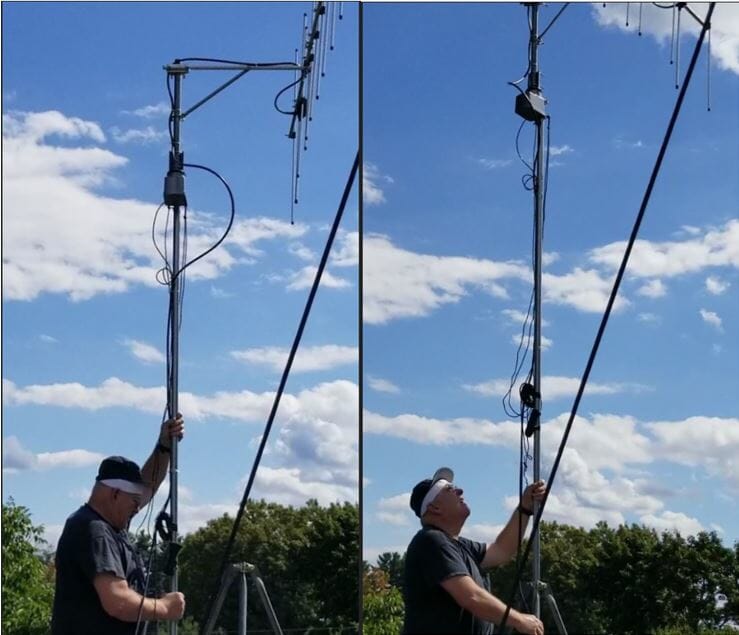
Install the 2 Meter Yagi antenna in the roof mount tripod
Lifting the Completed Antenna Assembly
Lifting the completed assembly to mount it in the tripod.
I lined up the whole assembly and carefully lifted it into the tripod mount. If I ever do this again, I will have a helper!
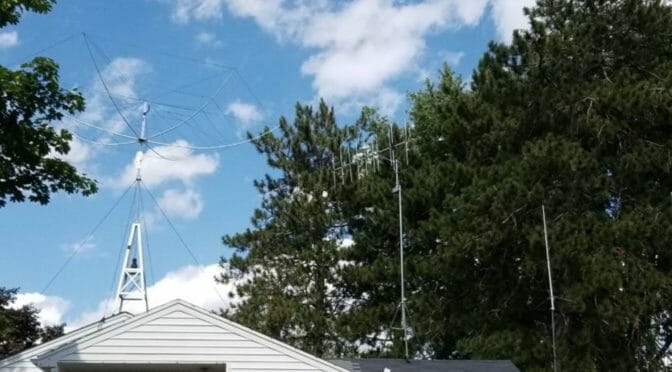
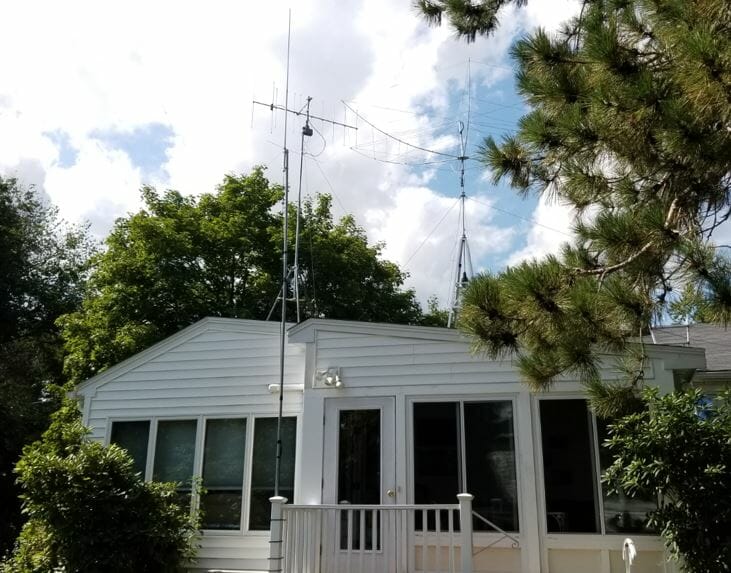
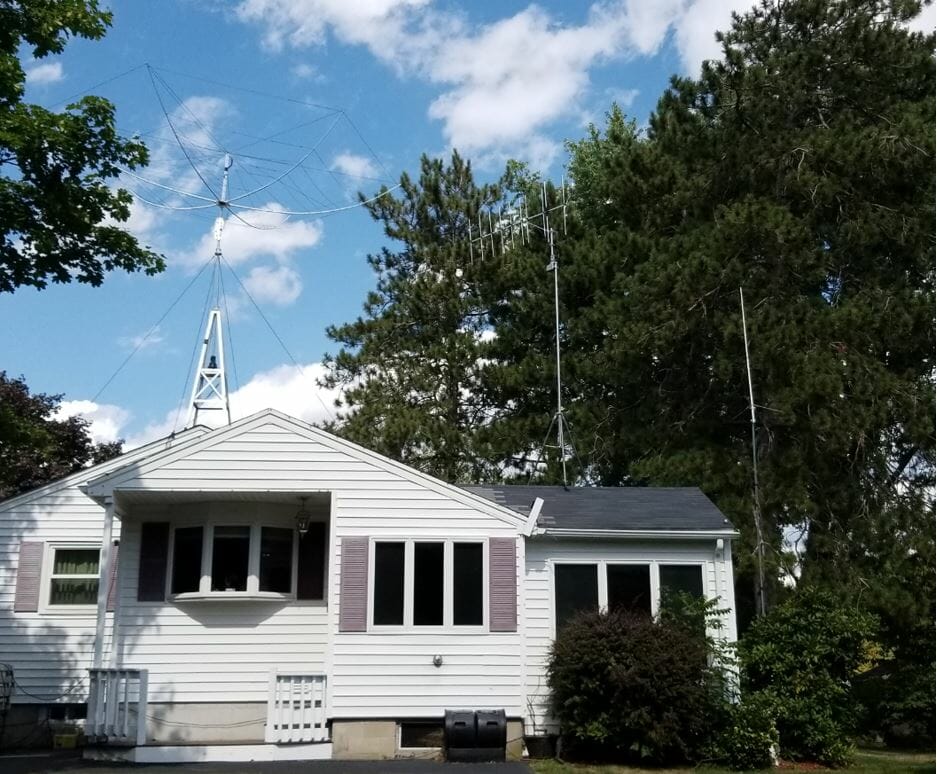
3 Antennas Over the HouseHF and VHF Antennas
The Hex Beam is 33 feet up. The new A144S10 10 element 2 meter Yagi is around 28 feet and the Diamond X200A is around 20 feet high at the feed point.
The results are in
Finally, I made arrangements with Fred, AB1OC to do some testing later that afternoon. I oriented the antenna to the compass accurately and looked up the heading to the repeater. Fred helped me with adjusting my mic gain and power output to make sure the radio was working properly. After a few tweaks, we were both happy with the results. I hosted the Nashua Area Radio Society’s Weekly Repeater Net that night, which turned out to be a success. I am looking forward to exploring the capabilities of this new antenna.
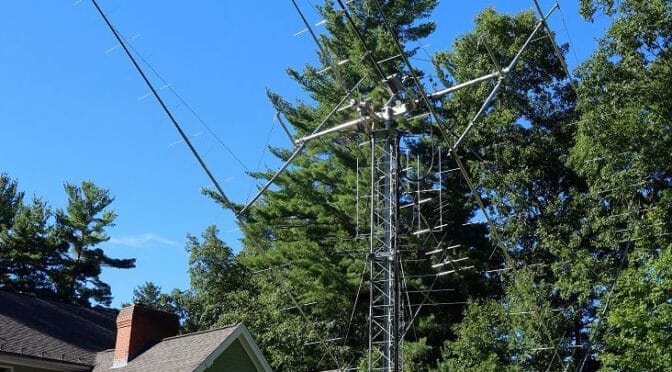
After a year’s worth of planning and 10 months of construction, we have our new 2m EME Antenna System installed on our EME Tower and working! This stage of our project took about a week…
We’re making good progress on a new 2m EME Antenna System here at AB1OC-AB1QB. Our Antenanns system is up on our EME Tower and we are working through the setup and integration of the equipment and software for our EME Station.
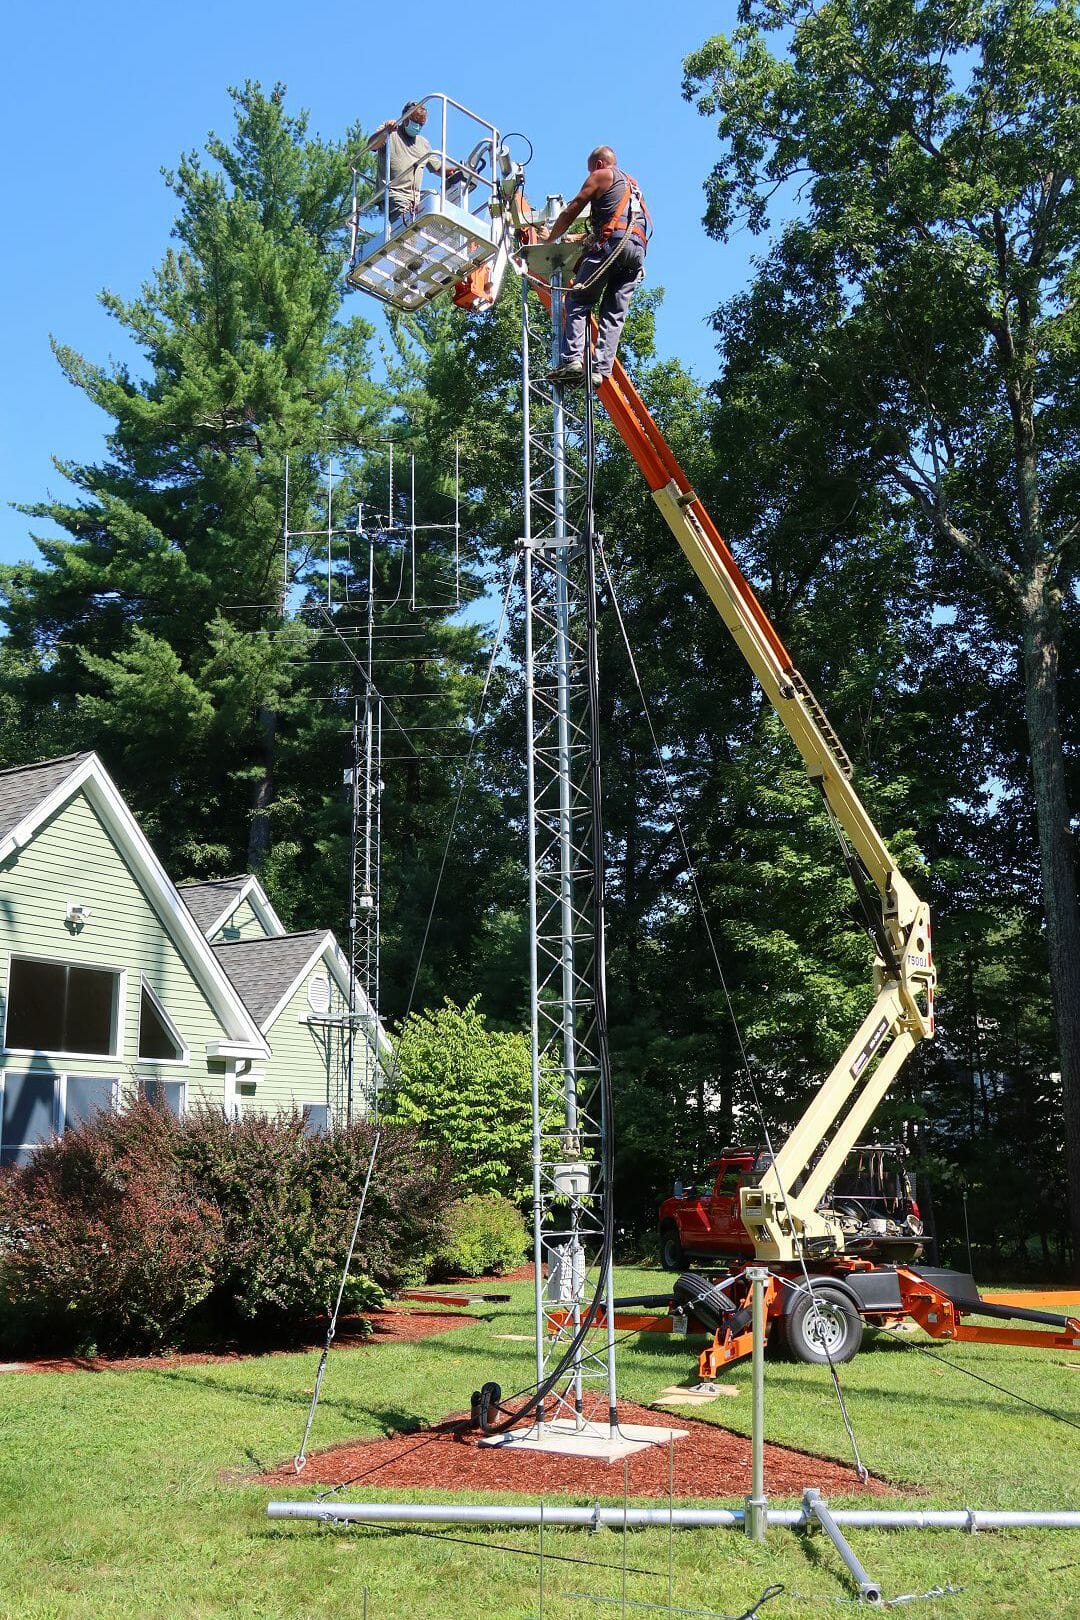
EME Antenna Installation Using A 50 Ft Boom Lift
We rented a boom lift and worked with Matt and Andrew from XX Towers to get our Antenna System up. Our antenna installation took a week to complete and it turned out quite well.
You can read all about this step in our project via the link above. We should have the work needed to bring the rest of our EME Station together sometime during the next few weeks. We can already receive signals that other Hams are reflecting off the moon!
We use cookies to ensure that we give you the best experience on our website. If you continue to use this site we will assume that you are happy with it.