Researchers at the Ted and Karyn Hume Center for National Security and Technology are preparing to send an amateur radio satellite into a geosynchronous orbit in 2017.
This will be a great opportunity for Amateur Radio satellite operators! Some preliminary information about this satellite may be found here.
The proposed frequency plan for the spacecraft is:
Uplinks: 5655-5665 MHz
Downlinks: 10455-10465 MHz
The amateur radio payload will comprise a Software Defined Transponder capable of supporting many different modes, including analog SSB.
Possible coverage of a Geosynchronous satellite at 74 degrees West – Credit NX5R
According to AMSAT Vice President-Operations Drew Glasbrenner, KO4MA, the satellite’s potential footprint would extend over the US from the Mid-Pacific to Africa.
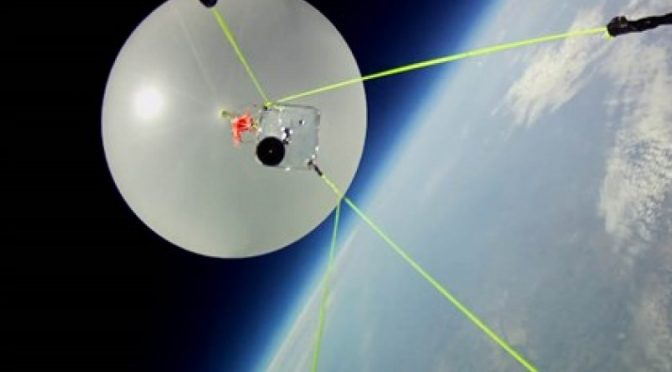
We are making good progress on our High Altitude Balloon project. We have identified three local schools are interested in the project and Jamey, KC1ENX and others are working to set up a meeting with teachers in these schools to explain what we are doing and gain support. You can see what we are sharing with teachers and parents here.
Possible Balloon Payload Experiment – UV Radiation Measurements
Brian, AB1ZO is working on flight planning and science experiments for our high-altitude balloon. You can see Brian’s plans here.
We have also started a fund-raising campaign to raise the funds that we need for equipment, helium and other equipment to build and launch our balloon. Our fund-raising campaign has been active for about a week now and we are approaching the halfway point of our goal. Please consider helping us with the project by making a donation. You can do this by clicking on our GoFundMe drive below.
I wanted to share some tips to follow for our 18 Feb Kit Build from 1-4pm. As I already built my own kit, I wanted to share some advice.
I know not all of you can attend, but for those of you who can, please read below. I’ll also post on the website along with some pics.
Make sure you bring a magnifying glass AND a multimeter. Also, might help to bring an LC meter too (though I didn’t have one at the time) The color bands on the resistors are particularly impossible to see, so I had to measure the resistance of every one. I even did it 2-3 times to make sure I was right.
To test your kit at the end of the night, you need to supply it with power. You can do this 2 different ways. The first is bringing a 9V battery along with 9V battery leads terminating at the end of a female port as shown below. The second is grabbing a power adapter rated for no higher than 12 V again terminating on a female port with pic shown below.
You might want to bring a small Phillips head screwdriver (for eye glasses) in order to perform probe calibration.
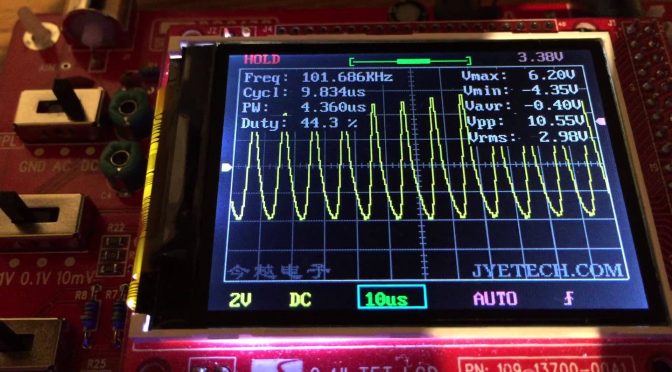
If you want, bring your laptop so you can download some signal generators (using your sound card) in order to play with the oscilloscope. In order to do this, I ended up using a BNC to an audio adapter which I purchased off of Amazon Prime. I’ll bring mine in case you don’t have one
If you have a standalone signal generator, please bring it, along with BNC wire connections for the o-scope.
DSO138 power supply port
9V battery adapter12V power supply (stolen from a Linksys router) with port (top-middle)
In order to do some testing, we are going to want to use either signal generators that club members graciously bring in, or you can use your laptop’s sound card. To that end, Mike (K1WVO) suggested a really nice link to do this.
We use cookies to ensure that we give you the best experience on our website. If you continue to use this site we will assume that you are happy with it.


 with port (top-middle)")