Category Archives: Antennas

Articles about Antennas, Feedlines, Towers and related equipment. Fixed, Portable and Mobile Antenna Articles are included.

Satellite Station 4.0 Parts 1 and 2 – New Tower and Antennas

Our current Satellite 3.0 Antennas have worked well in their portable configuration. We’ve had them to License Classes, Field Day, Ham Fests, and ultimately to Hudson Memorial School for an ISS Crew Contact.

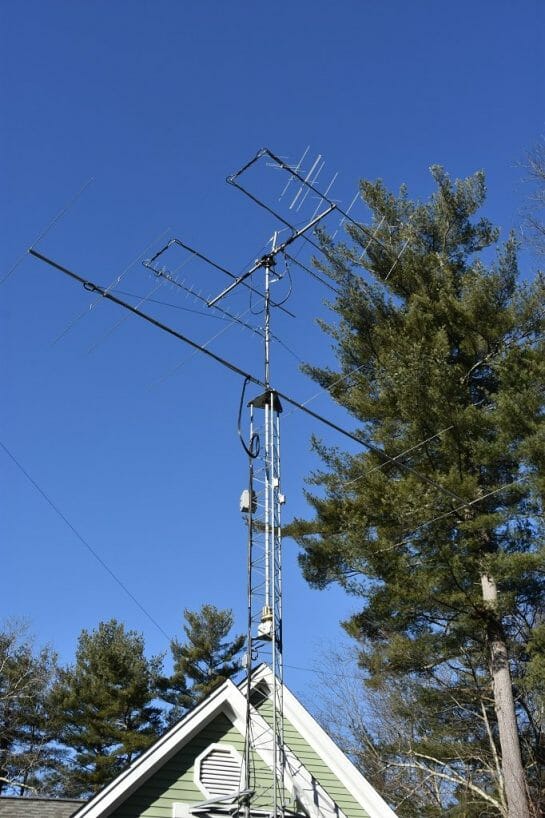
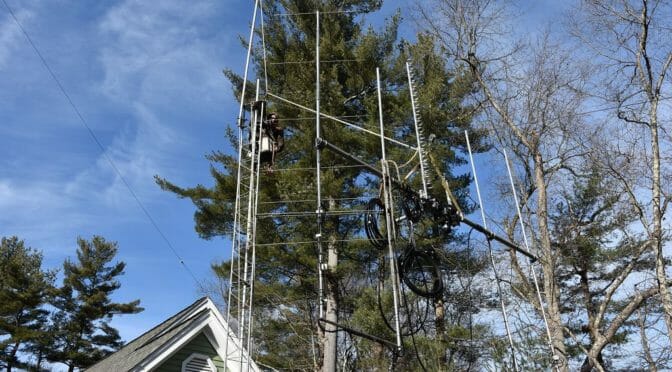
We have begun our Satellite Station 4.0 project with the construction of a new house-bracketed tower and the installation of our Satellite Antennas and a new 6 m yagi. You can read about our progress to date via the two links below…

Completed Antenna Stack

Source: Satellite Station 4.0 Part 1.0 – New Tower and Satellite Station 4.0 Part 2 – Antennas

The permanent installation of our Satellite Antennas and the associated new tower at our QTH is well underway. Here are two articles on the construction of the new antenna system. The project is based upon a house-bracketed Rohn 45G Tower. This is a good option for many Hams to consider when putting up a tower at their QTH.

Fred, AB1OC

The MFJ-1836H Cobweb antenna for your attic

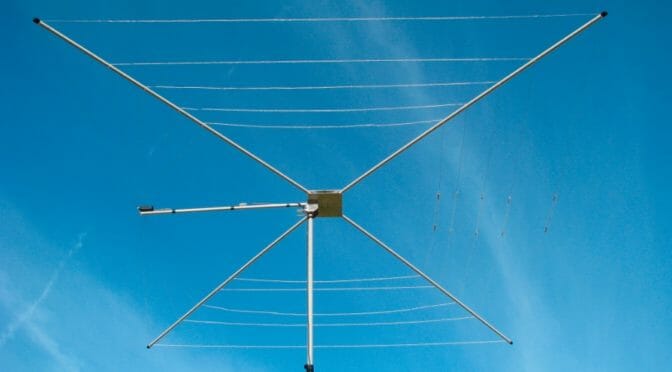
MFJ-1836 Cobweb Antenna

MFJ-1836 and MFJ-1836H

MFJ has created a set of 1/2-wave dipole antennas folded into a square (sort of a cobweb antenna). There are two units that cover 10m-20m. They are the MFJ-1836 ($229.95) that handles power up to 300 W, and the MFJ-1836H ($259.95) that handles up to 1.5 kW. These antennas are roughly 12-feet as measured diagonally across the square they make. (That is, about 9-foot by 9-foot.)

I purchased the high-power version and raised it up 25 feet in my backyard last year. I found its performance to be comparable to the vertical dipole antennas I have erected permanently.

My Original Intent

I originally purchased the antenna to see if it could be adapted to travel. I’d like to go on another lightweight DXpedition someday and I’m always looking for low-cost/low-weight solutions. This antenna weighs under 9 pounds (with the low-power model weighing slightly less than its big brother). Just for reference, the Buddipole Tripod and Mast weigh almost seven pounds and that’s before we add an antenna!

Assembly

Assembly of the antenna is straight-forward. I mounted it on a pipe and stuck it into a deck table’s umbrella hole. That allowed me to put the work at eye level and spin the antenna while I assembled it. That made assembly easy. I’m guessing I spent an hour reading the instructions and routing the wires.

The Wires

This is the only disappointment with the unit: the wires. MFJ used a lightweight stranded wire that is quite fragile with frayed ends. I’ve snapped the outer-most wire (for 20m) twice. If I were to attempt to adapt this antenna for travel it would have to be rewired with something more robust. My first choice would be Wireman model 534 “Invisible Touchcoat ‘Silky’ 26 AWG, 19-strand 40% copper-clad steel” wire. This stuff is tough with a break strength of 25 pounds. If I were to rewire this unit, or more likely purchase another antenna, I would discard the MFJ wires and use this stuff.

Tuning the Antenna

Tuning was straightforward when I used the antenna outside mounted up 25-feet. I just followed the MJF instructions and got a good match on all bands.

Tuning the antenna indoors mounted in my attic was another story.

MFJ-1836H mounted in NE1RD's attic
MFJ-1836H mounted in NE1RD’s attic

This antenna, like nearly all antennas, works best when in the clear. That is, they work best when there is nothing in their near-field (say within 1/2 a wavelength). MFJ recommends the antenna be mounted at least 20-feet off the ground. Mounting this thing in my attic meant my furnace and roof are all within the antenna’s near field.

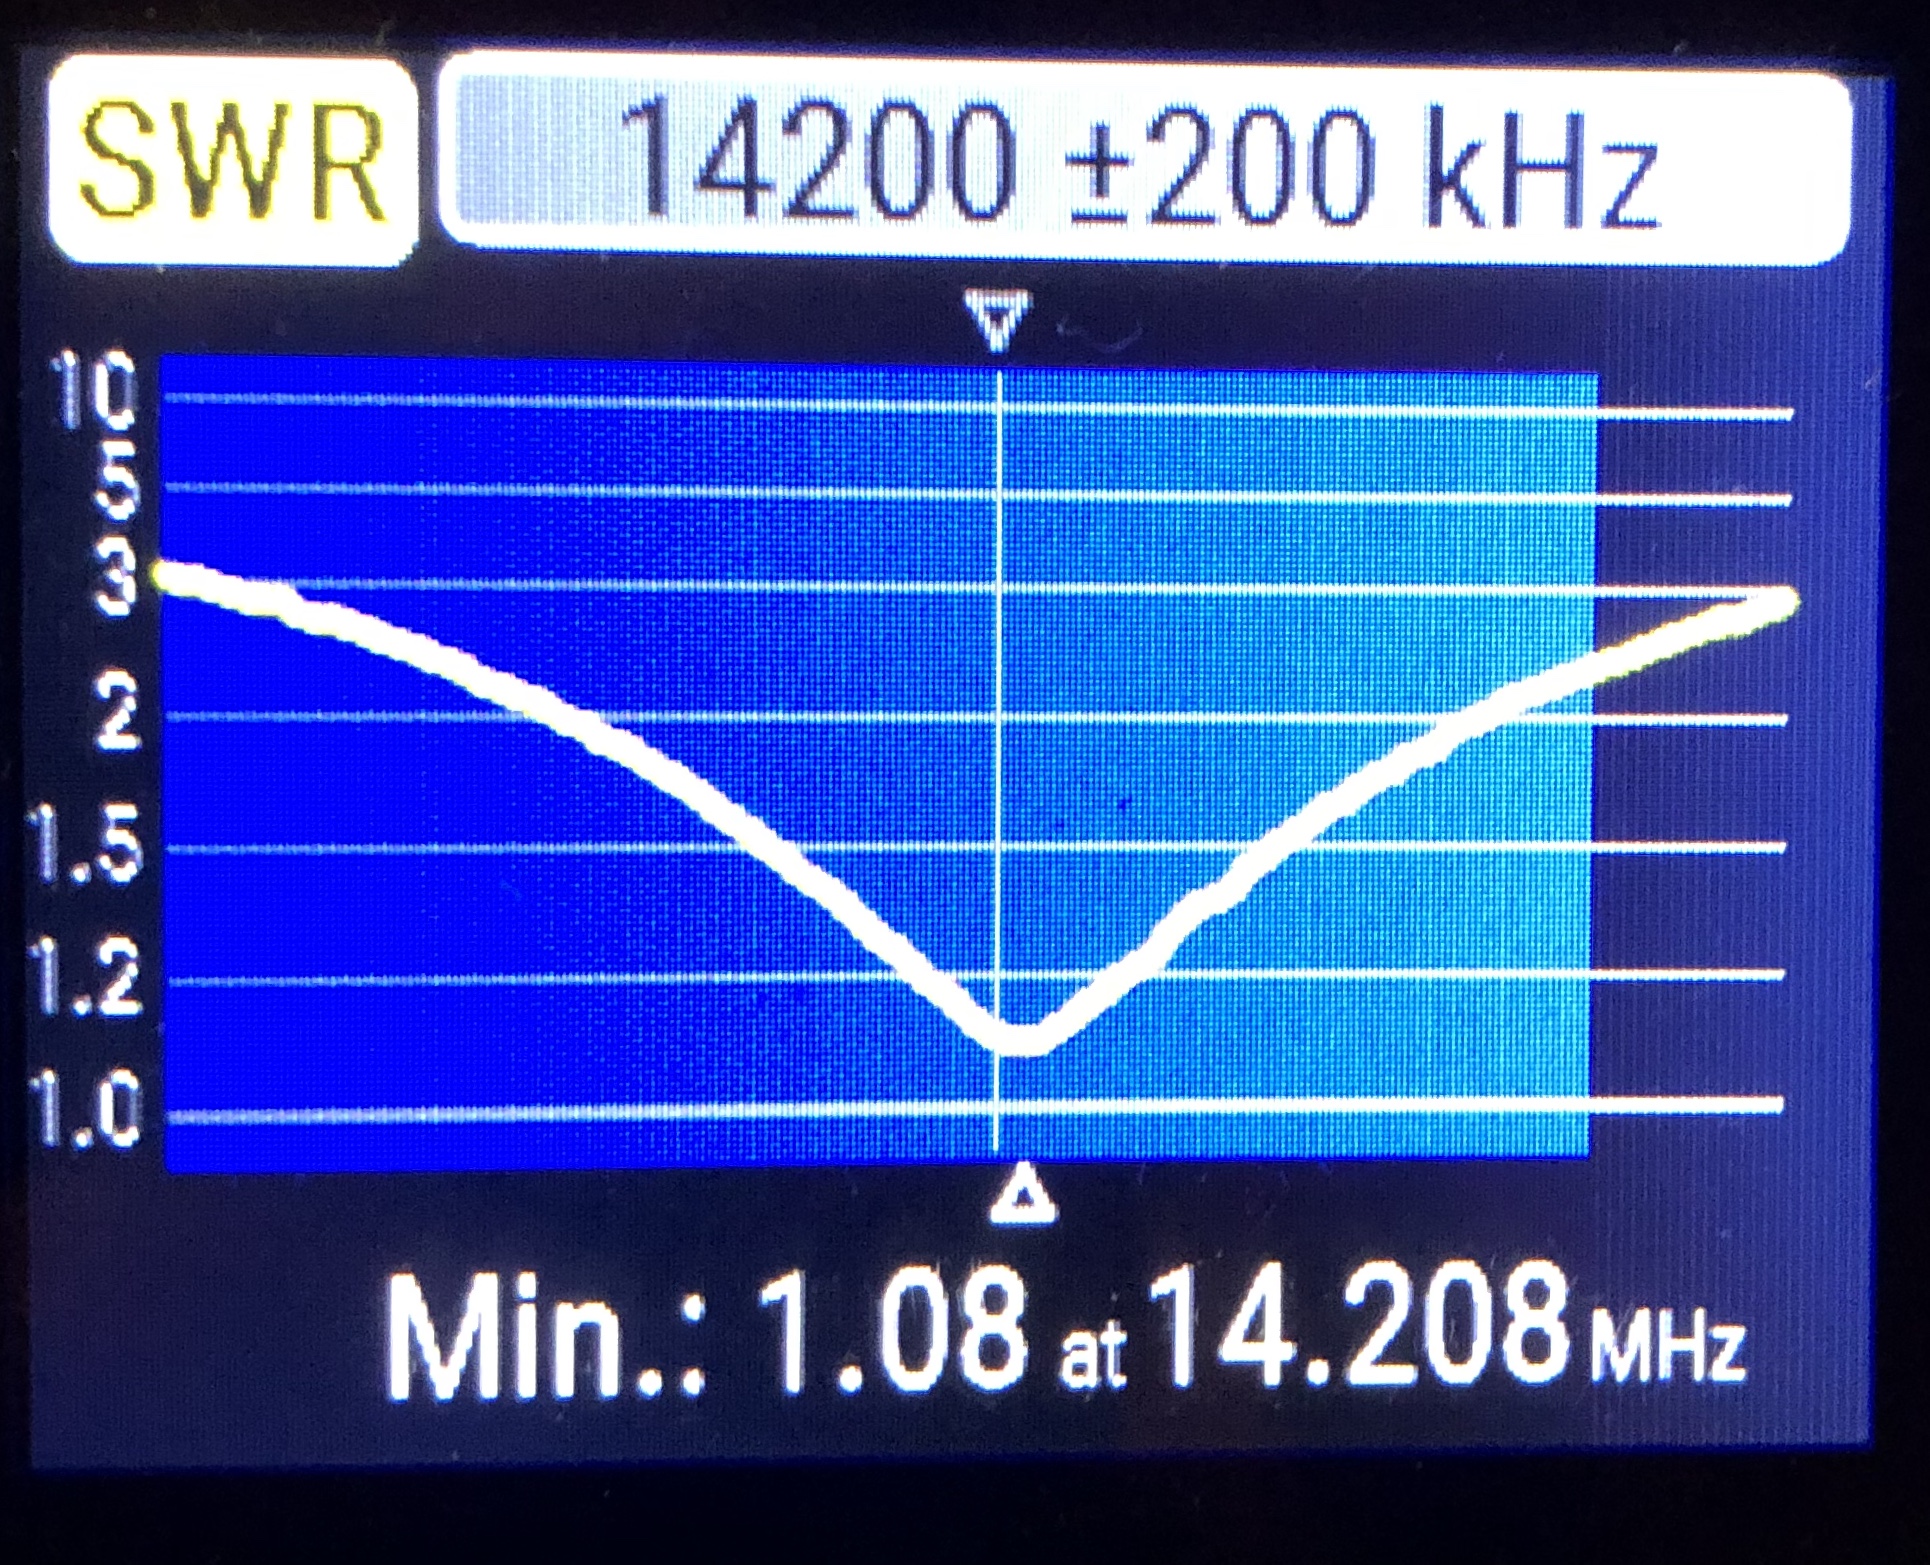
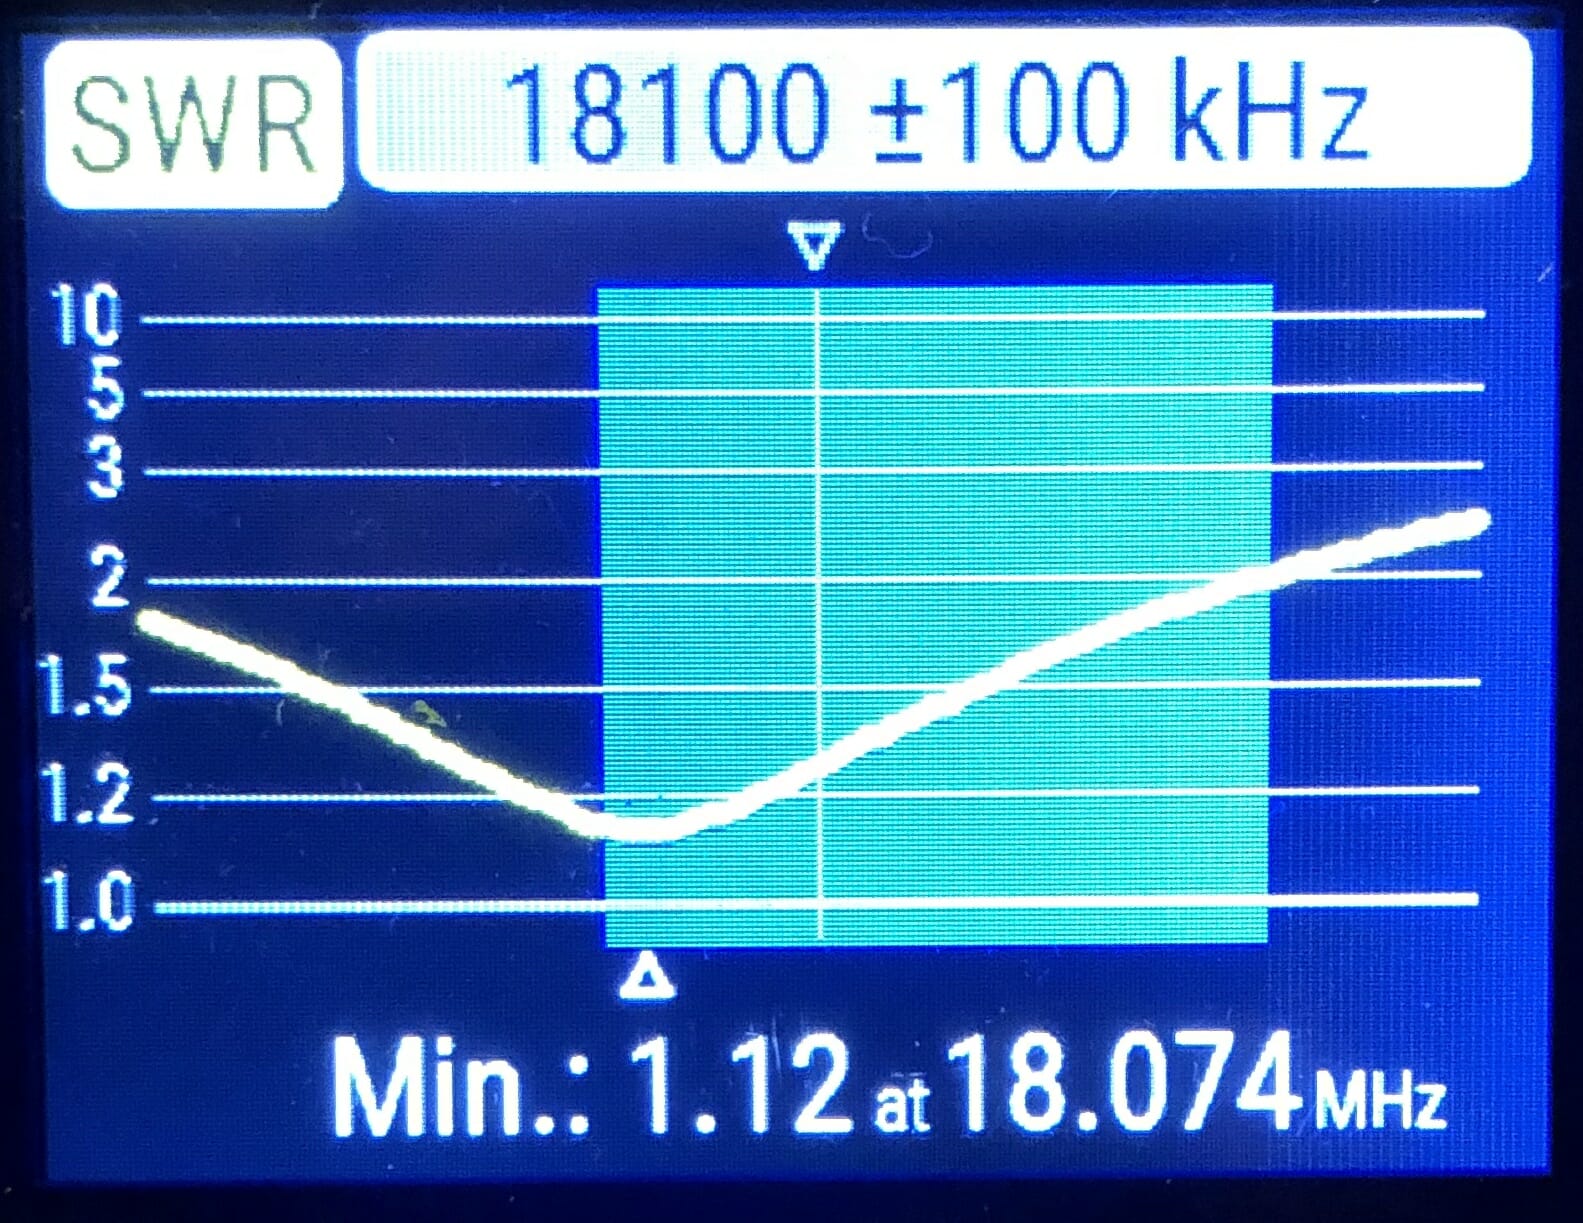
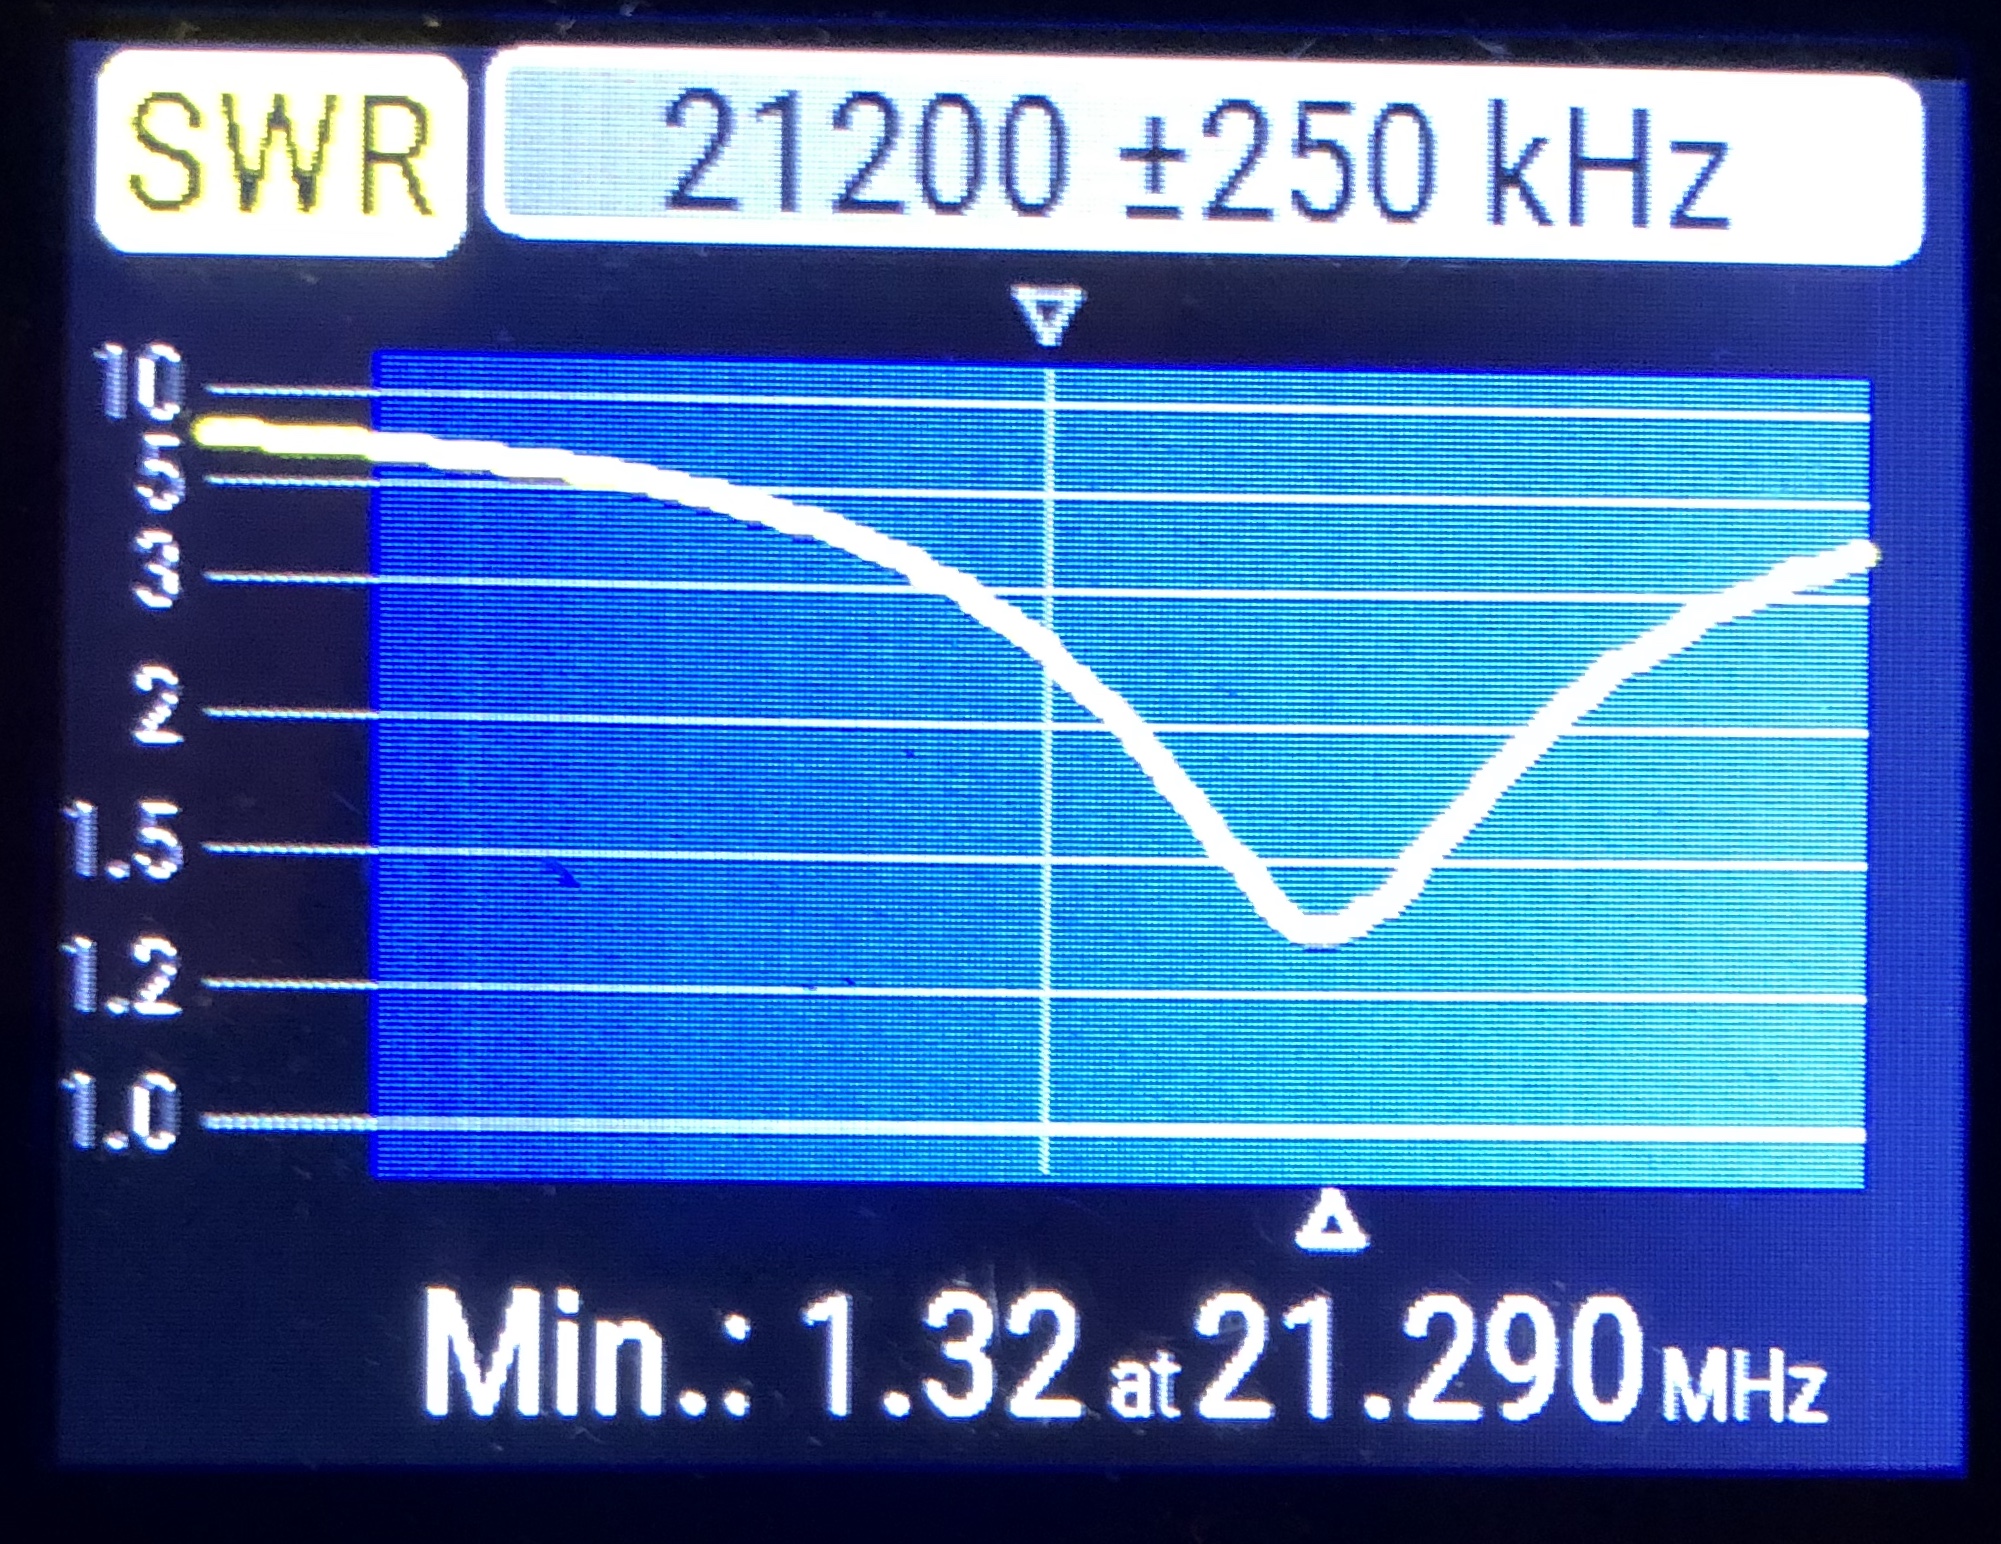
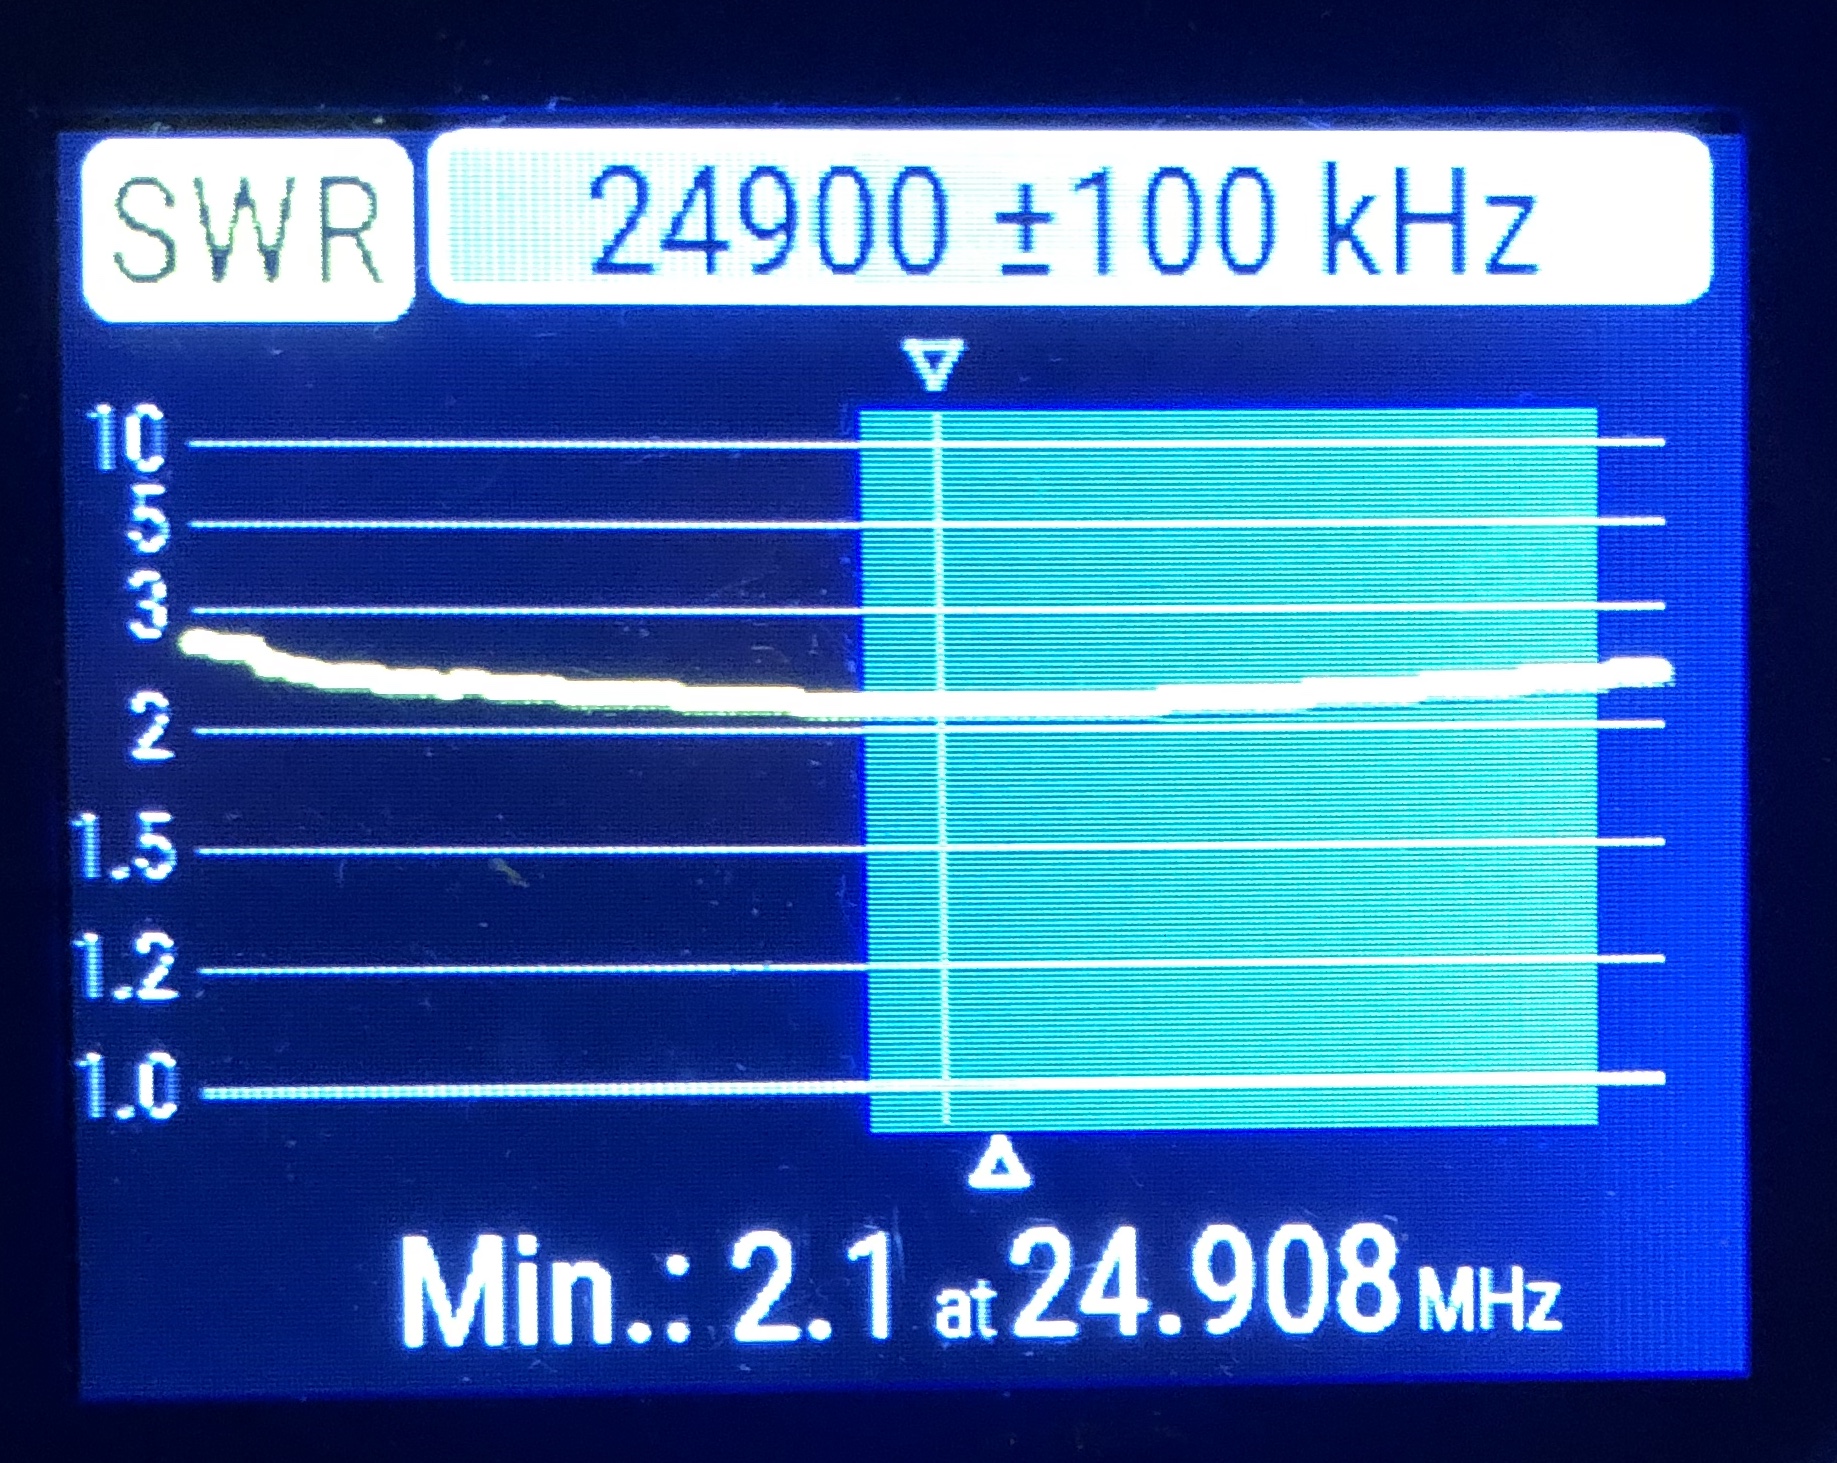
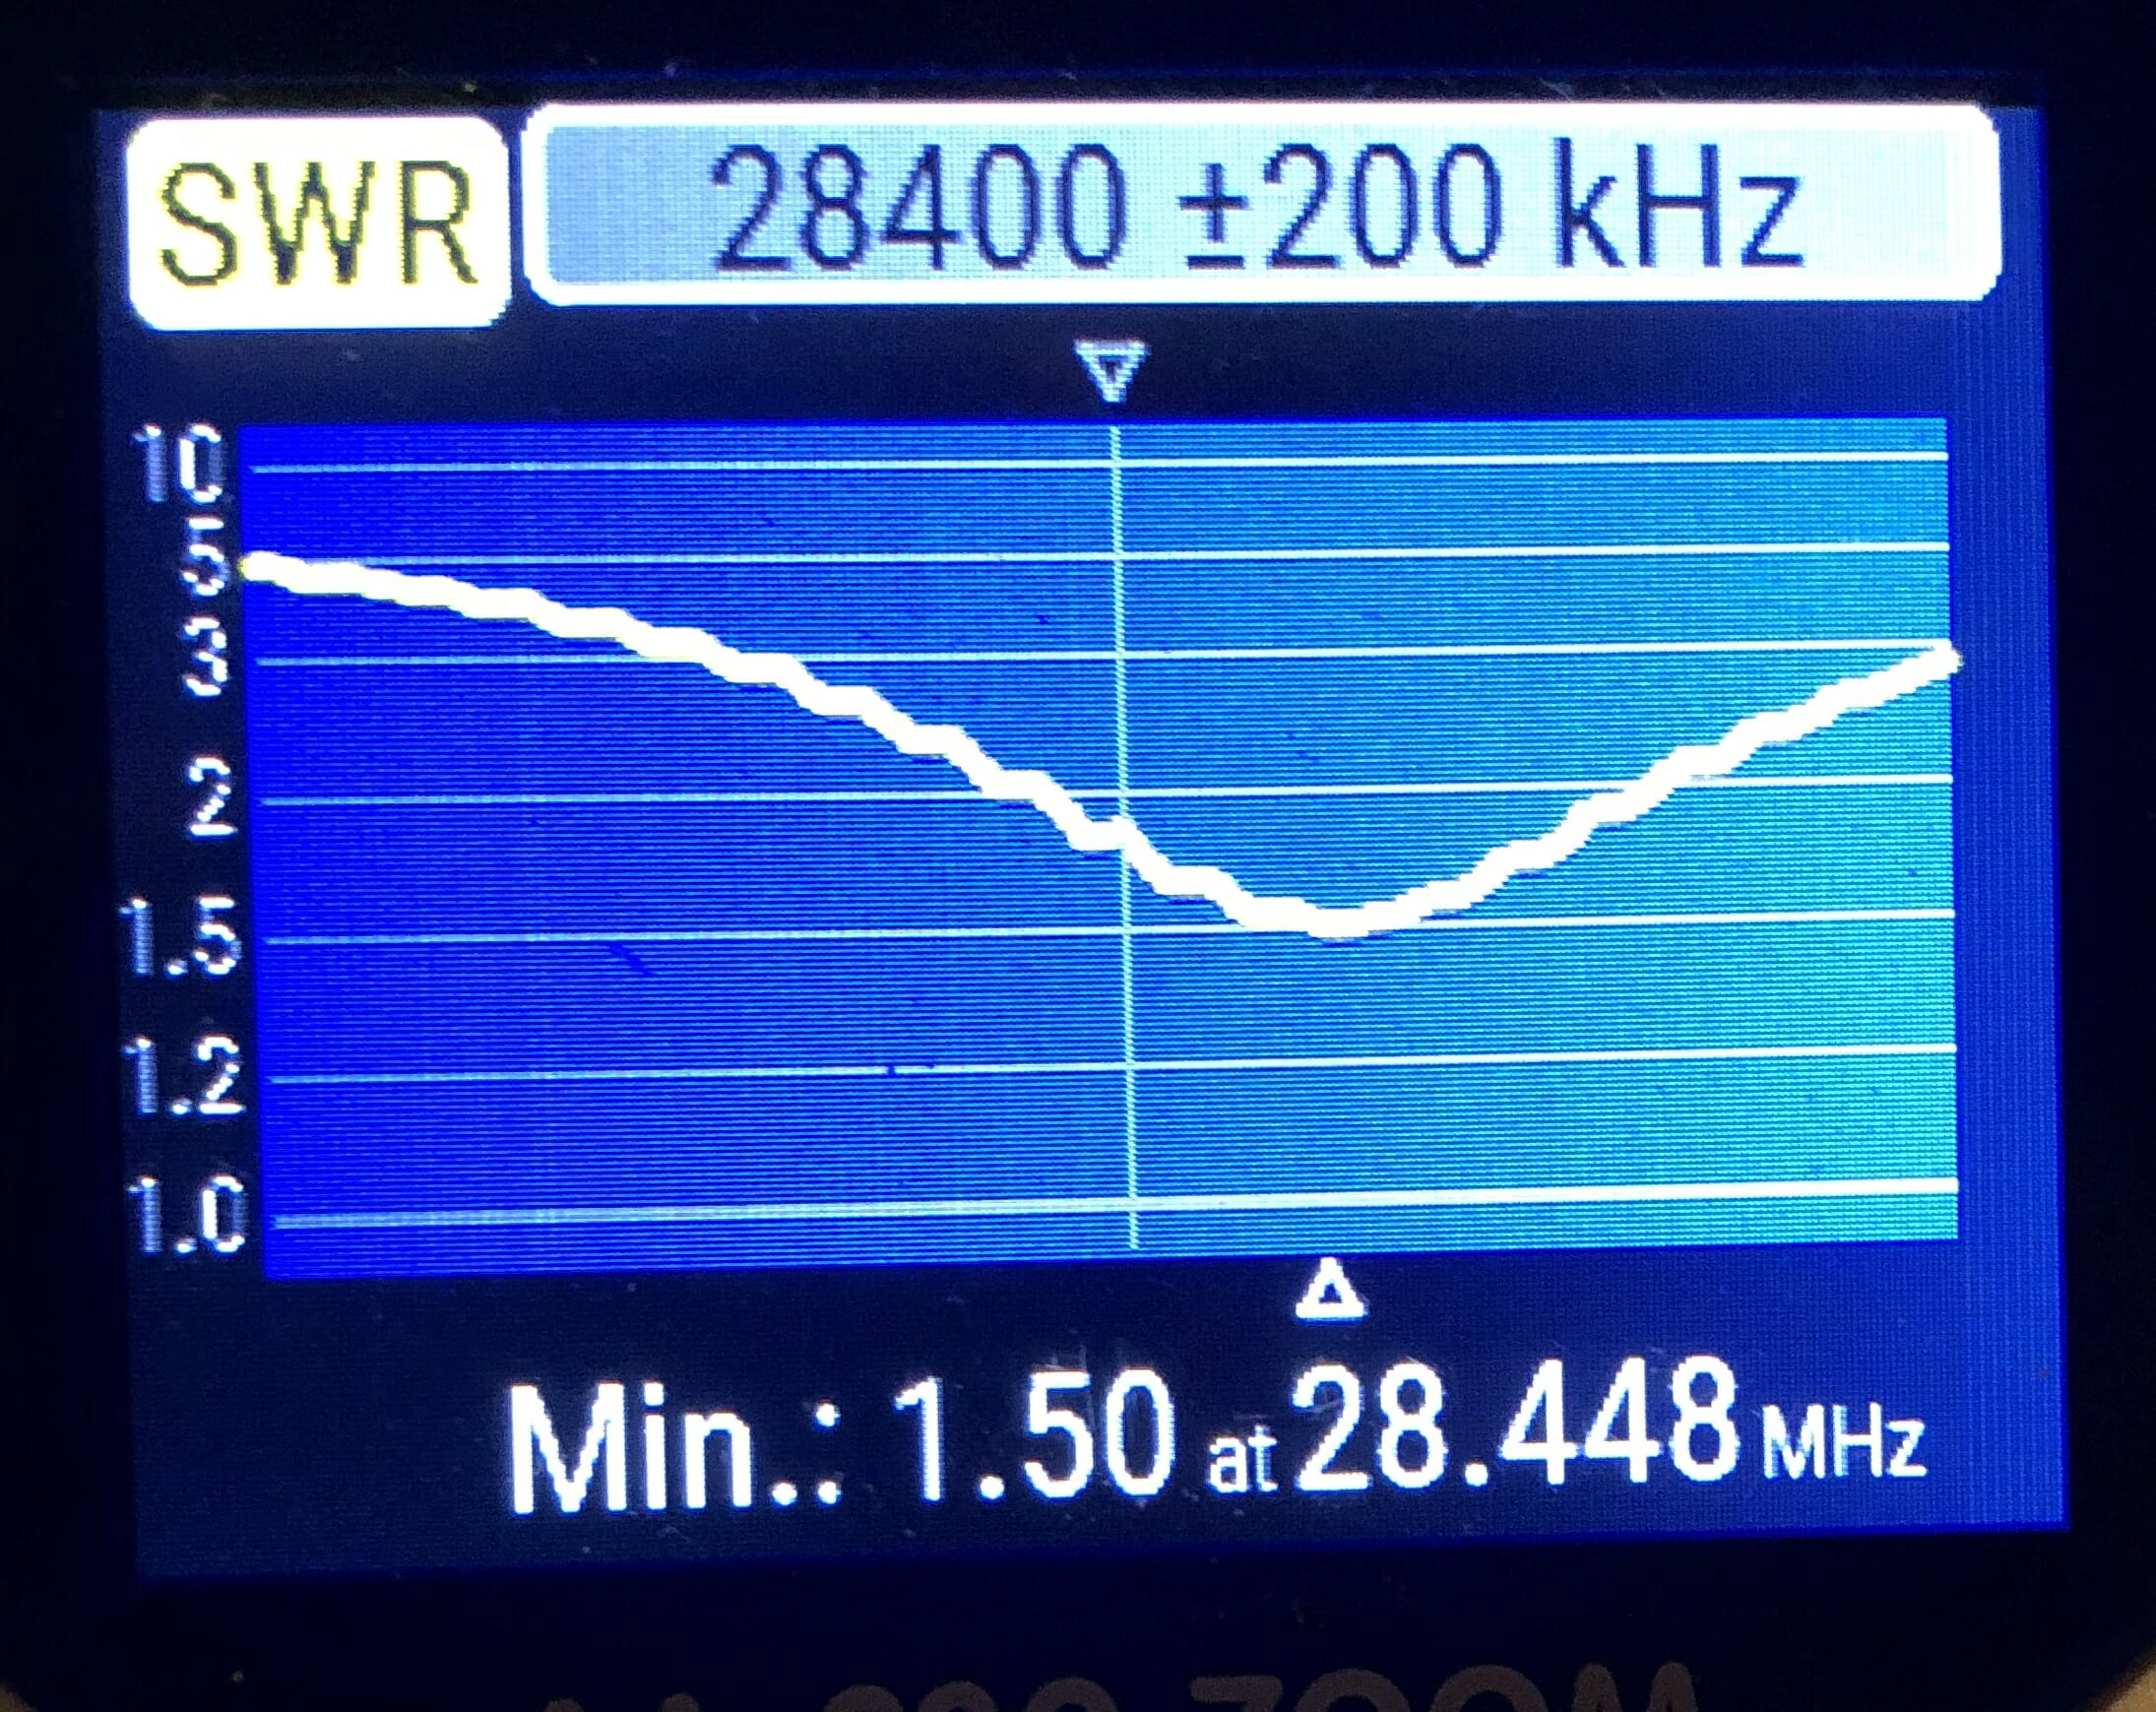
The upshot of this is I had to spend a little extra time adjusting lengths of the antenna wires to make it provide a good match on these five bands. My trusty RigExpert analyzer made the work go quickly. Here are the plots for the installed antenna.

20m SWR
17m SWR
15m SWR
12m SWR
10m SWR

I confess that I could probably do better on all bands except 20m if I were to spend more time adjusting the wires. But this is good enough for now.

HOA and Other Limitations

I spent my first few years in a restrictive environment where it was difficult for me to use outdoor antennas. If you have a large attic and find yourself in a similar situation then this antenna is worth a look. Temper your expectations, though. Remember that in general antennas are better outside than inside, and mounted higher rather than lower (although antennas can be hung too high!). Your antenna’s performance will be some combination of how well you have tuned it, and what kinds of objects are in the antenna’s near-field. Still, any antenna is better than no antenna!

The Big Brother: MFJ-1838

MFJ has a larger offering that covers the 30m and 40m bands. This antenna measures about 20-feet diagonally so you’d need a large attic to hold it. The MFJ-1838 is $399.95.

Wrapping Up

My home office is directly below the MFJ-1836H antenna and I have a small station there usually running an Elecraft KX3 (though some other QRP rigs are often called to duty there). With this antenna, I can now operate on any of five bands without needing to touch an antenna switch (all of which are two floors below my office in the basement!). It should make casual operating in the winter much more enjoyable.

Scott, NE1RD

Small Software Defined Radios ~ Part 1: Hardware

There are some exciting things going on in the software defined radio (SDR) world. In December (2018) I’ll be doing a Tech Night SDR workshop encouraging everybody to get familiar with these little gems. Use this article as a shopping guide to prepare for that meeting.

The SDR Stick

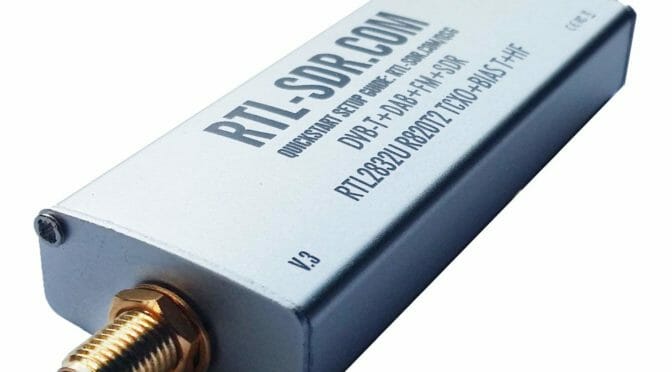
The workshop will concentrate on the USB stick style SDR. The most popular is probably the RTL-SDR unit based on the DVB-T TV tuner and the RTL2832U chipset. Sure it can be used to decode digital TV, but some innovative soul recognized that it could also be a general purpose receiver with a range of about 25 MHz to 1.5 GHz. Figure 1 shows that USB device along with a kit of handy parts to get started. This is available from Amazon here for about $28.
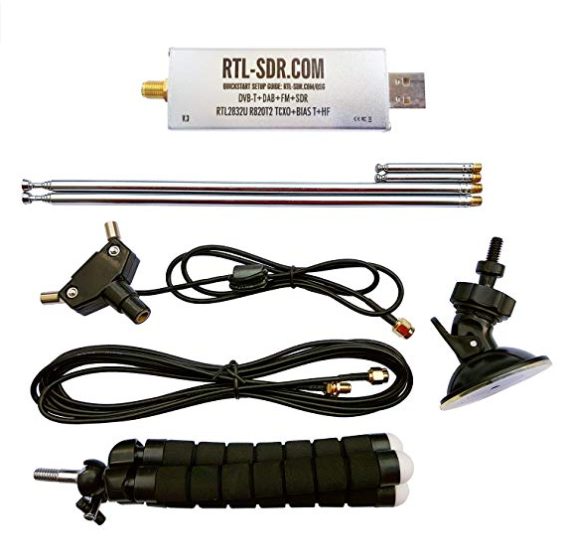
 

Figure 1. The starter kit for the RTL-SDR

 Figure 2 shows the circuit board inside the little dongle.
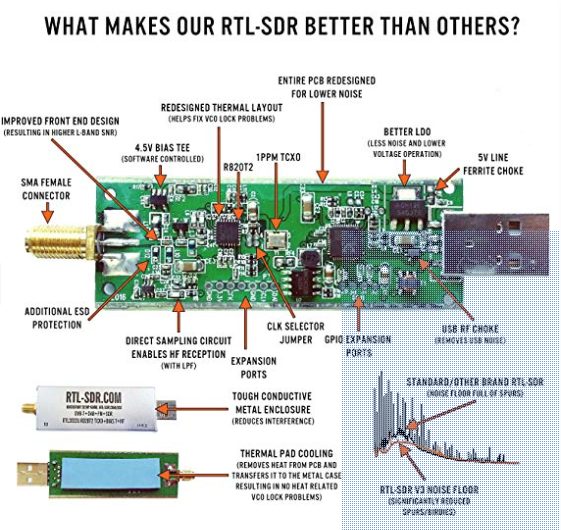
 

Figure 2. Inside the RTL-SDR stick

With this and your computer you can have a bunch of fun and learn about pan adapters, SDR tuners, and even watch for aircraft data.

Antennas for the Sticks

The starter kit comes with collapsable whips, a suction cup mount, a small lightweight tripod mount, and feed line. You can do quite a bit with just these parts. If you wanted to use this for a particular purpose (like monitoring aircraft) you can get an antenna specifically for that band or frequency. For example, this antenna is used for doing ADS-B aircraft monitoring. It is available from Amazon here for $8.
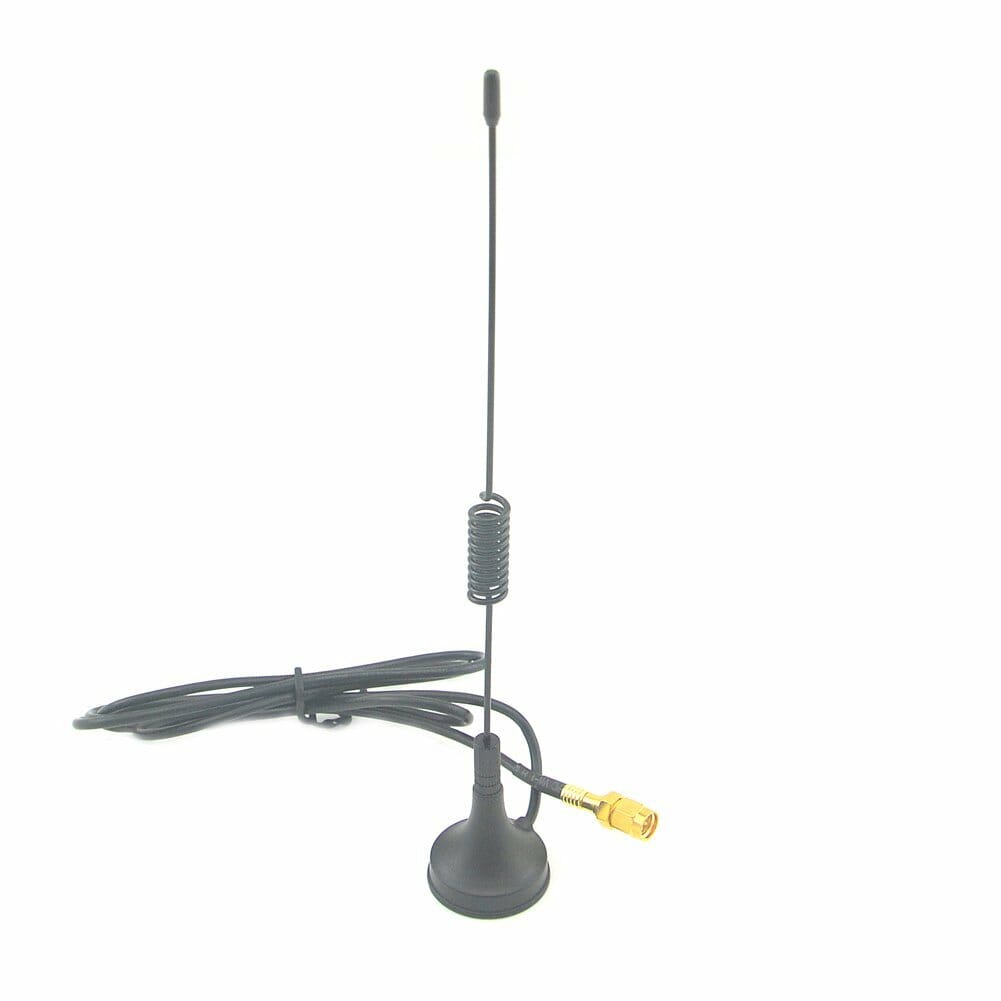
 

Figure 3. ADS-B monopole

Then again, you can make your own antennas easily enough for this purpose or others. See another article I wrote Homebrew ADS-B Antenna for Airplane Tracking for more information on that.

It is possible to use an existing antenna as well. The RTL-SDR dongle accepts an SMA type connector. A converter from SMA to BNC can be handy. Amazon has a set of two here for $11. See Figure 4.
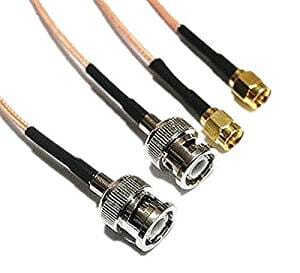
Figure 4. SMA to BNC connectors

No Computer? No Problem!

An excellent way to explore these small SDR devices is with an inexpensive Raspberry Pi computer. I recommend getting one of the higher end models of these single board computers with a little extra horsepower. Processing SDR signals takes a lot of CPU power and that generates heat. My first Raspberry Pi unit was underpowered and it overheated within minutes. I’ve switched to a newer and faster model that handles the task easily. And, I’ve put it in a case with a small fan to increase airflow. See Figures 5 and 6.

Figure 5. Raspberry Pi 3 B+ motherboard
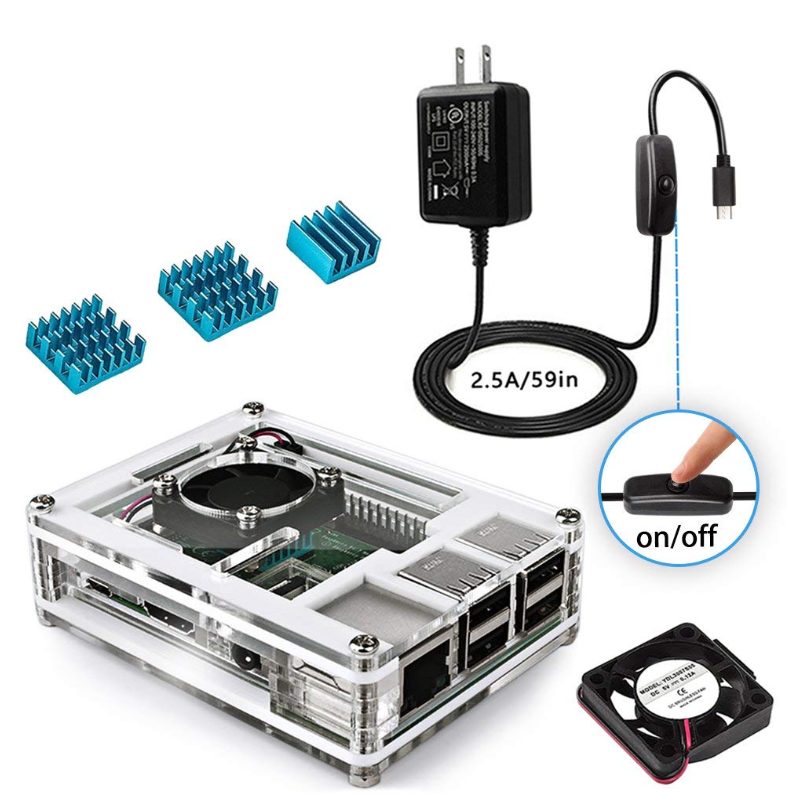
Figure 6. Kit with case, power supply, and heat sinks

These two items are available from Amazon. The Raspberry Pi 3 B+ board is $39 here. The kit that includes a case, fan, heatsinks, and power supply can be found here for $16.

Amplifier

A small device called an MMIC is a broadband RF amplifier that can bring signals up 30 dB. One of these is available on Amazon mounted on a board with two SMA connectors (in and out) here for $11. See Figure 7.
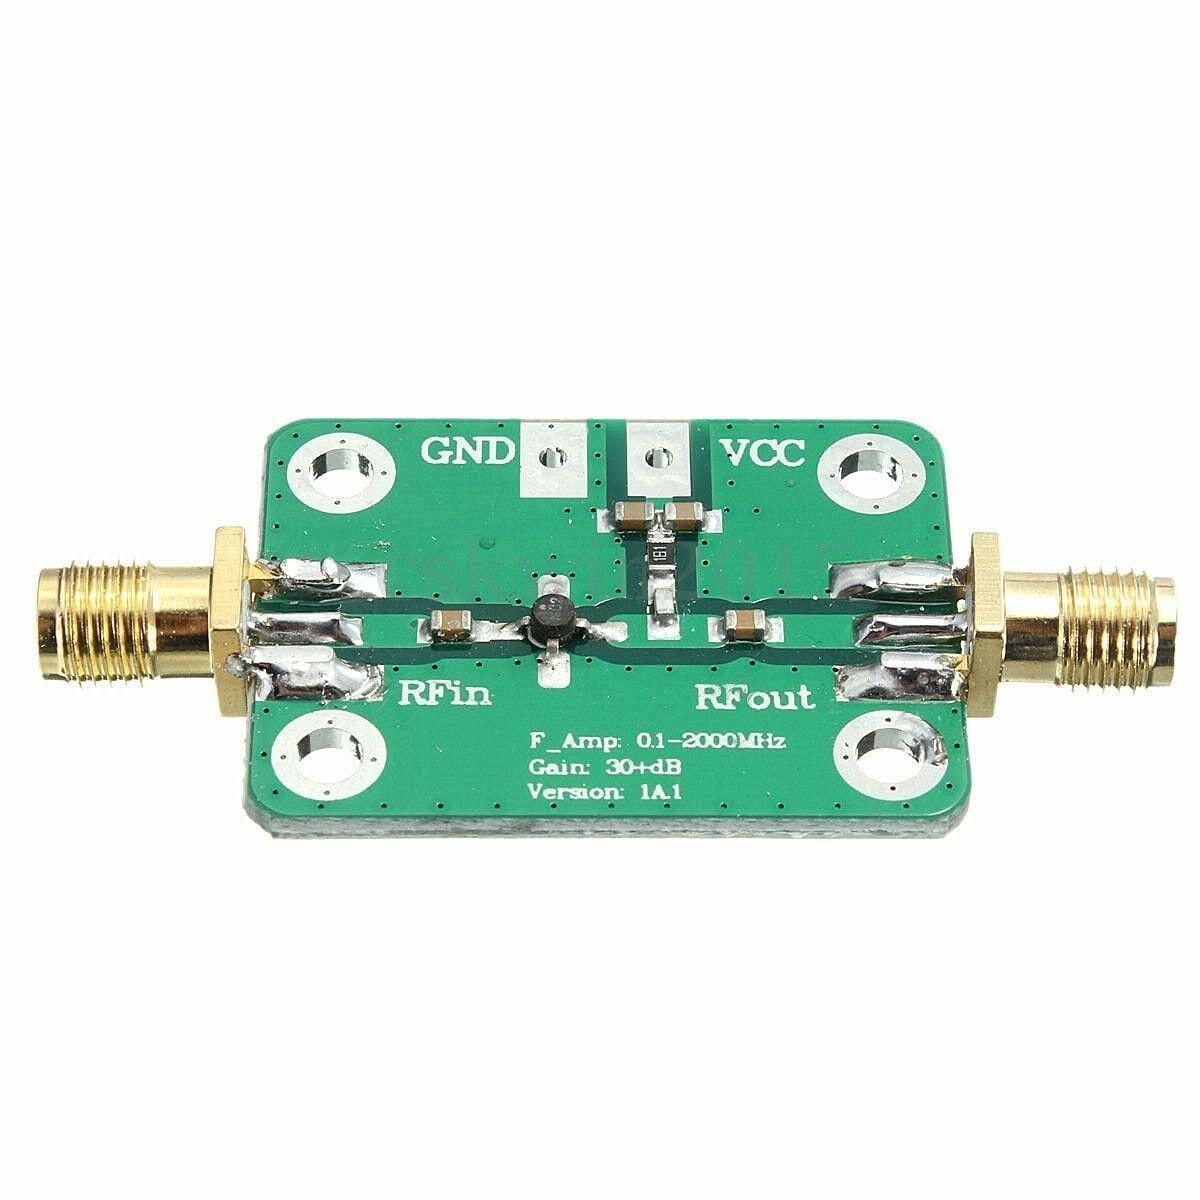
Figure 7. MMIC amplifier for RTL-SDR use.

You’ll also need a jumper to go between the amplifier and the SDR. An SMA to SMA jumper (set of 2) is available here for $4.59. See Figure 8.

Figure 8. SMA-SMA jumper

Aircraft Tracking

If you enjoyed the aircraft tracking talk given in the regular meeting by Thomas R Kavanaugh, KC1ELF, then you might be interested in the SDR stick sold by Flight Aware specifically designed for this purpose. It has an amplifier built in, and a filter centered around the ADS-B frequency. It is available here for $20. See Figure 9.
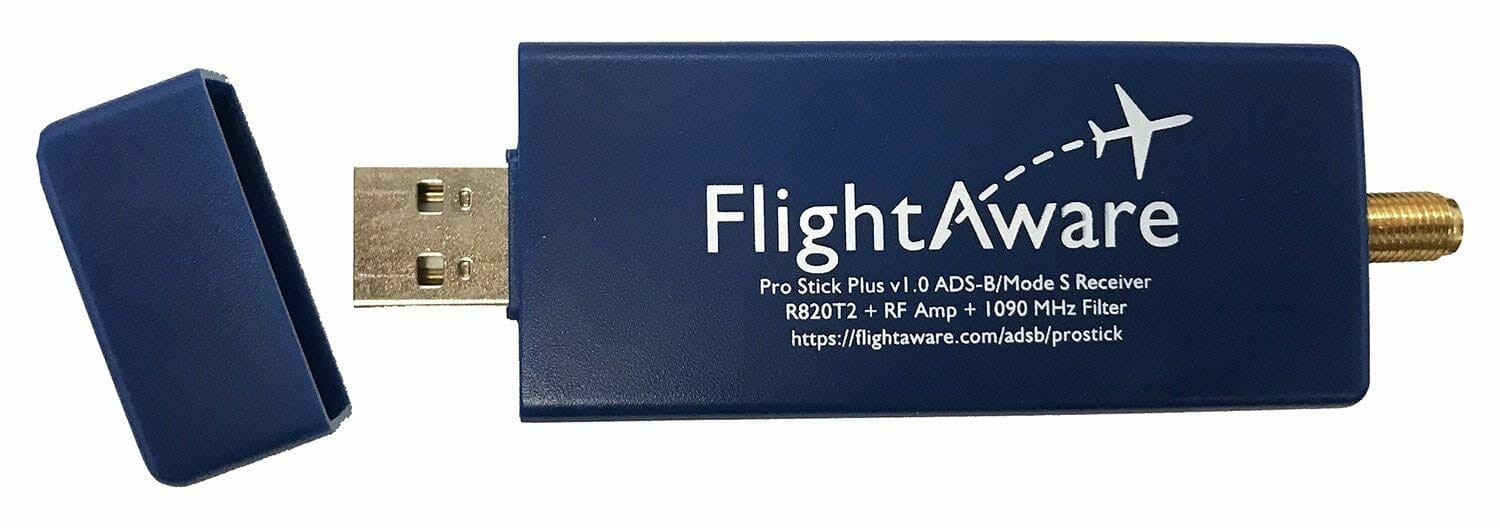
Figure 9. The SDR bundled solution for flight tracking

Smile!

Don’t forget to use the Amazon Smile feature when buying your equipment to support NARS!

Next Time

I’ll cover software options for these SDR sticks in the next installment. I hope you’ll purchase an SDR kit and bring it to the Tech Night meeting in December. It is a workshop intended to help everybody get something running. See you there!

Radio Amateurs Developing Skills Worldwide