WMØG’s NOVICE MEMORIES
By Jack Ciaccia
 I was introduced to the wonderful world of shortwave radio one Christmas Day way back in the mid-1950s as a young Boy Scout working on my Radio Merit Badge. My parents knew I was working towards this merit badge and bought me a Revell ‘Radaradio’ diode radio receiver kit for Christmas. This kit used a 1N34A germanium diode for the detector and a ferrite loop antenna versus the old-time traditional crystal radio receiver’s use of a piece of Galena, a wire-wound coil form, and a metal cat-whisker. After spending an hour or so putting this all together and grounding the radio to the water pipe on the bathroom sink, I found that I could actually hear a radio station in the headset! It was the Voice of America transmitting from Bethany, Ohio. Wow… DX!
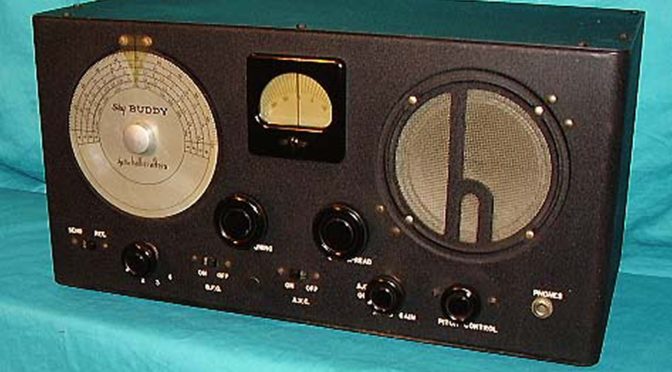
Late at night, I found I could hear Radio Moscow. Double Wow… Real DX! Of course, in those days at the height of the “Cold War” with radio propaganda battles going on between the two Super Powers with their Multi-Megawatt shortwave radio broadcast stations, you probably could have heard the Voice Of America or Radio Moscow with a wire attached to the fillings of your teeth. Then, I heard some other sort of radio communications. I could only hear one side of the conversation of a local ham radio operator working another distant ham radio station. I was hooked! I needed to hear both sides of those conversations. I needed a better radio, one with more selectivity and more sensitivity, etc. I found out that one of my father’s fishing friends had a shortwave radio and that he was willing to trade me for my AM/FM clock radio. That was a deal! Heck, that AM/FM clock radio was only used to wake me up for school anyway. Once I traded for the shortwave radio, an old 1938 Model S-19R ‘Sky Buddy’ receiver, I found I could hear all sorts of shortwave radio stations and lots of ham radio stations too. I could also use it to listen to Morse code and other strange noises and signals across the bands. I could even listen to my father, whose hobby was fishing for Giant Bluefin Tuna, Swordfish, and other big-game fish off the coastline of New England. My dad would spend as many days and nights out fishing that his business (and my mother) would allow him to do. In those days, most of the maritime Ship to Shore communications were on 2638 and 2738 kHz and with my homebrew wire-wound bamboo vertical, I could now hear him on the HF Marine Radio from his boat talking with other boat captains whose boat names I also recognized. By eavesdropping on his radio communications, I could now inform my mother as to when he was headed back to port. Of course, he surmised that I would probably be listening and would make sure that I knew, by his pointed conversation with the other boats, whether or not he had caught fish and if he would be back in port by evening. This radio SWLing was really helpful when he was fishing offshore in bad weather and would have to pull into some other port until the weather broke and he could finally make his way back home. In the days before cell phones, this was a way to communicate, albeit one-way.
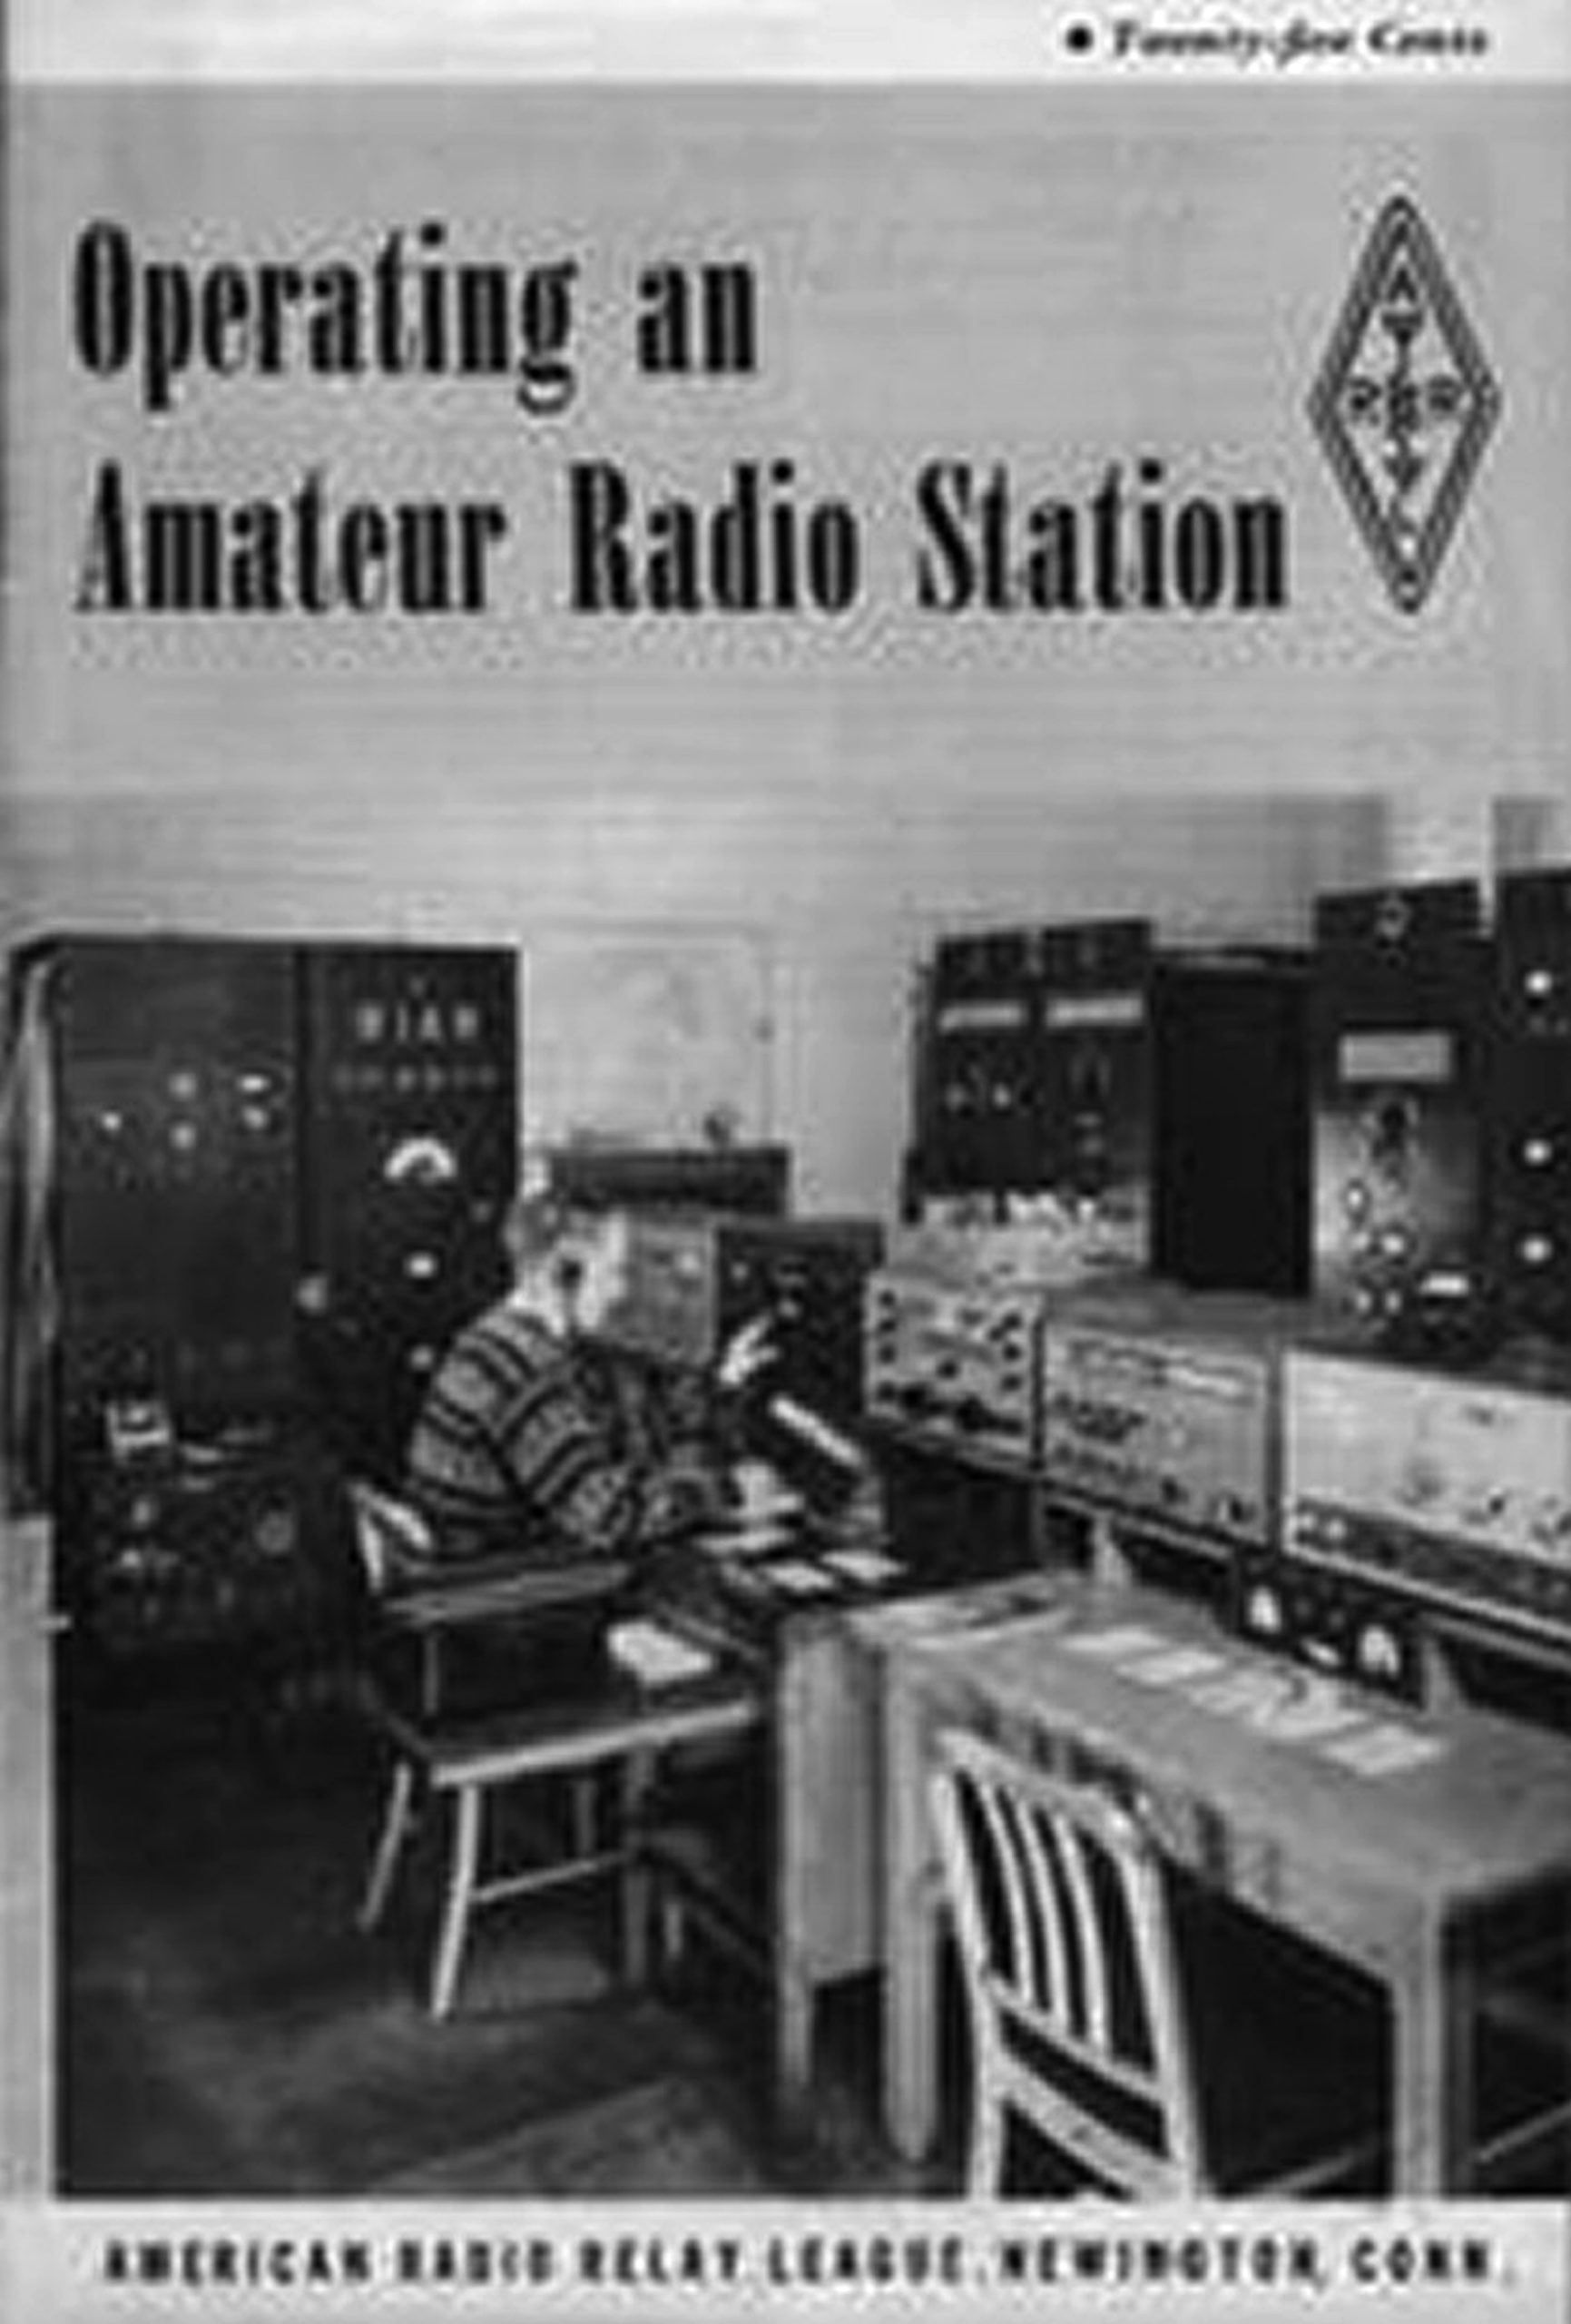
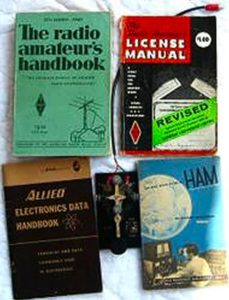
During the summer of 1958, I decided that I wanted to get my Novice Amateur Radio License. I spent just about every idle hour reading and re-reading my Novice Exam book, the Amateur Radio Operating manual, or practicing sending Morse code on my code oscillator or listening to Morse code on my shortwave radio and writing down whatever characters I could hear and decipher. Finally, by that August, I felt that I was finally ready to take the Novice Class license exam.
In those days, the standard procedure for getting a Novice Class license was to go to a General Class ham who would order a Novice License test from the FCC and then act as a volunteer examiner. After 1954, and until the ARRL VE system started up, the FCC did not routinely give Novice Class or Technician Class exams at their FCC Office examination locations. There was no special accreditation to be a Volunteer Examiner back then either. Anyone with a General Class or higher license, over the age of 21, and who was not related to the examinee could serve as a volunteer examiner for a Novice or Technician Class licensee.
 My father’s cousin owned a Radio & TV repair business and knew a manufacturers’ rep for RCA tubes that was a ham. He arranged for me to take the Novice Class test at this ham’s home. Cliff Smith, W1PPN (now SK) was the ham and my Novice Class examiner. Cliff was a well-known 160-meter DXer. I remember his home station was located right on the oceanfront in Barrington, RI. He had a monster of a long-wire antenna strung high across a saltwater marsh on the inlet of the bay. His rig was the classic Johnson Desk Kilowatt with a Collins 75A4 receiver. The ultimate ham radio station for those days. I nervously took the Novice exam and was excited to hear that I had passed. Now, all I had to do was wait to receive that coveted piece of paper from the FCC. In those days, it took approximately 60 days for the FCC to process these exams and issue the license. I made many, many fruitless trips to the mailbox before it finally showed up. Finally, after what seemed forever, there in the day’s mail was my brand new FCC license with my newly-minted Novice Class callsign, K N 1 I V Y
Charles Dickens, about 100 years earlier in his classic novel “Tale of Two Cities” had unknowingly made in his opening sentence an early assessment of my Novice radio experience. “It was the best of times; it was the worst of times.” I was like a deer mesmerized by the headlights of radio technology.
There was a “dark side” to the Novice license history at that time. I remember browsing through an old QST from about 1956 and in the Correspondence section, there were several letters complaining about Novices and how they were ruining ham radio. I don’t know how prevalent that attitude was back then, but QST did publish the anti-Novice letters as well as those of other hams who supported the then-new Novice license. “No kids, no lids, no space cadets” was one ham’s slogan, and he was not alone in those sentiments.
Another “dark side” was that the Novice dropout rate was caused by the difficulty some of us had in getting to a test session. After 1954, all Novice exams were given by mail, but the General exam was given only at Regional FCC Offices. You could get a Conditional Class license (equivalent to a General Class) if you lived more than 75 airline miles from an FCC office, but 75 miles airline miles could be many more miles in actual road travel distance. Novices who lived less than the Conditional 75-mile distance but more than a few dozen miles from an exam point could find it a real hardship to get to the FCC test site. Later, in 1965, the FCC extended the Conditional Class license distance up to 175 miles, which could mean an even longer 350+ mile roundtrip for some hams just to take their license exams. My nearest Regional FCC Office exam center was at the Commonwealth Building in Boston, Massachusetts some 42 airline miles away from my home in Providence, RI. When I finally was ready to take my General Class license, my father had to close his sporting goods store for a day in order to drive me to the Commonwealth Building through notorious Boston traffic and then wait for me to take the exam. I still remember his encouraging words just before I took my test… “I hope you are ready to pass this test because I’m not making another *d–n trip up here” – No pressure there! Eventually, my father got interested in ham radio too, learned the Morse code, and eventually earned his Novice Class license with the callsign of KN1LQG.
In 1958, the Novice class frequency privileges were simple to remember. From 3.7 to 3.75 mc, CW; 7.15 to 7.2mc, CW; 21.1 to 21.145 mc, CW and on 144-148 mc, CW and Phone. There were complaints from some Generals back then that “those annoying Novices should not be allowed on the new 15-meter band”. In September of 1958, right after I received my Novice license, the FCC started up the Citizen’s Band Radio, Class D, using AM phone. The seldom-used 11-meter ham band was taken away from the amateurs and given to those #@*!ing CB’ers. That was the prime subject of conversation on the air by hams of that time for many, many months. I applied for one of those new Citizen Band licenses too (CB licenses were mandatory then). I received the CB callsign 1W2754. In 1958, there were about 160,000 hams in the U.S. and about 50,000 CB’ers.
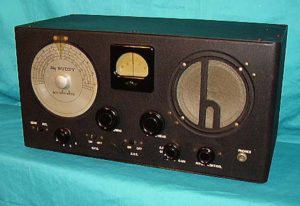 I now began to assemble my Novice amateur radio station. I already had my old vintage 1938 Hallicrafters S-19R ‘Sky Buddy’ receiver that was less than adequate on all bands. The main feature that they advertised about this radio is that it was a Superhet! I bought and built the Heathkit QF-1 Q-Multiplier kit for it and that helped the receiver out a little bit and gave me some much-needed additional sensitivity and selectivity. Later on, I built a Knight Kit R-100A, a single conversion 9-tube shortwave receiver with a built-in Q-Multiplier. It was definitely a step up in technology from my old Hallicrafters S-19R receiver.
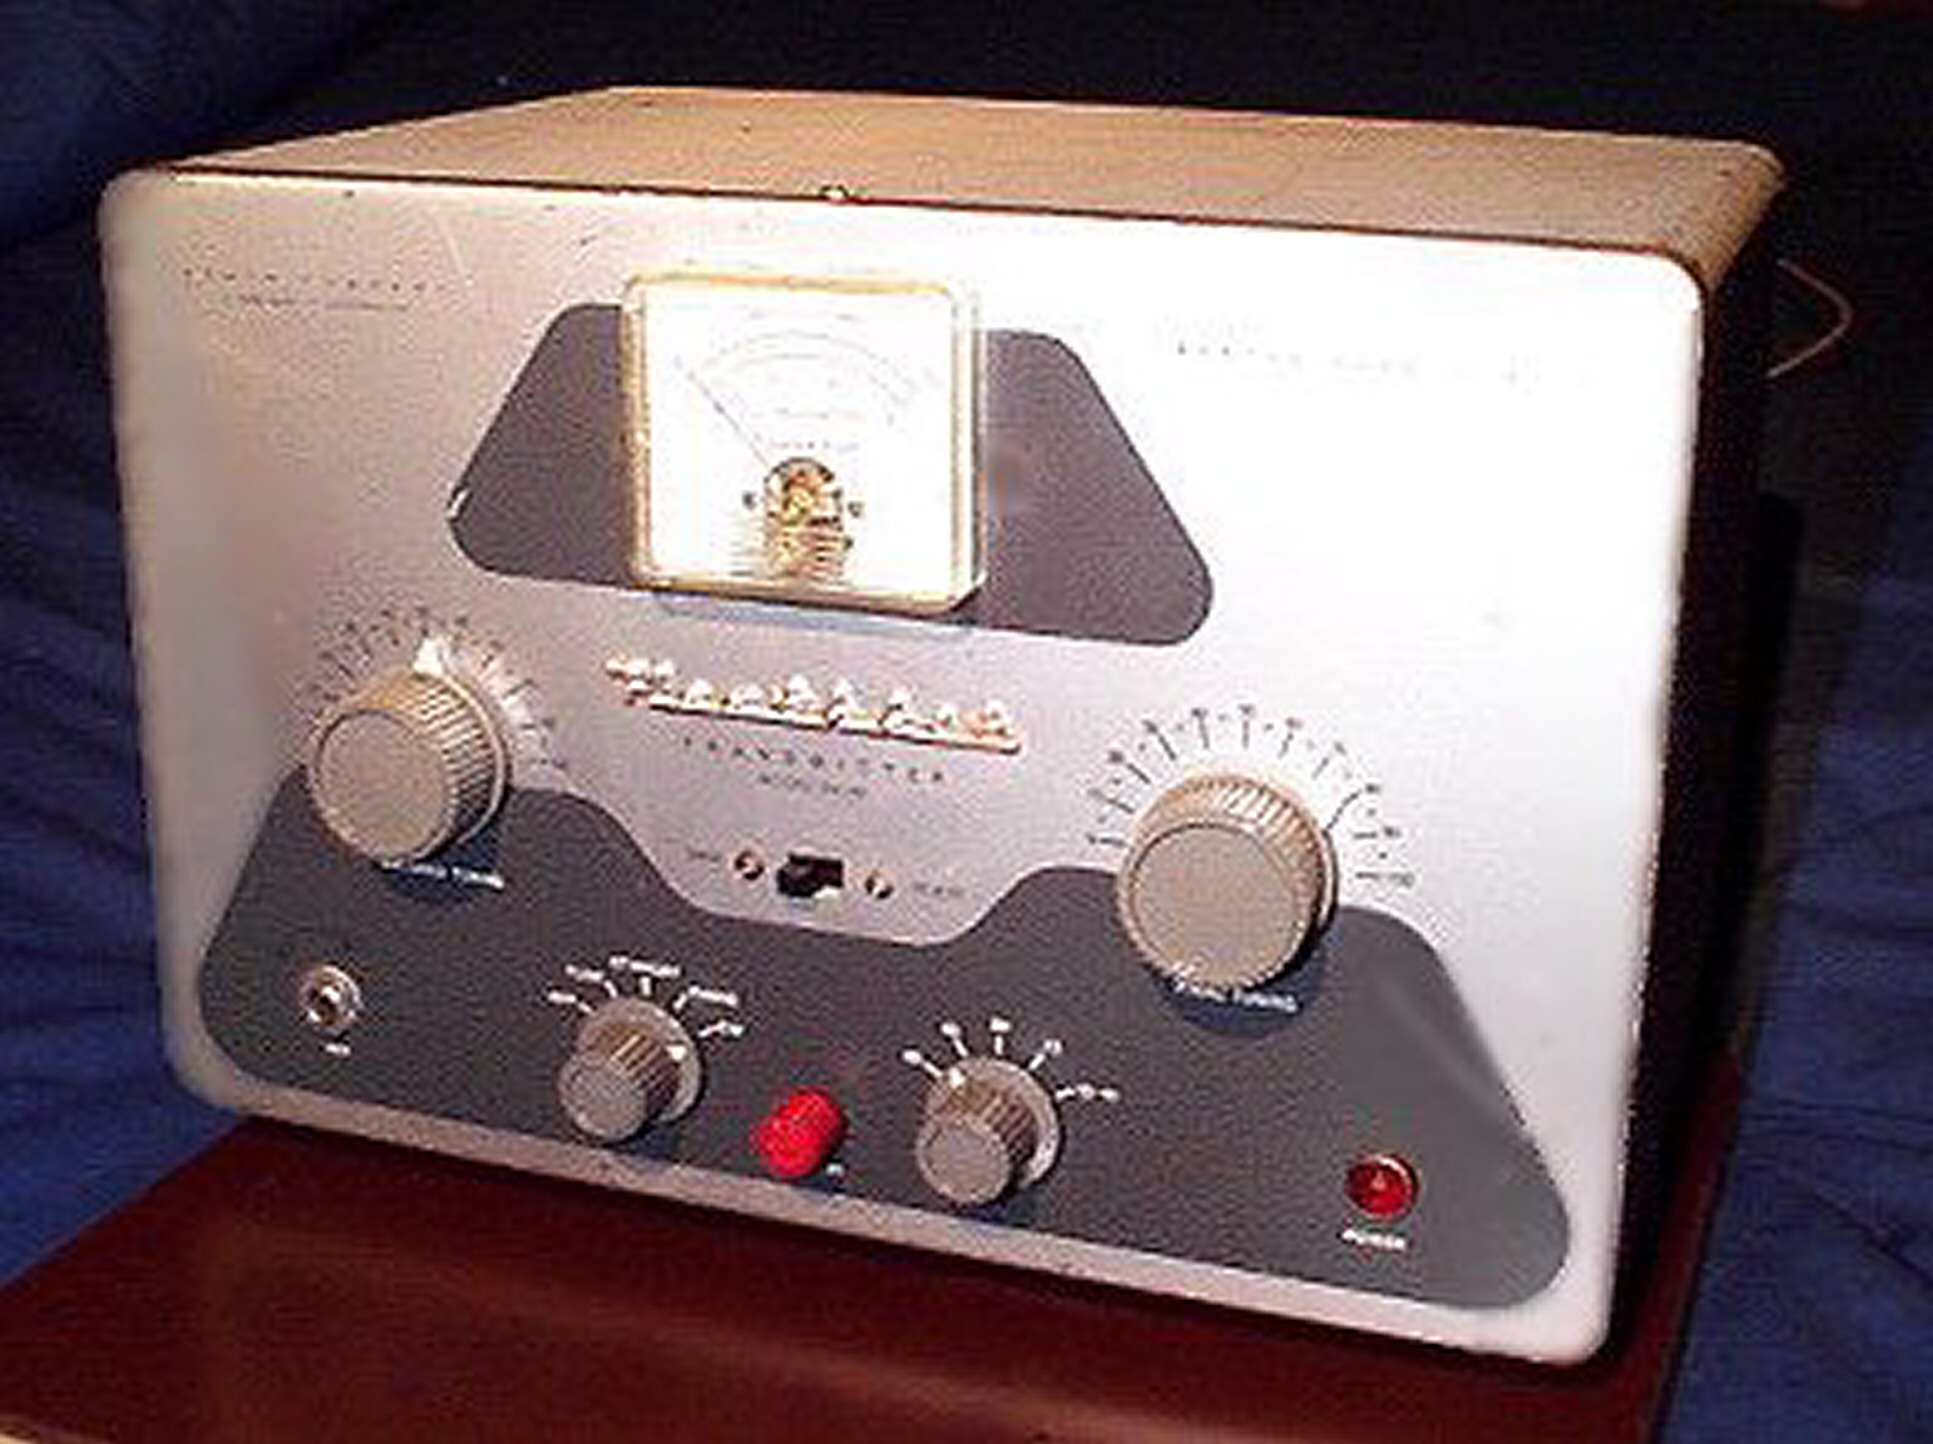
 My first transmitter was the venerable Heathkit DX-40. My parents staked me to the acquisition of this basic old transmitter. In the one-way negotiation with my father, it was decided that I could pay them back by mowing lawns (at $2.00/lawn) at our house, my grandparent’s house, and my uncle’s house every weekend. The price of the Heathkit DX-40 was $64.95 plus shipping from Benton Harbor, Michigan. It took a few days to build and then I had to troubleshoot it for another few days afterward. It was during that time that I learned about cold-solder joints. Soldering is not an acquired art, nor is it something you inherit genetically… it must be learned… one burn at a time! Heathkit had introduced the DX-40 in January 1958. It was designed for the 80 to 10-meter ham bands and it used stacked B+ for the oscillator and buffer tubes (both 6CL6’s). The final amplifier tube was a 6146 rated at 75 watts CW or 60 watts on AM phone. A switch on the rear panel allowed you to select between one of three crystals or an optional, external VFO once you achieved your General Class License. There were 6 tubes altogether and the plate voltage on the 6146 final amplifier was 710 volts. I was very careful not to measure that voltage with one of my fingers!
Tuning the DX-40 was also a new experience for me. The grid current had to be set to 3 milliamps and then the plate current needed to be dipped and raised alternatively with the ‘antenna tune’ and ‘final tune’ controls. The input power was the product of the resulting plate current multiplied times the plate voltage. Before initiating a CQ, I would place the transmitter in the tune position on very low power and press my J-38 code key down while tuning my not-so-accurate S-19R receiver to locate my transmit frequency. There was no such thing as digital frequency readout and only the most expensive receivers at that time had 100 kilocycle calibrators and/or accurate analog scales. Since Novices did not have phone privileges on most of the HF bands except for a portion of the 10M band, I did not have much use for a microphone, but I did need to buy some crystals. I opted for 7166 kilocycles, which was in the middle of the 40-meter Novice band, 7150-7200 kilocycles. For 15 meters, I ordered an additional 7045 kilocycle “rock”, which tripled up to 21,135 kilocycles in the Novice portion of the 15-meter band. The DX-40 was a rig that was tailor-made for the new Novice with ambitions to upgrade. In 1958, the Novice license was only good for one year and it was non-renewable. A new Novice had one year to increase his code speed up from 5 wpm to 13 wpm and to study up on the theory, memorize 6-10 schematics including Colpitts and Hartley oscillators and full & half-wave rectifiers, plus learn additional mathematical formulas about series and parallel resistance, reactance and memorize and understand the then-current ham radio rules and regulations.
The only antenna that I felt I knew enough about how to build back in 1958 was a dipole. I designed and built one for the CW portion of the 40M band that would resonate on the 15M CW band as well. Our family home was a large Victorian-era house (built circa 1880) with a very steep 12/12-pitch (45°) four-gabled roof. Getting onto the roof was a feat in itself and I had to have assistance from my uncle, a construction worker, to get that part of the antenna up and attached to one of the steep eaves. The other side of the 40M Dipole was attached to a 55-foot tall telephone pole that my father had installed years ago for our Yagi TV antenna. Now that I think about it, I had a taller antenna back then than I have now!
I didn’t have a coaxial antenna relay to switch between the S-19R receiver and DX-40 transmitter, so I set up a big knife switch to use for the antenna TR switch. I think we all must have got this same idea for an antenna switch-over from watching old ‘mad scientist’ horror movies. This switch arrangement also created a ready-made source of RF burns! My ham shack was located right there in a corner of my bedroom. I can remember leaving the knife switch ungrounded and then going to bed during a midsummer’s night thunder boomer. And, because I knew just enough about electrical theory to respect and fear lightning beyond all sense of logic, I just laid there and hoped for the best, rather than getting up and trying to ground that knife switch. Fortunately, I was lucky enough not to have had my antenna struck directly (or even indirectly) during that event. The little EMP arcs were really fascinating to see in the dark, though!
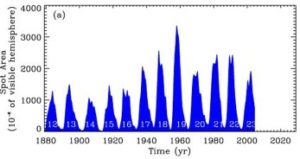 About the time I was getting my Novice feet wet in ham radio, we were in the midst of Solar Cycle 19 and some of the highest sunspot activity ever recorded in recent history with daily numbers in the 190 range! From what I can remember reading back then, the Northern Lights were even observed in Mexico three times during the year 1958. One day in July of 1959, a HUGE solar flare went off that virtually killed all HF communications in the Northeastern US for the better part of a week. The Aurora Borealis could be seen as far south as Providence, RI where I lived. It interrupted utilities, airline communications, etc… The New England Telephone & Telegraph Company measured voltages as high as 150 volts across their lines. It was a “humdinger” of a solar event. Imagine the damage that could have been caused if we had our modern satellites and cell phones back then! Being a young Novice I did not know much about solar flares, or how they affected radio communications, and even what had just happened. I came home from school, turned my ham radio on, and began to listen but I could not hear a signal on any of the bands. It was pretty much dead. I immediately thought the worst, and I remember spending half that day taking apart and checking my receiver and re-aligning it and testing the tubes and capacitors, etc… Later that week, a local ham explained to me what had taken place and how it affected the radio waves, etc… I felt a little foolish but relieved that it wasn’t my receiver after all.
Getting on the air was a different story. Now that my station was set up and working as well as it could, I decided it was time now to make some CW QSOs on 40 meters. I quickly realized that my 5 wpm code speed had already diminished somewhat due to the inactivity of waiting for my license from the FCC for those 60 days, plus the additional delay of getting my station built and set up. So, now I was really scared! The only thing worse than “mike fright” is “key fright”. My first few QSOs were marked as “lost” in my first logbook entries. The one thing I knew for sure was that I was definitely getting out because hams were *gulp* answering my CQ’s! Fraught with panic, fear, and that fleeting thought of “why am I doing this?” I had almost given up being a ham due to the lack of anyone to Elmer me and because of the relatively few contacts I had made so far. I finally managed to stumble through a few complete QSOs right up to the 73’s. Those hams on the other end had the patience of Jobe to stay with me while I nervously pounded that old J-38 key. Eventually, I got pretty confident in my CW sending and receiving and was logging more and more complete QSO entries into my logbook.
Chasing DX was fun and I had some success on 15-meters but the better DXing was to be had on 40-meters at about 4 AM, well before I left for school. Chasing that DX created many long days at high school that was punctuated by my yawning throughout some not-so-exciting classes. The first Canadian and South American stations I worked on were great DXing achievements for me. Eventually, I made it “across the pond” and had a few QSOs with stations in Europe, particularly with stations in England and France. I was particularly proud of being able to work the Little America KC4AAA station on McMurdo Sound in the Antarctic being operated by the US Navy and some USGS scientist hams during “Operation Deep Freeze III” and the IGY of 1957-58. I would relay them the Boston Red Sox scores weekly because most of those Navy Seabees were from NAS Quonset Point, RI, and were big Red Sox fans. The QSL card from KC4AAA was hand-delivered to me the following summer one day with a knock on my door by one of the regular Navy hams I had kept in contact with at the key. What a wonderful surprise!
With the high sunspot activity at the time, some Novices were earning the Worked All Continents (WAC), Worked All States (WAS), and even the DXCC award. I wasn’t one of them, though.
One of the nice things about being “rock-bound” in those days by the few crystals you possessed, was that you could easily find other stations that you’ve worked within the 5 to 10 kilocycles that you typically searched near your “rock’s” frequency. When I would get home from school, I would typically try to make a few QSOs before going out to hang with my friends and getting my homework finished. I was fortunate to have found on the ham radio another young ham my age in Ohio who regularly operated very near my 15-meter frequency. He was a Boy Scout too, also in the midst of trying to obtain the Eagle rank, and subsequently, we had many things in common. His callsign was KN8MTK, “Mighty Tough Kid”. His name was Ken and we would spend the better part of an hour catching up on our weekly activities and whatever else we thought was worth discussing back then. Usually, they were radio-related discussions. But we also pounded the brass about our hopes, dreams, and future plans for our lives after high school. He was my first on-the-air pal and I looked forward to those QSO’s every week. We both graduated from high school in 1960. He was headed out west to Washington State because his dad was being transferred there by the Air Force and he planned to work in a state forestry program and I was working on a charter fishing boat again that summer before heading out to college. We promised that we would listen for each other the next fall if we could get our General Class licenses and both be back on the air. Alas, we lost touch. For many years, I had often wondered what had happened to my old radio pal.
Fast forward 50 years >> By Ken Anderson, WØETT ~ Besides rag chewing a couple of times a week on 15m while we were juniors and seniors, Jack, KN1IVY, and I worked each other in a couple of contests back then: Novice Roundup – back when it was two weeks long – and the November Sweepstakes; I think he beat me in both! Other than a few local ham teenagers I met at the Dayton ARA, Jack was my on-air pal who I worked most often that first year and a half. We kind of lost track once I left OH in the summer of 1960 to go to college in WA state. I graduated from High School in June ’60 and left for Washington State to work for the state forestry summer program. Later that fall, I went to Centralia College in WA for my Freshman year and got the callsign K7MFF. I only had it for a year when my Dad retired from the Air Force and the rest of the family moved to Denver, CO. I ended up at the Univ. of Denver as a Sophomore and graduated in ’64. I’ve had this callsign WØETT since 1961. When I came to CO in ’61 to go to DU, I got a reissue WØ call, which I’ve held since. I hadn’t run into IVY until a few months ago while checking the Grand Mesa Contest Club (GMCC) website info about members where I read WMØG’s background and his old call KN1IVY leaped out at me. One of the DX guys I worked was Jack, ex KN1IVY in RI, who is now WMØG in Boulder. Jack got home from high school and got on the air about the same time I did and we both had a Xtal frequency within a few kilocycles (kHz for you newbies) on 15m. I’m pretty sure that I worked KN1IVY in my first contest, the 1959 Novice Roundup! Recently, it was fun to run into Jack (in person this time!) at the Boulder Amateur Radio Club’s swap fest after nearly 50 years and it gave us a chance to exchange a few old novice day stories. (end)
Thanks for ‘finding’ this old Novice again Ken!
It has been interesting to have this 60+ years hence Novice reunion with Ken; even though we’ve known each other in Colorado without knowing that we had known each other before (huh!) I think that sentence made sense (?) Even more interesting, what are the odds of two kids, one from Ohio and one from Rhode Island, both moving about the country and the world during these past 60+ years and only by circumstance and chance, were now meeting again in Colorado? The fact that we’re both still very active in ham radio and that we both still like to chase DX and Contest and that we both even belong to the same Grand Mesa Contest Club and Mile High DX Association radio clubs? Would you care to calculate the odds?


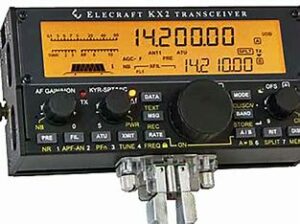
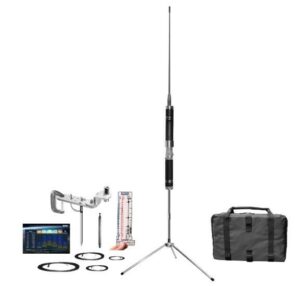
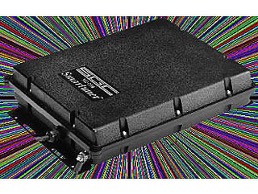
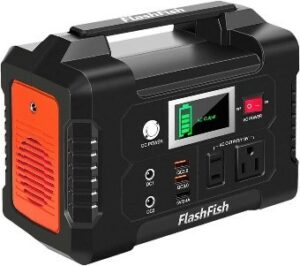 The internal KXBT2 Lithium-Ion battery pack In the KX2 provides 11 VDC @ 2.6 Ah, giving you about 8 hours of operation. It slowly recedes in power as the voltage decreases. The Solar generator plugs into the DC input of the KX2. When the power is less from the Lithium-Ion battery than the Solar Generator output, the KX2 automatically switches to the more prominent voltage source. I have a 100-watt foldable solar panel that inputs to the Solar Generator. However, you can’t charge its battery while it is running. Multiple Charging Outputs on the Generator Provide More Options: Features with AC/ DC/ USB OUTPUTS: 110 VAC output (200W), 2 DC outputs, 2 QC 3.0 quick charge USB ports, and 1 USB port (2.4A auto). It provides 151Wh (40800mAh) to power your transceiver, smartphone, tablet, laptop, camera, light, drones, fans, in-car appliances, CPAP machine, and more anytime. Triple Rechargeable Modes = Efficient Solar Generator: FlashFish power station’s Lithium-Ion battery pack can be charged by a 15-24-volt solar panel (not included), AC wall adapter, and car charger efficiently. There is no memory effect and no worry about battery capacity reduction.
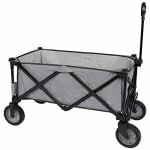 ms worth bringing along for your activation should include a lightweight, foldable table and a comfortable folding chair. A pop-up canopy is also a good idea if the weather is too sunny or the weather turns to rain. With all this gear, you might want to invest in a foldable wagon to haul it to your chosen spot after leaving your car. They typically cost about $70, but you will also find many uses around your home for them caring for household chores and at hamfests carrying about your newfound ‘treasures.’