All posts by Jamey Finchum

First licensed in October of 2015, upgraded to general in November of 2015 and finally upgraded to Extra in May of 2016 all through the NARC classes - which are fantastic classes! I don't have any background in radios or electronics, so this is all new to me and I'm learning new things every day. I've recently started using PSK with Fred's (AB1OC) help and am slowly learning CW. My station: Icom IC-7100 Vertical Dipole (20 meters) LDG AT-100ProII Autotuner DX Lab Suite on Windows 10 73, Jamey (AC1DC)

SOTA/POTA Activation of Mount Washington (6,288′)

In the winter I really enjoy operating from my shack. But in the summer I’m finding that I really love operating mobile and portable – getting out in the great outdoors. I’m very excited about our upcoming SOTA/POTA activation of Mount Washington on Saturday, August 26th, 2017. If you enjoy portable or mobile operation or even just being outdoors with great people this is the event for you!

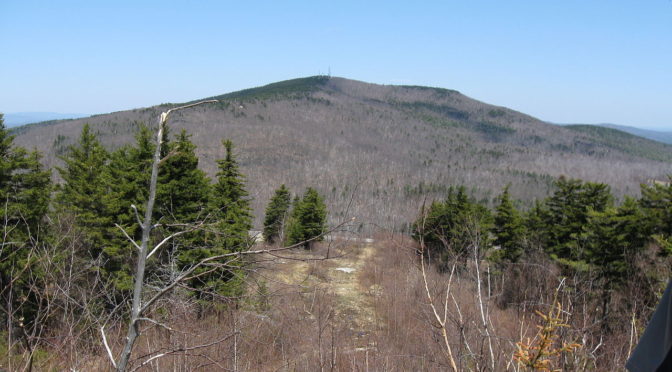
The top of Mount Washington sits at 6,288 feet above sea level. It is the highest peak east of the Mississippi and north of the Carolinas and is known for some of the “worst weather in the world”.  We’re hoping that doesn’t hold true on the 26th. Don’t let the weather or the altitude deter you as there are several ways up the mountain.

The Mount Washington Cog Railway:


SOTA - The Mount Washington Cog Railway
The Mount Washington Cog Railway

The unique way up the mountain is from the Mount Washington Cog Railway. Mt. Washington’s cog railway is the world’s first mountain climbing cog railway. Also, it is the second steepest rack railway in the world with an average grade of 25% and a maximum grade of over 37%!

The Mount Washington Cog Railway Access Road is located off Rte. 302 in Bretton Woods and trips begin at 8:00 am and run through 4:30 pm. Tickets can be purchased in advance on their website.

Drive Yourself:


SOTA - Mount Washington Auto Road
Mount Washington Auto Road

The Mount Washington Auto Road is located in Gorham, New Hampshire on the other side of the mountain from the Cog Railway. The auto road is open from 7:30 am until 6:00 pm on August 26th and rates start at $29 for a car and driver and go up from there.

This drive is not for the faint of heart! There are panoramic views and you will travel through four distinct climate zones on your way up the Northeast’s highest peak. If you are not comfortable with heights or narrow winding roads without guard rails you may want to check out the guided tours or the hiker’s shuttle to the top.

Please note that there are some vehicle restrictions that you want to check out if you plan to drive yourself.

Guided Tours:


SOTA - Tours of Mount Washington
Tours of Mount Washington

Guided tours start at the base of the Mount Washington Auto Road beginning at 8:30 am and you have the option of a two hour guided tour or three hour guided tour. The disadvantage of the guided tours is that you are not on your own schedule and time at the top is limited.

The tours do sell out so you will want to book your tickets early if this is the option for you.

Hiker Shuttle:


SOTA - Hiker's Shuttle
Hiker’s Shuttle

Another way up/down the mountain is the Hiker Shuttle.  The Hiker Shuttle leaves from the Stage Office at the base of the Mount Washington Auto Road beginning at 9:00 am. The shuttle then leaves on an as-needed basis, so waits of an hour or more may be necessary. The one way down option can be a little tricky as rides down are sold on a first come, first served basis.

Hiking:


SOTA - Connor (KC1GGX) descending via Tuckerman's Ravine trail
Connor (KC1GGX) descending via Tuckerman’s Ravine trail

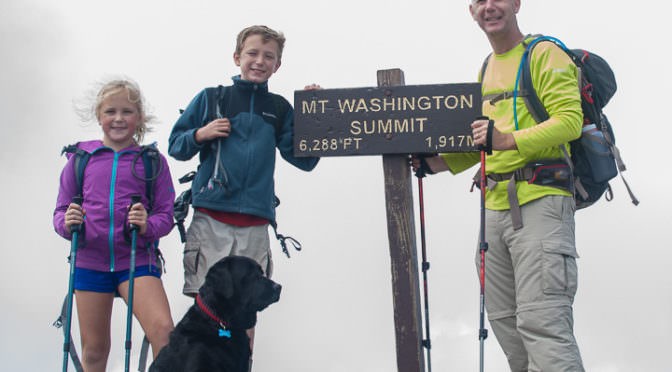
The final way up/down the mountain is hiking the mountain. Although this may not be for everyone – this is a very strenuous hike – it is the most rewarding.

There are two starting points for getting up Mount Washington – the east face and west face of the mountain. The east face trails begin at the Pinkham Notch Visitor Center which has information and basic rooms available for rent. Reservations in advance are a must!

The East Face:


SOTA - East Face of Mt. Washington
East Face of Mt. Washington

The easiest trail (easiest is probably not the right term for any trail on Mount Washington) on the east face of the mountain is Tuckerman’s Ravine for both the ascent and descent. Lion’s Head is the same distance, but slightly steeper. It is not the best for a descent. Boott Spur is another option, which is not any more difficult than the other trails but is much longer. The benefit of this trail is the awesome views!

SOTA - Abby (AB1BY) on Lion's Head
Abby (AB1BY) on Lion’s Head

West Face:


SOTA - West Face of Mt. Washington
West Face of Mt. Washington

The trails on the west face of Mount Washington begin from Mount Washington Cog Railway and offers two trails, the Jewell Trail and Ammonoosuc Ravine Trail. The Ammonoosuc Ravine Trail ascends via Lake of the Cloud Hut where you can stop and get a hot coffee, hot chocolate, water or some snacks… not to mention the fantastic views!

SOTA - Lake of the Clouds Hut
Lake of the Clouds Hut

If you are planning on hiking an early start is an absolute must, especially if you plan to have any time to operate on the summit. Club members that are planning to hike please let me know. It would be fun to have a group to hike with as well as safer for everyone involved.

Accommodations:


There are many accommodations in the area ranging from beautiful hotels to primitive camping areas. Again, booking in advance is a must! Many of the camping areas in the White Mountain National Forest are booked on a first come, first served basis. They do not take reservations in advance. My family is planning on camping out on Friday and Saturday night in the area. We will probably be at the Roaring Brook Campground. We’d be happy to have people join us!

Join in on the Fun!

Lastly, the Finchum’s have a tradition of celebrating any major peaks with a celebratory Moxie the top and we invite you to join us in toasting at the top!

SOTA - Toast at the Summit of Mount Washington
KC1GGX, KC1ENX, and AB1BY Celebrate with a Moxie Toast at the Summit of Mount Washington

SOTA/POTA Activation on Mt. Pack Monadnock Coming Up

On Saturday, June 10th we’ll be activating Miller State Park (POTA KFF-2662) and Mt. Pack Monadnock (SOTA W1/HA-041) in Peterborough, NH. This is also the date of the ARRL’s June VHF contest!  Miller State Park does have an auto road up Pack Monadnock and there is a $4 fee per person.  There are picnic tables at the top if you would like to pack a lunch. I am thinking we should plan on arriving at 11:00 am and hopefully set up and ready to go by 12:00 pm.

This should be a great opportunity for a wide range of our members to get out and activate portable. With three activities going on we should have something to tickle your fancy. Below is a quick description of each activity with links for more in depth information.

SOTA is an amateur radio award scheme for people who want to get out and operate portable from mountain peaks. A couple of important rules for SOTA are that you can only activate a peak once in a calendar year – so if you’re using your own call sign you won’t be able to activate Pack Monadnock again until 2018 – and you must operate separately from your car (nothing attached – antenna, battery, etc) and you cannot use fossil fuels.  You must operate battery, solar, wind, hydro powered. You may work all modes (CW, digital or voice) on all bands.

POTA (Parks on the Air) is much more lenient, as far as operating possibilities. You, or your vehicle, must be totally within the park and you can operate using fossil fuels (generator or car). Parks can be activated more than once in a calendar year and QSOs are cumulative for the park if you return. Here is a link to a quick description for getting started with POTA. You may work all modes (CW, digital or voice) on all bands.

ARRL June VHF contest begins on Saturday at 2:00 pm and runs through Sunday at 11:00 pm.  I have never participated in a VHF contest, but being on top of a mountain can only help!

In order to keep some organization to the activation, I have created a Dropbox file for members to sign up and list any equipment they would be willing to bring.

Let me know if you have any questions, suggestions, etc.

73,

Jamey KC1ENX

QRPGuys Iambic Paddle Build

I’ve been practicing a lot of CW lately and had ordered a QRP guys iambic paddle from their website qrpguys.com awhile back. I went to the CW class on Saturday morning, which got me in the CW mood. After knocking some items off the honey-do list I was getting a little bored on Saturday night so I headed down to the shack and dug out the iambic key kit I had ordered.

I’ve never done any kit building or anything slightly engineer-y until joining the club. I don’t always understand why things work and building kits (even simple ones help me along). This kit didn’t look too hard, although it has a 4 out of 5-star difficulty rating on their website, so I jumped right in!

I made sure I started by sorting out all the parts in an orderly fashion.Iambic Paddle Build  I learned this much from working countless hours after Christmas and birthdays on Star Wars lego kits that are made for children, but built by adults after the kids get frustrated 15 minutes after starting!

I then got to the fun part of soldering. This was different than what I’ve done in the past as I started with soldering all the mechanical parts together by applying a small amount of solder and then checking to make sure everything lined up before putting a lot of solder on. Iambic Paddle BuildI enjoyed this as it was a large area to solder and it didn’t matter so much if my soldering skills aren’t very good! There were only a few electrical components to solder and that part was rather easy, even for my limited skills!

The toughest part of the whole build was assembling the paddles. You can see from the picture there are four nuts (and lock washers) that are to be assembled on the inside of the paddles with very limited space. TIambic Paddle Buildweezers were an absolute necessity – and earplugs for any youth that may be hanging around. After many – and I do mean many – attempts of dropping and picking up nuts and washers I finally got the washers and nuts in place and fastened.

Iambic Paddle Build

I was thrilled to have succeeded and ran out to the car, where my radio is hooked up at the moment and gave it a quick test run. Below is my not-so-professional video which shows my not-so-professional CW skills.

The paddles work well. The black pads do stick together a little when you push on both paddles at the same time, but I am very happy with my tiny QRP paddles! I am thinking of cutting slots in the sides and attaching a velcro band to attach to my leg to keep the paddle in place in the hopes that I could operate it with one hand. Let me know what you think or if you’ve built this kit before.

73,

Jamey (KC1ENX)

Radio Amateurs Developing Skills Worldwide